Reconstruction is in progress

The last month has been spent pulling the parts the ‘new’ shell apart, drilling out the thousands of spot welds that hold these things together.

My aims here are two fold, the first being to get the floor and firewall sheet metal out of the way, as there are too many pieces to try and trim up and fit all one once, so I have decided to get the chassis sections all fitted in one go, then add the floor in as a second step.

The second is to pull enough of it apart that I can get to all of the inside layers of metal that make up the A-pillar, so that I can join it all back together stronger than factory.


Below, the floor is almost completely separated from the chassis rail.

IMAG0132

The outer skins unpicked, and test fitted.

IMAG0114


With all of the firewall and floor removed, it was time for a test fit of the rails etc.

IMAG0137

Doors and 1/4 panel on, to make sure the fit is good.  The red door doesn’t line up – it sticks out at the back lower corner –  and I’m not sure at this point if its the car or the door.

IMAG0145

Before moving on, I got another door and fitted that.  It’s within a mm of perfect, so the red door has a twist in it after the crash.  At this stage its held together with about 5 tex screws, so hopefully I get that last mm right when its clamped properly and welded.


Next it was time to clean up all of the joints and overlaps, get them all painted with a weld-though primer ready to be permanently attached.

The first join to get right to make this all fit is the bottom of the windscreen.  The parts of the red car here were bent, but its the area that has the chassis number, so I wanted to keep that bit intact.

After some tacking, and work with the hammer and dolly I have the red parts straight again and lined up with the donor parts.

IMAG0151

Tacked all of the side joints into place and refitted the door – lines up better than it was before the crash!

IMAG0153

Have one issue to sort out, the rail has to pull forward by a couple of mm to line up with the front cross member.  The tops of the towers are in the right place, as is the door opening, but the rail itself needs a little pull.

IMAG0152

All of the front suspension pickup points have been attached to the car, and they are all lining up enough that I can get all the bolts in, so its close to being perfect.  I also have the strut brace fitted, and have the towers all located correctly, happy with how its all coming together so far.

Next weekend, will pull the rail forward a couple of mm, recheck all my measurements again to make sure its all square, then I can start welding it together for the final time.

After that, the fiddly bits of trimming the floor pieces to match up to the existing car, then the joy of welding thin steel for hours on end…..


Will it pull?

This weekends job was to get the race car onto the jig, and have a go at pulling it straight.

First order of business was to get the blue car off the jig, and out of the way.  As it needs to be dismantled anyway, figured I might as well cut it up now – moving 1/3 of a car is a lot easier than a whole one.

IMAG0085

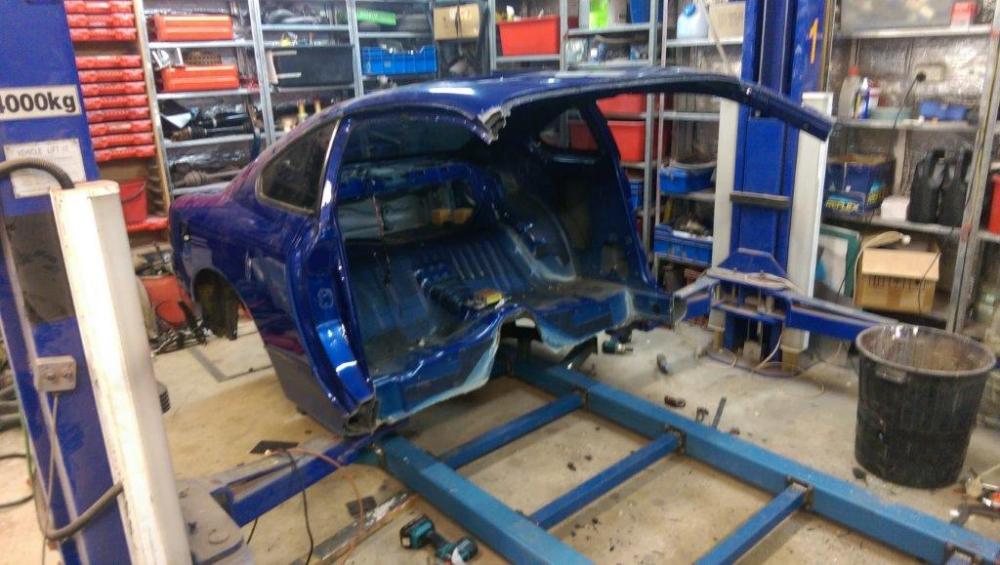
Front end off, in two pieces, and out of the way.  Until I get the windows out of rear section, I’ll leave it in one bit.

So, this leaves me with the replacement piece, roughly cut out.  Its a big piece!

IMAG0088IMAG0087

With that out of the way, its time to make sure everything on the jig is still square, that its all level etc.  The blue car was damaged in the left front, so at this point I wasn’t 100% confident that it was totally straight.

So with the car out of the way, it was time for jog work.

IMAG0089

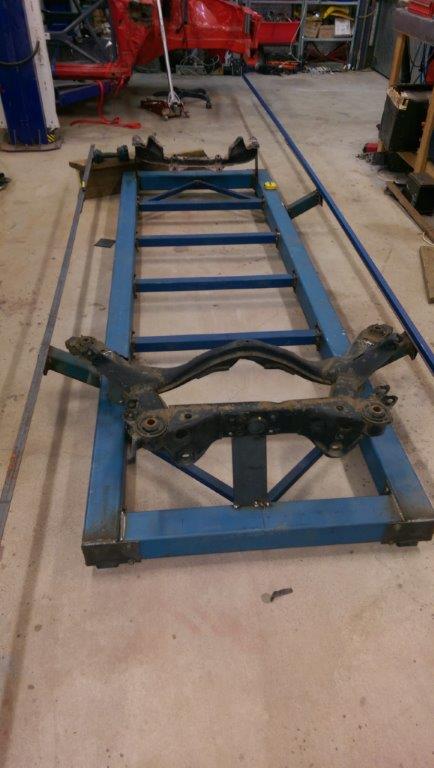
Using measurements, I got the left front sil clamp made up (blue one was crashed here) so that it was level and square with the other side.

Made sure that the front cross member was perfectly square and level when compared to the rear subframe, so that she ends up straight once I’m done.

Now that the race car was back on the hoist, it was time to pull the rear suspension and fuel tank out, so that I could drop it onto the jig.

Lowering the car onto the rear subframe, and bolting that up, we moved around and attached all of the sil clamps.  They were all with 0.5mm of fitting, with one taking a little love with the hammer to slip into place.  So far so good.

Dropping the bolts through the front rails they slotted perfectly into the front subframe – nice!

With that all done, it was time for a ‘FULL PULL’  (Frequently yelled out at tractor pulling contests in the southern states of the USA – http://fullpull.com/)  I know, I need to watch less USA motorsport tv, and probably less US tv in general…

So, with the pulling arm attached to the frame, the hook onto the car we start jacking.

Its moving – that is promising!

IMAG0092

Letting the pressure off, it springs right back to where is was to start with.  OK, so more force needed.  After putting a lot more in it, the section of the car that I’m pulling on (which was already ruined) starts to crush.  Hmmm, this is already much harder than what I did on the blue car – stupid roll cage.

So, after a bit of persuasion with the hammer, we get the hook onto a more solid, although already ruined part of the car and tried again.  We get past where we got before, and its not crushing, that’s good!

A few more pumps, and the hook is starting to straighten out, release the pressure again.  At least this time the car has settles back 10mm further out than what it was originally.  So the hook goes into the press to be squished back into shape, and I cut another hook out on the mill.  Then welded both hooks together to make one 20mm thick solid steel monstrosity

Try again.  Everything holds this time, although the car is starting to deform a little where the hook is, its bending the 5mm plate that I put in there to spread the load.  Next was a sequence of pulling until a measurement was reached, then relaxing it to check its location.  Then repeat…

During each pull, the creaks and groans from the car was a bit unnerving, and nearing the end of the process, BANG.  After cleaning up after myself, we have a look and the car has popped out of one of the rear sil clamps.  Loosen that off, take the tension off the puller and sits back into place.  Do it up tighter, and try again.

We finally get it out to where it needs to be, ending up moving it out by 55mm to make everything line up again.  Of most interest was that we had to stretch it out to 85mm to get it to settle here – thats 30mm of over stretch – and was a lot more than I was expecting.  Every time you bend metal, you know that this is going to happen, but this was a long way, especially when you are sitting there watching it.

And there it is, in theory at least, all straight.

IMAG0093

With all of that completed, its was getting late and the next step is going to consist of hours of using the angle grinder, I figured I’d wait until the following day for that.

Another job on the to do list is to start unpicking a couple of bits off the blue car, so that I can join the thing back together even stronger than out of the factory.  There are many pieces that are 3, even 4 layers thick, so to do this properly, you need to remove parts of these layers so that you can get inside it and weld all of the layers, one by one.

This means another 1000 or so spot welds to remove.

IMAG0091

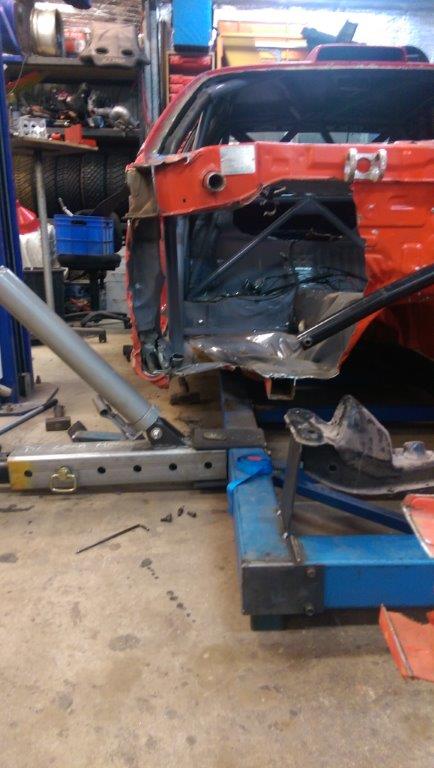
Its now Sunday afternoon, just enough time for an hour or two on the saw and the grinder to get the race car stripped of all of the pieces damaged beyond repair.

This leaves you with a rather large hole…

IMAG0094

From the front, it doesn’t look any smaller.

IMAG0096

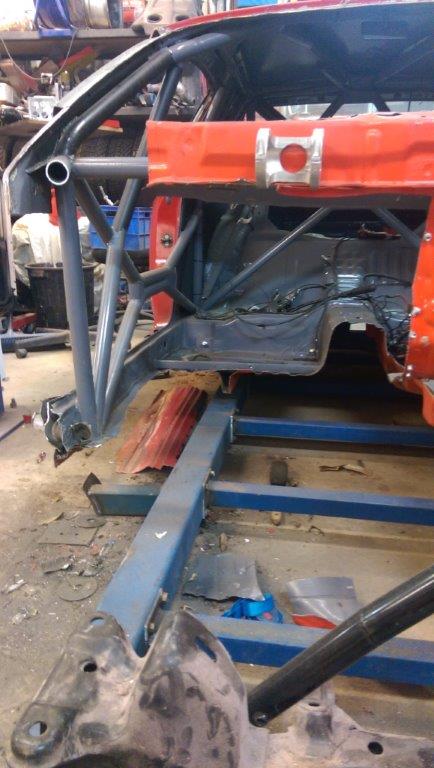
Last job of the day was to start accurately preparing the A-pillar for the transplant.  The three joints that I am going to make are all at natural joins of the car, so this bit worked out really nicely.

On the blue car the very inner skin will be totally removed, as I’m using the complete inner section from the race car.  The middle layer will still be attached to the rest of the blue car, and the outer layer will have been completely removed.  So when the blue car is offered up for the last time, I’ll be able to weld up all of the joints. that are internal to the a-pillar.  The outer skin will then be put on over the top and welded on, making a repair that will probably be even stronger than out of the factory – and hopefully just as straight.

IMAG0095

Next weekend is a case of doing the same at the bottom of the a-pillar / sil and also out at the front radiator support, and then accurately cut all of the floor and scuttle panel so that they can simply be butt welded together.

I can tell you one thing, moving the cage out was at least 5 times harder than pulling the same area out on a the standard car, and this is an area of the cage that has no triangulation that would stop the bars moving back to where they need to be – everything was in the same plane, so should have been easy to bend back.  It is very easy to see how these cages add such a massive amount of strength to these cars in the areas where they are triangulated.

So I’m fairly happy with all of this as the question ‘can I get the cage straight again?’ was my biggest worry.  The work is not done by any means, but now that the cage is straight, the rest of this is something that I know I can do – its just a matter of time, angle grinders and welders.

It works so far

Seems to work quite well.  The car pulled out with less force than I was expecting, so I think I shouldn’t have too many issues getting the race car straight, lets see.

Nothing else interesting to show today, spent time measuring things over and over, stripping out the remains of the inside of the blue car, taking windows out, and cutting off the ruined left front parts from it.

Next job is to get the blue car off the jig, and measure everything up and make sure all the mounts are square, then sit the race car on and see how far it needs to be moved, and if any other parts are bent (the passenger side rail looks slightly bent too).


I’ll try and keep this more up to date, rather than these bursts of posts.

More jiggery

More work on mounting the car to the jig.  While I don’t need it for this fix, while I had a straight car on it, I picked up an old s13 subframe, and mounted it to the jig.  If I ever damage the rear of mine, I now have a bunch of reference points to work with.

Did the same with a front crossmember, will need to make sure these are all perfectly square once I get the blue car off the jig.

Machined out a another bunch of parts, to make the pulling arm.

IMAG0067


And with the magic of television we have an almost complete pulling arm.  I’ve made it all adjustable, arm lengths and angles can all be changed for ‘next time’.

IMAG0068

As soon as I make the mount to fix the arm to the main jig, we can have a tug at the front of the blue car and see if this monster will work.

Donor car on the jig

Got the blue car positioned exactly central over the jig, and have started making up mounts to hold various parts of the car.

Started with one in each corner of the sil panels, holding the pinch welds under the car.IMAG0057


Also did a bit of cleaning up around the shed, here is what is left of the right front rim.  At least like this it makes un-mounting the tyre really easy.

IMAG0075

The impact has bent the mounts on the shock absorber, broken the brake caliper off both of its mounts, snapped the lower suspension arm, bent the front cross member.  Luckily the engine and gearbox mounts both bent when everything moved, so the engine block and gearbox case seem to be undamaged.  The pedal box frame is also going to need to be rebuilt, as its bent, and the throttle pedal will need to be re-made as its been bent sideways and twisted around, also breaking the rose joints used as the linkage – I still had my foot on the throttle on impact, sometimes never lift doesn’t work out…

Rally day!

Only as a frustrated spectator this time.

We did a road closure for the Boddington Rally, awesome event, great place to watch to the cars.  From our location we got to see them pass us twice, with 5+ corners all visible.  Great day, great event – need to get car fixing.

IMAG0053

Chassis Jig – The beginning

After a couple of hours on youtube, watching all sorts of cars get straightened, I’ve now got a tiny bit more of an idea as to how to go about going this.

First step was to buy some thick walled steel.

IMAG0043

The it was time to fire up the mill and let it machine out some plates that will be used to bolt this whole contraption together.  It is going to be too big to store in the shed in one piece, and as I’m sure this won’t be the last time I bend it I want to be able to keep this thing.  So the plan is to be able to unbolt it all, to store it as single lengths – it will make more sense later – I think.

IMAG0044

Then its just a job of welding it all together, keeping it exactly square and level.


We then end up with something like this, now to get a car on top of it.

IMAG0049


The Surgery begins

So, after having a chat to a fellow rally driver/panel beater I’ve got some clue as to how to go about this (I did say some, I apologize in advanced to all of the panel beaters out there who will probably be shaking their head if they ever read any of this!).

First task was to cut off all of the bits that are not going to be savable.

IMAG0033

More has to come out still, but I need to pull the bottom of the A pillar back into place first, using what is left as a rough guide of where to stop.  So the next job is to make a frame to mount the car to, and a pulling arm to pull things back out – I feel a YouTube training session coming on.

So how bad is it?

13265835_1008213102597452_1363301429718368669_n

Stripped the car the weekend after the event, with the help of the family. I’m still too sore to do much, so I could not have done it without them – thanks!


And no, its not an optical illusion, it really is that bent in the front right.  Parts are bent in, other bits are higher than they should be, other bits twisted.  At a minimum the whole right front corner needs to be replaced.


I found a damaged shell cheap on Saturday, so went and picked that up too.  It’s bent front left, so it no good as a complete shell, but a perfect donor for right side chassis rails.

IMAG0021

I’ve been to a few panel beaters, the answers have ranged from ‘no way, start again’ to ‘yeah, maybe, but its not going to be cheap’.  So the cheapest quote was still more than I can stomach, so I’m left with the options of give up, or have a crack myself…

The next event – Karri Rally

Event two of the championship, started well, good pace without pushing too hard.

SS1

Photo courtesy of Allan Bird Photography

Into a left hander, than tightens late, we hit a slippery section that I wasn’t expecting and slid straight off.

The following photos courtesy of Pixel Print-cess

IMG_1476

Looks ok from this side, but…


IMG_1509

 This is what was on the other side of the car.


IMG_1539

So it was onto the trailer, event over.  It doesn’t look too bad from these pictures, but the broken rim, broken brake caliper, snapped lower suspension arm, bent crossmember means that there is no way of fixing it today.

With the door ‘shut’ there is a 40mm gap between the car and the top of the window, so some important parts of the car have moved.  Won’t know much more about how bad it is until we get it home and pull some it it apart.

The thankyou list

Wow, what a ride.  Was not expecting this result so early – and it has not come easily.

Firstly, to my Wife and kids, thanks for allowing me to skip things like mowing the lawn and all of the other outside jobs that I haven’t done, so that I could spend the time in the shed making this car the best I could make it.

Secondly, to Megs, such an awesome job for your first ever event with pace notes.  You were super organised all weekend, and that takes a lot of stress off me because I can worry about the car, while you worry about where we need to go and when.  Your calling of the notes was exceptional, you have so quickly learnt how to call them out for me at the right pace, and I know we will just get better and better every event that we do.  I’m very impressed!

To my extended family, thanks for all of your help, and your time over the weekend to service for us, cook for us, or to just stand around cracking jokes at us – you know who you are!

A special quick mention to Luke from MCA that we abducted from the service park, thanks so much for your help in getting our damper back into a working state, so that we could finish the event!


If you have a business that is interested in sponsoring us, please get in contact!


To all of my supporters:

1911057_469180119876916_4639279_o.png

A big thanks to Shannon at Tune Corp for the tune on the engine.  Normally a v8 man, he did an awesome job in tuning this stock engine to produce the 140hp at the tyres that it has – its low, yes, but this engine had just over 100hp in stock trim, Shannon has extracted the rest, all with a safe tune.  Visit  Tune Corp to see the 800+hp cars that he does on a daily basis.


Capturdddde.JPG

To Shane, at Tyreways Bentley – thanks so much for all of your help, every time that we need it.  Getting us tyres, wheel alignments, setup advice and all the swapping of tyres onto and off of rim that you do for us.


download.png

To Matt at AutoPro Canningvale, thanks for always looking after me, ordering in all the random parts that I’m after and for the great service from you and your team.  That banjo bolt that I you ordered in for me just before the event was the only reason that we finished the event!  Go and see the team for any of your auto parts needs.


rw-logo.png

To the team at Rent WA, thanks for the rental truck for the weekend, it meant that we were able to carry a lot of spares and we were well prepared for any situation because of this.  For all of your commercial rental needs, see RentWA


To Mike at Artek Signs and Designs, for all of the sticker work that you did for us. Artek Signs do all types of commercial  work, go and see them for all of your large commercial sign writing jobs.


The LONG drive back

Let me reset the scene.

10km to go until we get to the final control and the finish line.  The car is surging on left handers, and I can hear the fuel pump changing tone.  I tell Megs that I’m not sure if we are going to make it back..

So, I channelled all of my fuel saving skills from watching many hours of Nascar, and put in a fuel saving run that Carl Edwards would be proud of.

Waiting at an intersection, engine off.  As soon as we got up to speed, engine off, any downhill, engine off (thank god for electric power steering :)).  We probably made it back to Nannup with the engine off for about 70% of the time.

We get to the final control, and had officially finished – phew!

As we had ended up at the very tail of the field, we were much later than expected in getting back in.  I’ve got officials left and right trying to rush me back to the service park.  I’m thinking, hold your horses, we can go back and park at the back of the line of cars at any time – what’s the big rush?

We wander back to the main service park, and when we drive in Dave says ‘ Well done!’.  At this point I’m a little confused.  Raz was much faster than us today, and I hadn’t looked at any other times, but was wasn’t expecting what he said next.  “For what?” I ask.

“You’ve Won!”

Wow, I was expecting an answer like ‘You’ve finished the event!’, not that.  Now at least I understand what all the rush was about – Wish someone had actually told me.

Podium.png

Within seconds Terry had his microphone in my mouth and was bombarding me with questions, for the most part I don’t even remember what I said.  Now that I don’t have that pressure of public speaking, here is what I would like to say…

The final 3 – SS17, 18, 19

Ok, time to give it a bit push now – Healthway Loop 2.  I’ve since watched the in car videos, and by the 1.5km mark I’m already 3 seconds faster than my first run – game on?

13048204_852854441504009_8016440987410850853_o.jpg

Then I get the call from Megs – SOS in 450m shows on the rally safe.  Ok, keep counting it down for me.  It then disappears, so we get back on it.

It reappears in another hundred meters, and we get the countdown from about 300m all the way to the site.  We are the second car to arrive, so our job is to gather an info that we can, and get to the next SOS radio point to relay the info.

We get as many details as we can from the official that was there, and we are off to the next SOS point.  We’ve got about 3km to go, so we stay on it enough to be fast, but slow enough that we don’t go off as well.

Finally we get to the SOS point, and while stopping, tooting my horn and waving at them to come over to us, I nearly drop the front of the car into a ditch in front of us – would have been embarrassing….

After relaying the info to them, I move the car into a safer spot, and we get out and go and sit with the officials and their radio, just in case there is any more info that they need.  After they have it all sorted out, we get released by rally base to transport through the rest of the stage.  We stop at the finish while the officials get confirmation on is we can get to the next stage, or if we need to go straight to SS19.

In the end, the decision is to go to SS18, Folley 2.  Megs is still a bit nervous after seeing all that, so we take this next stage with more caution than the previous stage.  We loose a chunk of time, but we finish.

So, SS19 – the last stage!

We are now at the back of the field, and we are behind some much slower cars.  I ask for a 3 minute gap to the car in front of us, with Rally Base granting us a 4 minute gap – Thanks!  I’m glad we got it, because we caught that car by over 2 mins 20, so we would have caught them, despite the dramas that we had.

OK, that’s good – less worried about having to pass them on stage.  Then as we start the stage it starts to rain – great!

About 1/2 way through the stage, on a long left hander – fuel surge…  Ohh no….

Every left the car would lean out, meaning a bit lift from me to make sure I don’t hurt the engine.  A very frustrating stage as it felt like we were losing minutes. In the end it wasn’t that bad, but we do lose another 20 seconds.

As we cross the finish line I shut the motor off.  I spent a bit of time designing the fuel cell use every last bit of fuel – so assuming that work has paid off, we are nearly out of fuel with another 10 odd kms to go to get back to the finish at Nannup – I’m not sure we can make this….

SS14, 15, 16

Before we get out to SS14 we have a service. Nothing much to do to the car, but during chatting, Jo starts talking about the results.

“What time did you get on Brockman? Raz beat you by 50 seconds according to the results!”  We check the photo we have of our time card, and its correct.  Hmm, ok, I need to pull my finger out then!

Healthway Loop 1.  We start this stage with a concious effort of trying to start pushing the car and myself a bit harder. We have a look at the time at the end of the stage, only down by 8 seconds this time.  Ok, that’s closer at least.

b.jpg

Photo courtesy of Drift Images (https://www.facebook.com/DriftImagesMotorSport)


I’m a little bit torn at this point.  We have about 3 weeks till the next event (so about 2 weeks until scrutiny), so almost no time to fix anything at all, so I really can’t afford to stick it off the road.  But at the same time, you always want to ‘win’.

SS15, Ellis 2.  We go out at the same pace as we did on the previous stage, and end up around the same time per km behind.

SS16 Brockman 2.  At last, a repeat stage.  I’m a lot more confident with my notes on the second pass, as we have done it at speed before and have made additions / changes where needed.  33 seconds faster than my first run, and still comfortable at this pace – no mistakes, no running wide.  We are the closest that we have been all event to Raz, in terms of time lost per km.  Lets push a bit harder the next stage and see what happens.

SS12 and 13

We do the now familiar drive from Busso to Nannup, change tyres (to 4 fully inflated MRFs this time), then head out to the first stage of the day.

Both of these stages went well, you can feel the right rear damper going off during the longer stages, but its not too bad considering that its full of an air pocket and jack oil.

The MRF tyres on the rear seem to suit this car, I feel like I have a lot more grip.

13063121_853331798122940_2349654252019035325_o.jpg

Photo courtesy of Drift Images (https://www.facebook.com/DriftImagesMotorSport)


We get through both stages without any real issues, but when we get back to service I get a bit of a shock.

a.jpg

Photo courtesy of Drift Images (https://www.facebook.com/DriftImagesMotorSport)

SS11 – Trade Hire Busselton Long

Stage 11, while still being on Saturday is actually the official start of day 2, so here we go again!

We took up most of our service time in Nannup, so while being on time, when we get to Barnard Park all the officials are stressing and yelling at us because ‘we are going out any second!’

About 30mins later we are still still here in line, fully suited up, hemets on etc.

Finally they release us from the Oval to go around to the start, I’m ready to go!  At this point we stop in the line of 15 other cars, and wait here for another 20mins.

Finally its our time to start.  I have Mr Flood behind me – its game on Floody!

13047880_1127508923946063_8741111910328708237_o.jpg

Surprisingly, having the right rear shock only 1/2 working actually made the car turn in better on the tarmac – didn’t understeer anywhere near as bad as it was the night before.

Got three nice laps in, 3 nice handbrake turns at the hairpin for the spectators.

Cross the finish line on lap 3, Red flag – Ohh no, don’t tell me something has happened to Floody!

I ask the official what’s happened – he says ‘you’ve done 4 laps’.  I say, ahhh no, that was only 3. That look of confusion, and then guilt crosses his face and I realise that he has mis-counted and has pulled us in early.  Arrggggggggggggghhhhhhhh!

We trundle around back to the Park Ferme area where we get questioned by the puzzled officials as to why we pulled in.  ‘The guy had the red flag out’ I say, ‘so we stopped’.  ‘Ohh, sorry about that’ they say. ‘ Turn around and you can have another run.’

I’m not too keen on that idea, this stage is one that you can gain one second, or loose the whole rally.  I ask what my other options are, to which the reply is a derived time based on my stage times during the day.

I take the derived time option.  A bit of a woossy move, but the risk of another run vs the reward is just not worth it with a busted shock.

One a few minutes later, a WRX, on a re-run crashed backwards into the concrete, completely pancaking the back of the car.  Somewhat justifying in my own mind that I made the right choice.

The car goes into Park Ferme (where you can’t work on it) and will stay there for the night.

Once we get back to our room, a look at the results gives us a surprise.  Although I’ve been talking about where we are sitting in the results in these blog posts, during the day we had not been looking.

To our surprise we have won 2WD for the day!  Bring on tomorrow then…

Service D

Pulled in, climb under the back of the car – oil all over the bottom of the shock.  The fitting to the remote canister is not tight, and its leaked all the oil out. hmmm….

We get the car up on its stands, and attempt to tighten the fitting up.  On touching it the circlip comes off and the hose pops off.  Inspection of the fitting shows that its cracked – something has hit it 😦

We pull the shock out of the car to have a better look.  The fitting is ruined and even with the help of ‘the man’ Murray Coote we couldn’t find anyone that had anything even remotely close to this fitting.  ‘Its an m10x1 thread’ Murray has said during this conversation – hmm, that’s the same thread as my banjo bolts for my brake calipers, and I have a spare one.

Then we find this absolute champion of a bloke called Luke, spotted as he was wearing an MCA shirt.  He helped us out in putting together a solution so that we can keep running.  First thing, we need some thin oil.  What do I have???

Will this jack hydraulic fluid work?  After wiping a bit on his fingers, we got a ‘yeah, that’ll do’ from Luke.  We got the shock filled, bleeding it, filling, bleading filling etc.  Almost there.  A couple more strokes of the shock to get the final air bubbles out and – we run out of oil.

‘What else you got?’  Says Luke.  looking into the toolbox at the air tools – any air tool oil? ‘At home, yes’.  I wonder off to see if anyone else in the service park has 20ml of any type of thin oil, while Jo is doing the marathon run to the BP servo to see if they have anything suitable.  During this time Beau and Luke have pulled the drain plug on the air compressor and have drained some of the oil out of that, and have the shock filled up.

We’ve got nothing to pressurise the system, filling it up with as much oil as we can is our only option.  Using a banjo bolt from my brakes, some alloy crush washers and an alloy spacer we get the whole thing cobbled back together and we have at least a partial damper.  There is about an inch of movement where there is no damping (air bubble), but there is at least something for the rest of the stroke of the damper.  Its not pretty, but as long as we can keep some oil in it we should be ok.  Time will tell.

Cody the superstar tyre changer does his thing, and the tarmac tyres are put back on ready for the drive to Busso and around the Special Stage.  Left rear tyre is soft 😦  This was fully inflated this morning, another job.  Jo runs off with the tyre and finds the Dunlop truck (Thanks Boys!) who check it, and can’t find any leaks in the tyre.  We grab another old Khumo what we had in the truck, and get that fitted to the rim to be sure.

Day 1 is almost done…

SS9 and 10 – Nannup Oval

3, 2, 1, go!

Launched off the start on the tarmac, the right rear sits right down instantly, ohh no, the damper is gone.

Turn into the first corner, you start on the tarmac, mount a kerb mid corner and then it is dirt.  It is the most cut up section of the weekend, and get a HUGE understeer, then once all of that was sorted out lots of wheelspin in the soft sandy dust.  Need to do that better next run…..

Turn into the right hander, you jump off the grass, over another kerb and back into the tarmac.

13072915_1708549662716794_5690947582279047460_o.jpg

Photo courtesy of CMR Photographic (https://www.facebook.com/cmrphotographic)


A long left through the carpark, into a long right that changes to gravel after a little jump.

Capturesdf.JPG
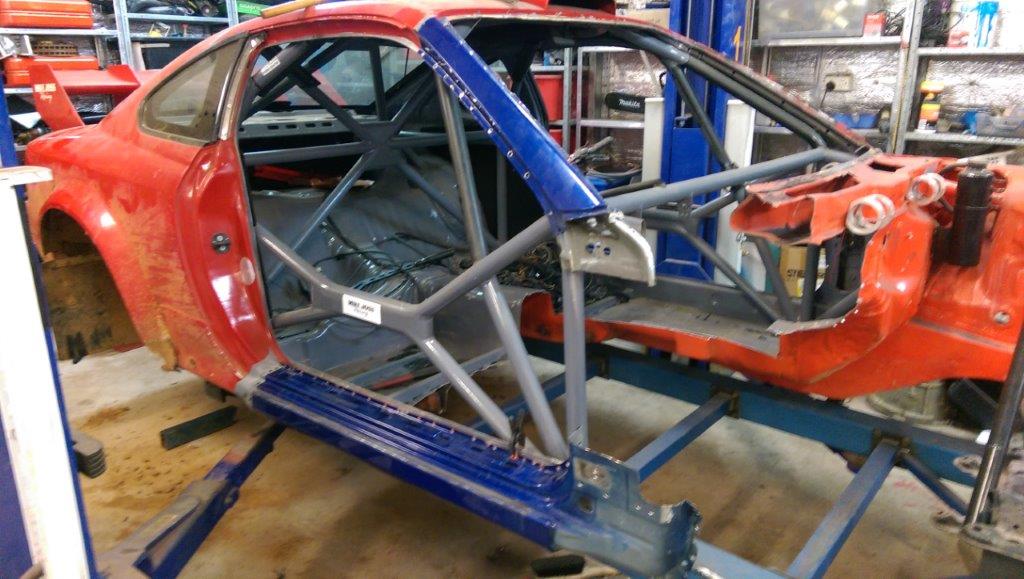
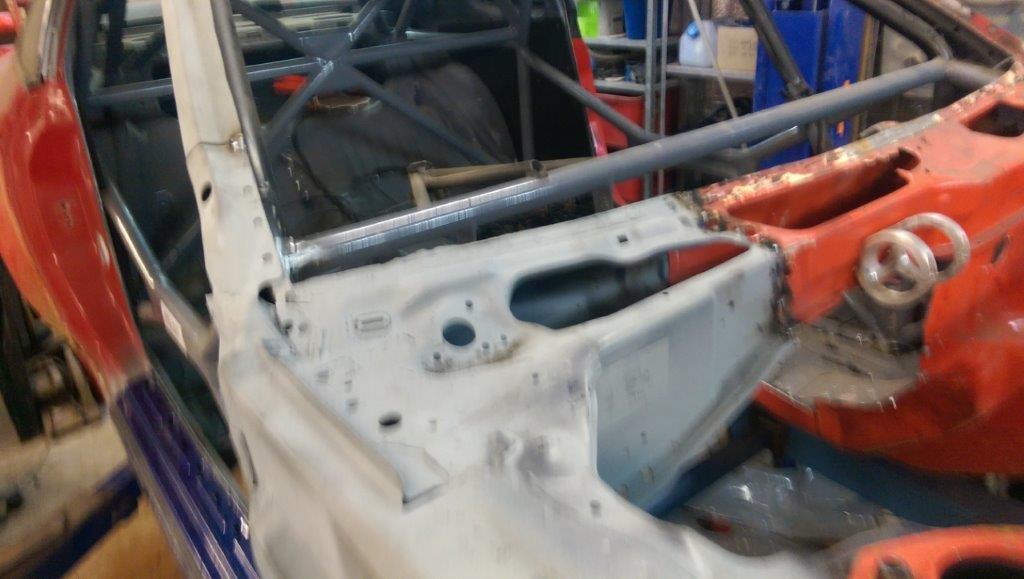
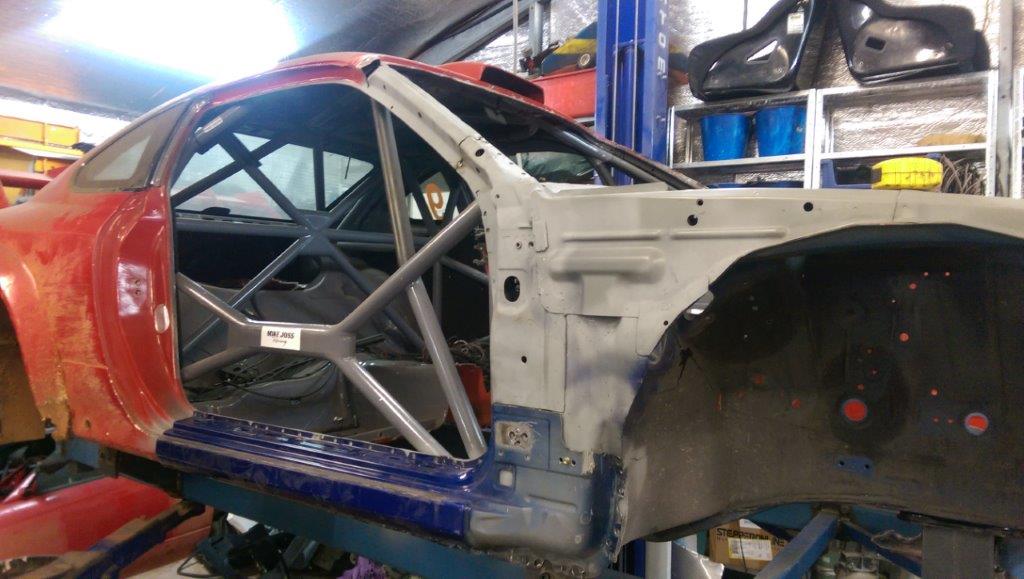
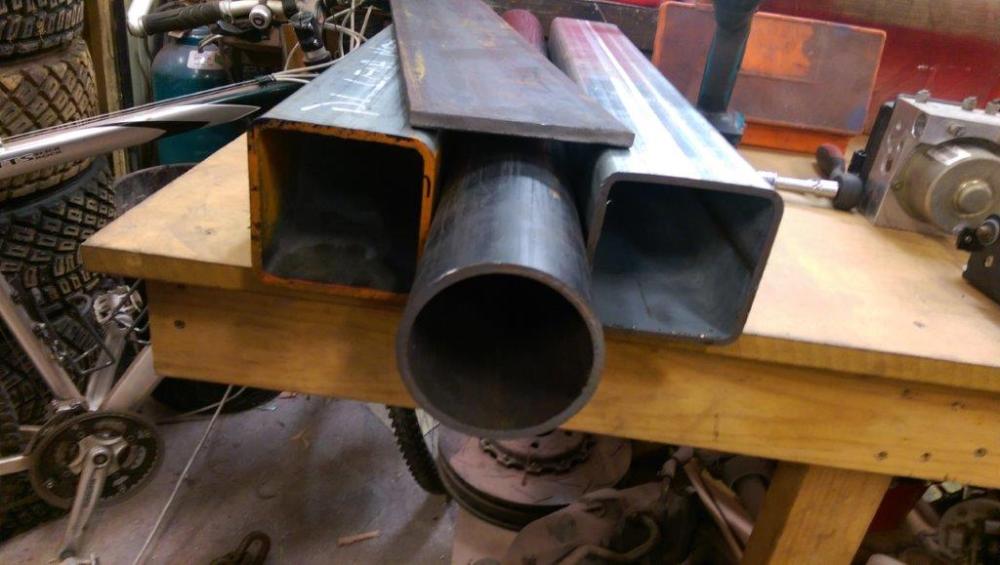
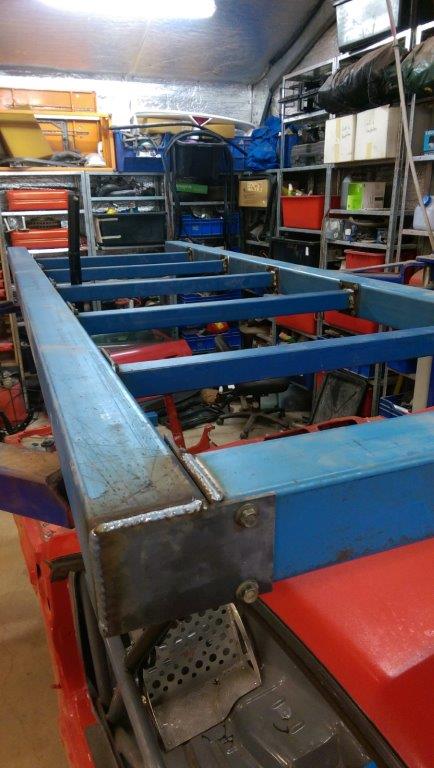
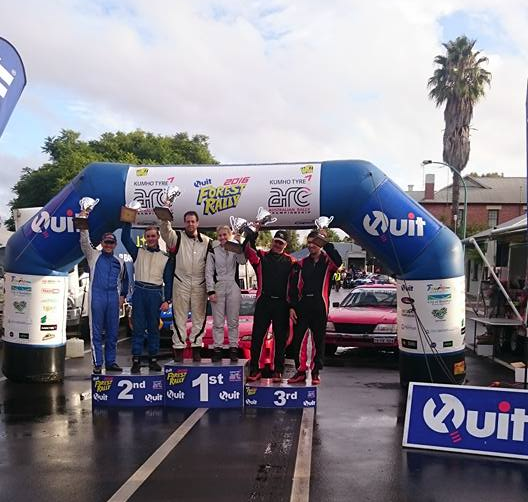
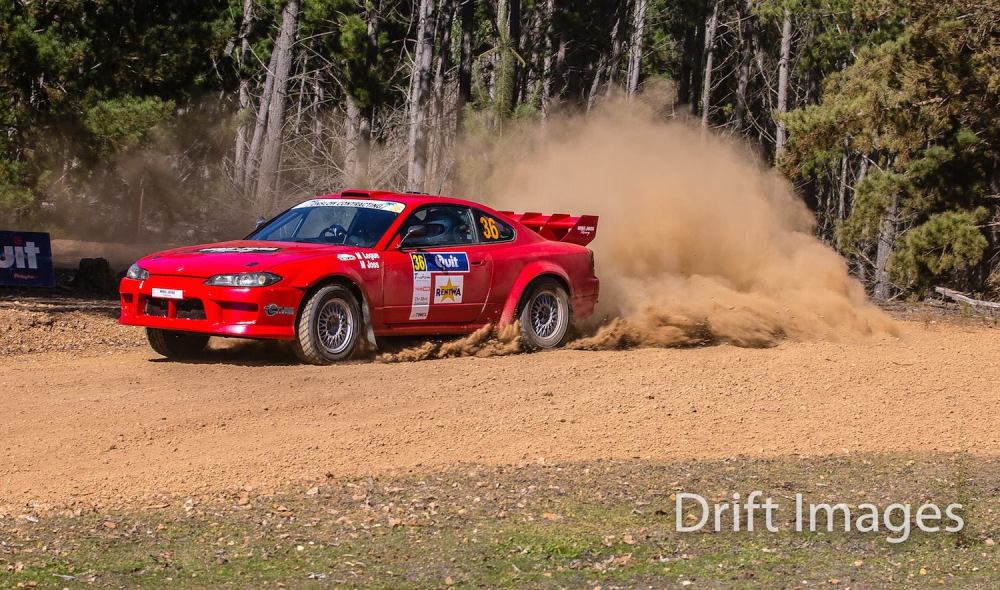
Photo courtesy of Alan Bird Photography (http://www.alanbirdphotography.com.au/)


A nice, long right hand slide, that turns into a quick left/right through the finish.  That last section was actually a lot of fun, having a dead shock means a big, big slide into the left under brakes – backing it in from that far back (by accident) was fun.


Run 2 was straight after, and was much the same story.  Did the first corner with a really different line, trying to keep it straighter though the boggy bit.  Waisted my time cause I still got a big under steer and nearly got bogged again – oh well….

Pushed harder through the carpark, another understeer – this is going well….

Lets try 3rd gear through the long right on the dirt, try get some bigger rooster tails – lots of limiter, not as sideways – another fail….

Another big slide into the left, flick right through the finish line – ohh well, at least that last bit was fun.

Time for final service, and what has happened to my damper!


SS7 – Koala 2 and SS8 – Ferndale 2

Second Run of Koala was about 7 seconds faster, over a second per km better than the first run, we are slowly improving.  Still sitting 8th fastest in the state.

13063282_1742097132699960_7446603863246658643_o.jpg

Photo courtesy of Artline Media (https://www.facebook.com/artlineonpoint/)

Next was the one that I was waiting for, talked about by many as their favourite stage – Ferndale.  We didn’t get it run it the first time, so had nothing to compare my time to, but we moved up a place to 7th in the state so we are slowing improving.  I really liked this stage, nice and long and a mix of tight switchbacks in the side of a cliff, and open fast sections in the bottom of the valley.

I’m not sure exactly how far into the stage it was, but there was a left hairpin where some TV guys were, we slid in nicely, trying to impress the cameras, struggled up the hill, through a couple of right handers and then the next left turns were not quite right.

Ohh no, not a flat..

No, its not that bad, maybe its going down slowly?

Each left hander after that stayed about the same for the rest of the stage.  The car was sliding in the rear a lot more than it had been in the first part of the stage, but the ground didn’t look any slipperier.  We keep going, and it didn’t get any worse so we adapted our driving to not load up the right rear so much, and finished the stage without it feeling a lot worse – but something wasn’t right.

End of the stage, pulled over on the transport and checked the rear tyre, still at proper pressure, kicked a few things, nothing moved – hmm, maybe its just me?

Driving back into town it was slowly feeling worse and worse in the rear right, something is not right.  We got to the Nanup Oval stage, and lined up for our run.  As soon as I launched on the tarmac on the Nanup Oval stage I knew the problem….


Service C

Safely back to the service park, just parked outside waiting for our in time.  Wondering around the car, checking things, a push on the left front tyre reviled a lot more movement than there should be.  hmmm…

Just loose wheel nuts maybe, nope.

Ohh no, not suspension…  Climb under the car – nope.

Loose bolts where the shock joins the hub?  nope.

Got Megs to rock the wheel while I as under the car – hmm, wheel bearing…..


Beau had wandered down to see us, so I got him to grab the spare knuckle, and pull the wheel bearing off it, just incase we need it.  I was hoping that the main nut holding it on was just loose, and it had not ruined the bearings or stub axle.


Once we got into service and got it jacked up, pulled off the cover on the axle and yes, loose nut.  Checked the rest of the bearing and the stub axle and tightened the nut.  Then hammered the side end of the nut back against the flat on the stub axle to stop it from loosening again (no split pins here unfortunately :()

Luckily a 2 minute fix, and we are good to go again.  Some lunch and a drink, and we are ready to go again.