Month: April 2013

New front end

Last night I started on the new front end framework for the car.  I’ve spent a number of nights working out the suspension geometry that I want to run, working out the suspension mounting points, chassis heights and widths etc – Hopefully I’ve got it right…

The front end is going to run the same type of suspension that I’m building for the rear end, so here we go.

Started off making one end, then tack welded that to the bench and started making the cross tubes and end tubes.

image

Front section almost complete, just needs one more bar above the cross in the front.

wpid-20130428_230629.jpg

Then it was time to get it lined up in the front end.  Do do this, I cut out some of the central tubes in the chassis, and then sat this in place.

image

It ended up being too hard to work with without an accurate ground plane reference, so I lowered it down off the rotisserie  and leveled it up on the ground at its final ride height.

image

Then made a platform at the correct height for the front end to sit on, then spend ages getting it all lined up, central and square.

image

Then its a simple case of joining up the tubes from the original chassis to the new section, and removing old sections when they are no longer needed as reference points.

image

This is how it sits now, just a few more tubes to go.

image

Next up is to work out where to put the cross bracing in this new section.  The large ‘hole’ between the tubes here is one of the areas that needs a cross brace.

image

Rear hubs

Started working on the rear hubs.  Once these are done I can work on the suspension arm mounting points on the chassis.

It starts with some flat 5mm plate, then some time on the lathe.

image

Second one done.

image

All of the loads from the wheel are going to be transferred to where these hubs bolt onto the plate.  So I wanted to connect the front plate to the back plate (you’ll see that later) and keep this whole box section connected.

image

Next up was the make the bottom mount, where the suspension arm will join the hub.

image

Machined up a little button, and threaded it.  This setup means that I don’t have to put a nut on the end of the bolt, this machined part will be the nut.

image

Here is where its going to go.

image

And then ll done.

image

Then made a plate to connect the mount to the main plate.

image image

Then worked on the rear plate, here it is welded on.

image

Then all linished up and milled out to allow the drive shaft to fit.

image

Then lastly added a V-shaped brace on the inside, connecting the mount to two of the tubes on the main plate.

image

The next thing I need to work out is the brake caliper mount.  Once that is done I can put the sides on the currently open box shape.  After that its the same thing with the upper mounting point.

Mini update


The wire for my GPS arial broke last year, so I ordered a new one.  This one is much lighter and bolts into the roof (the magnet mount of the last one won’t stick to carbon fibre).  I was disappointed to find that this 70 gram item had a big 20 gram steel nut to hold it on.  So I made a plastic one, using a combination of the mill and the lathe.

I’m super happy how this came out!

image


I built another shelf…

image


And made up all of the corner gussets by folding a nice curve in the using the press and  folding jig that I made.

image image


Also made up the plates for the side intrusion bars and welded all those in.

image


I also spent a couple of hours welding everything up on the chassis.

The basic chassis metal work is now complete (for now).  So next job is to finish the steering (picked up the last bit that I needed today), and get the mounts made for the rear suspension.  The frame can then be cleaned up and painted.

Steering progress

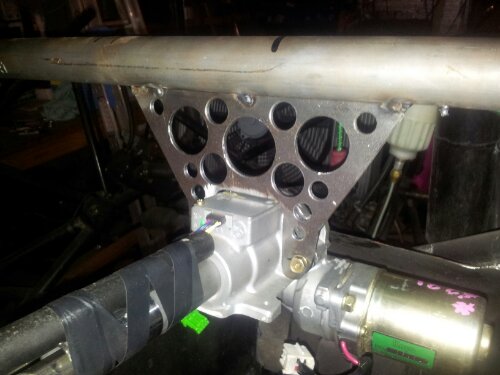
Made some progress on the new steering column.

image image image

Its all mocked up and tack welded in.  Just need one uni joint and I can fit it all and weld it in.

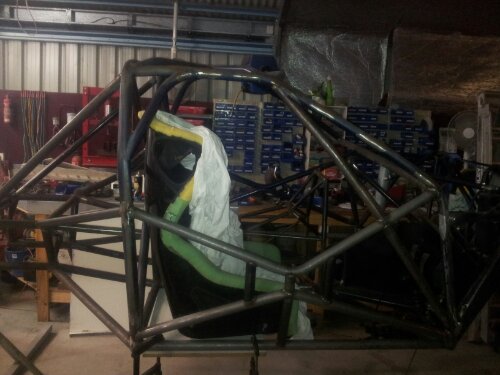
Also added the bars into the chassis under the seat, for side impact protection.
I broke my welding helmet, so had to get a new one.

image

Has a very big viewing window, I love it, makes it so much easier to see!

And also did a side job, machined an extension for a chair leg.

image

Assuming my customer likes it, I have another 20 to make!

Finished the night by assembling and fitting another 2 shelves to the shed wall. I bought these about a year ago…. talk about not rushing things 🙂

image

Seat mounts and more

Got a few hours in today, got seat mounts made,  added another tube to the chassis and some corner gussets.

Used the milling machine to make the seat mounts.

image

Then got them all lined up and welded in.

image

Some gussets
image

And added some bars under the front of the seat.

Finally a good Monday.

No work meant more play and I made good progress.

First off I made a rotisserie out of scavenged metal that I had.  It’s so that I can spin the car sideways, upside down or any angle in between in order to work on it and weld it up.  Welding upside down is never fun…

image

Then used the patented chest of draws on a go-jack chassis transportation method

image

to get the chassis off the hoist and over to the rotisserie, and got it all mounted up.

image image

With that done, I started on the real work. First up, new side intrusion bars.

image

Then rotated the car to work on the new roof cross bar.  Being able to spin the car around like this to work on it was sooooo nice 🙂

image

Then added the Carlos Bar to the door opening.

image

Next job is to make the seat mounts, but had to go plant some new trees and do some reticulation work in the garden.

image

Spent the rest of the night cleaning up the mess I made…