More filler, more sanding, then metalwork, then repeat

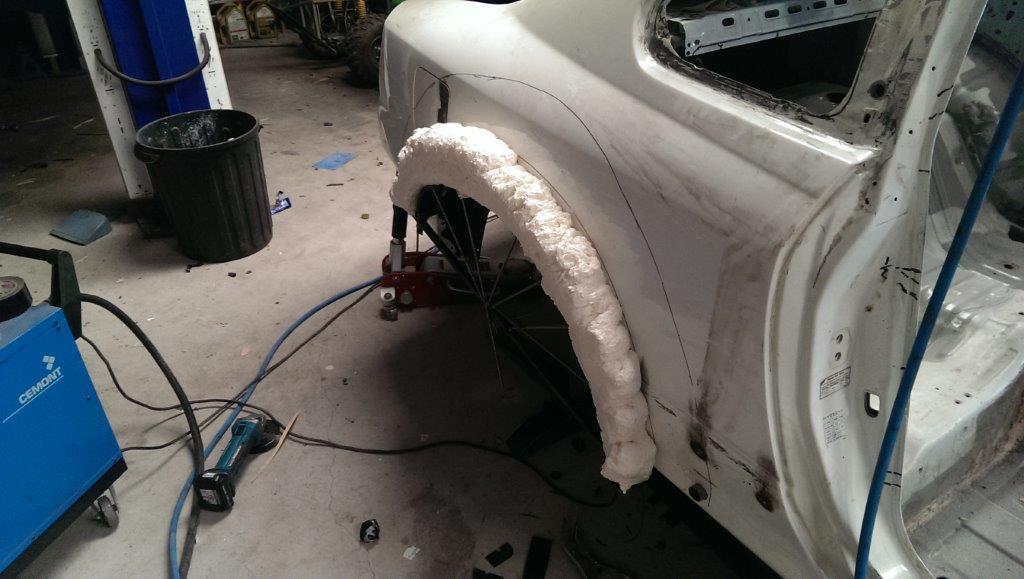
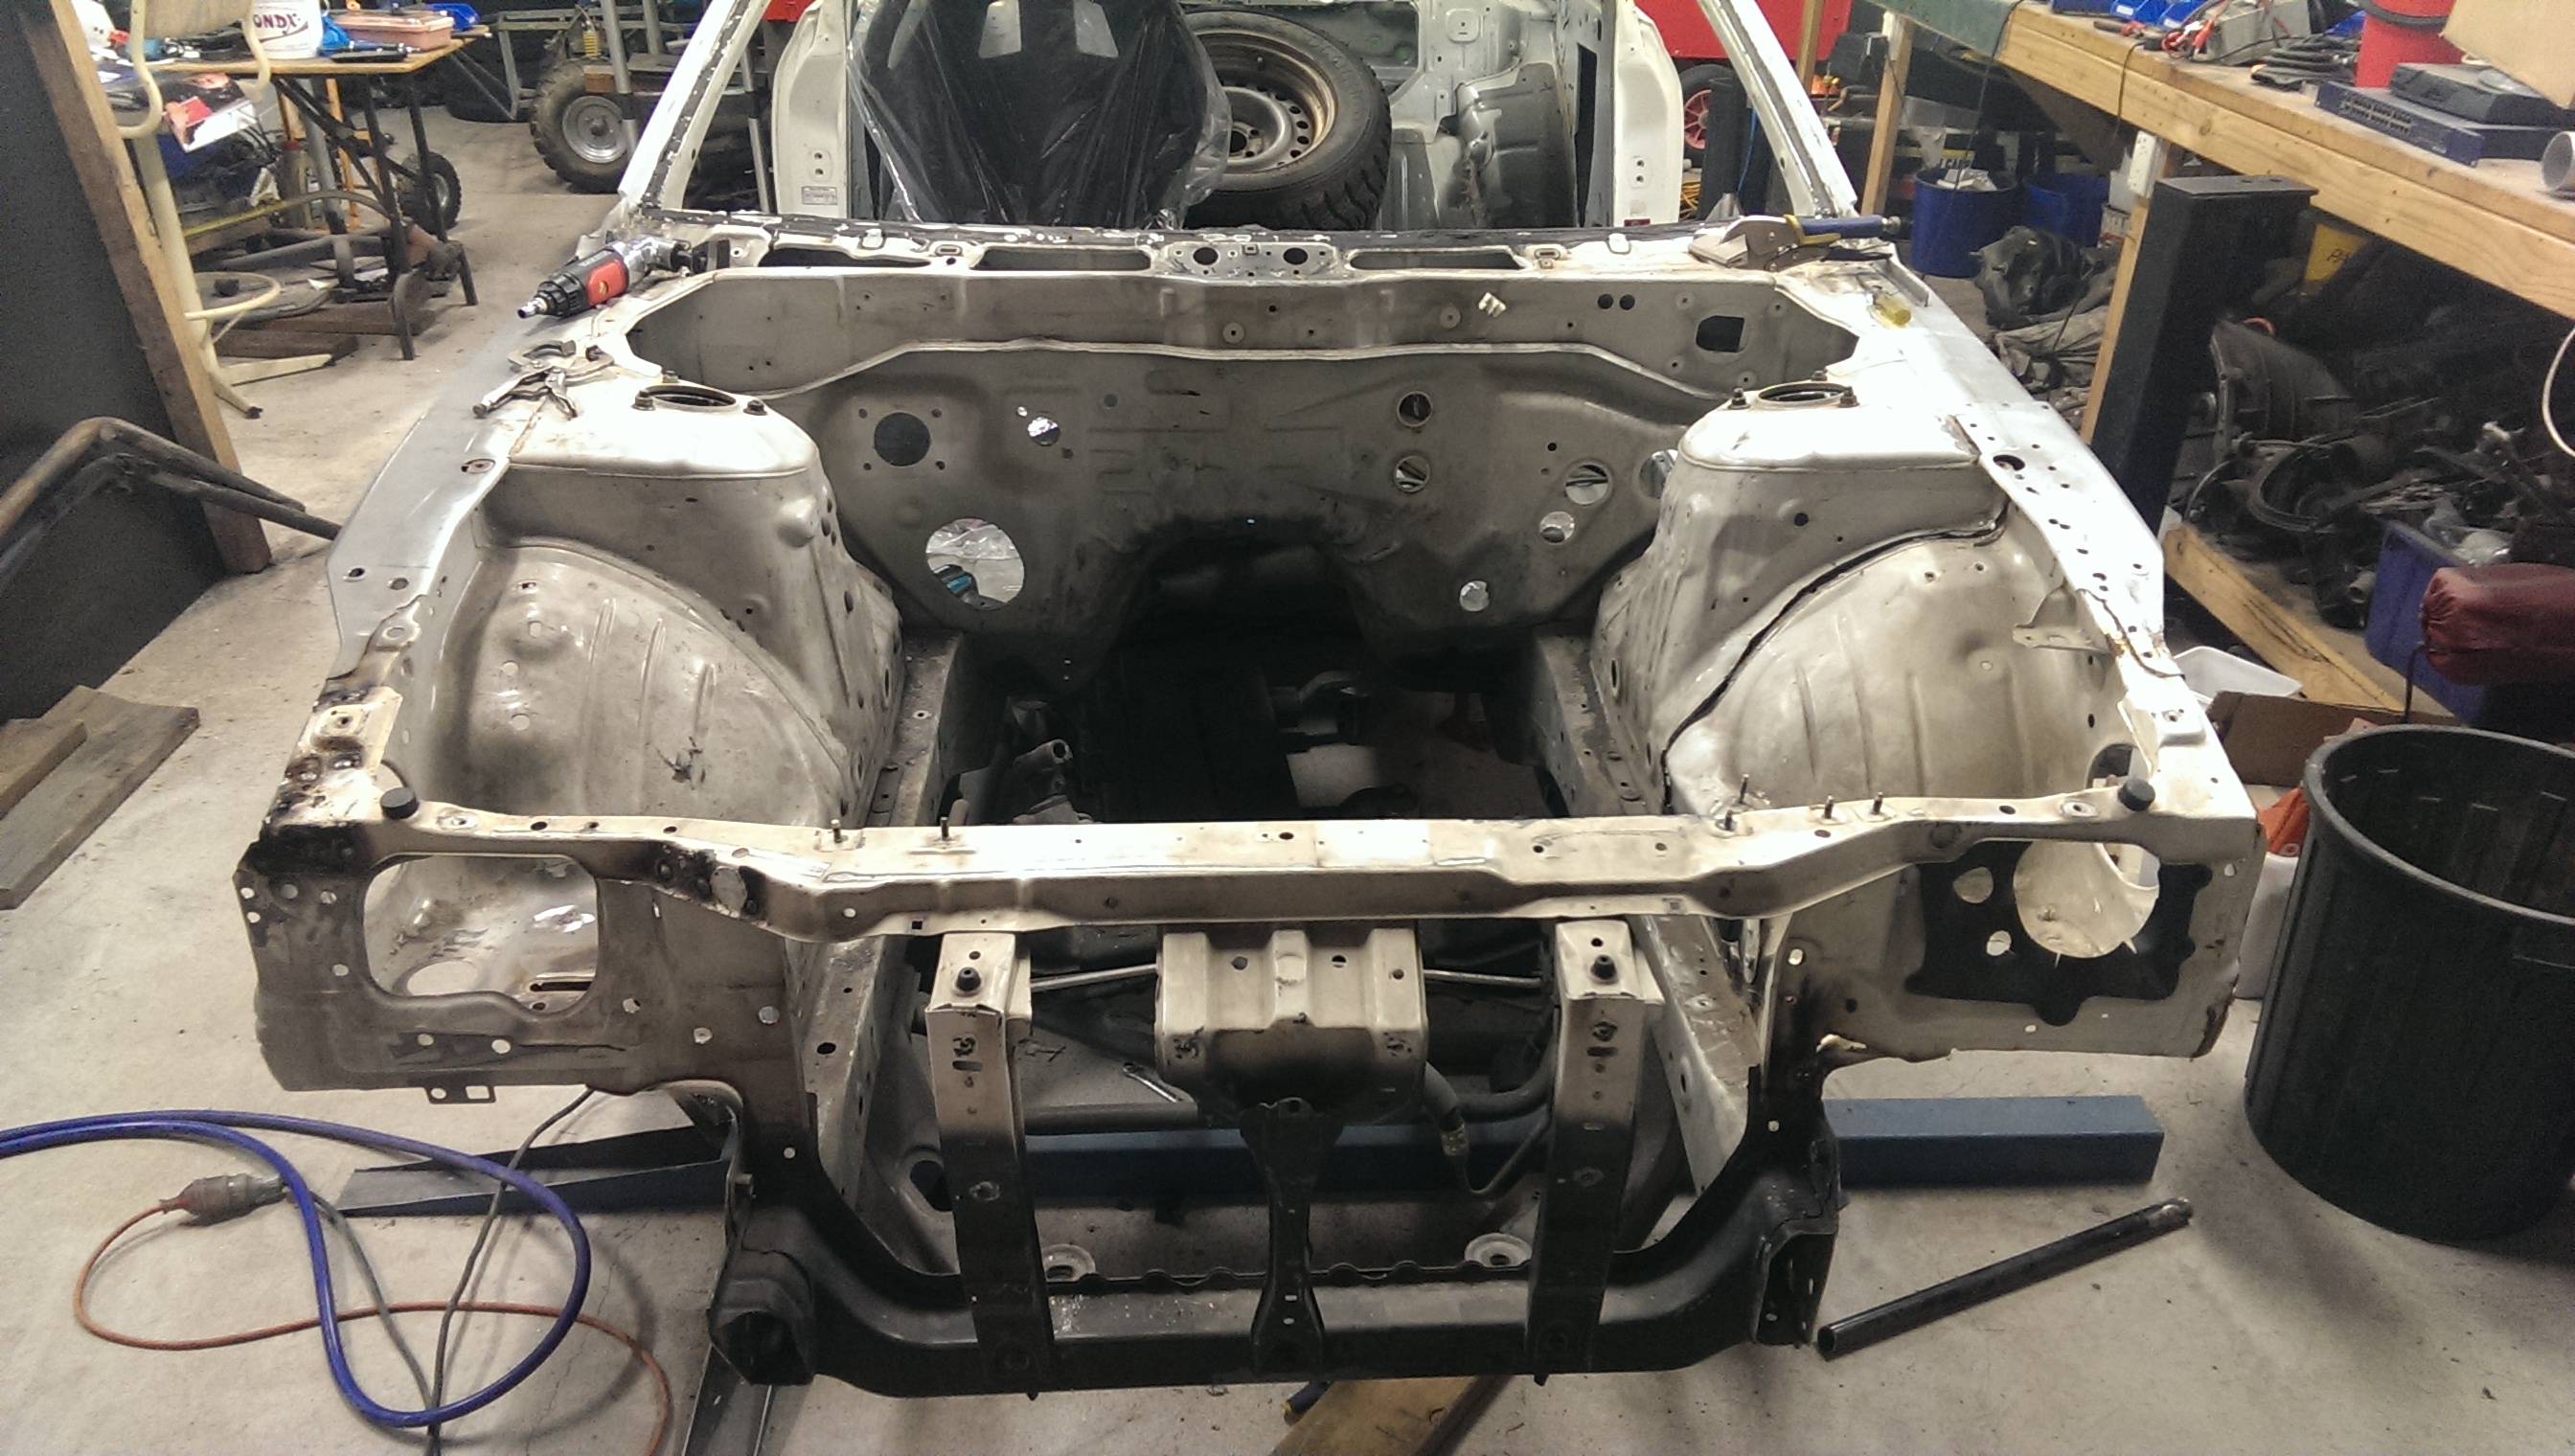
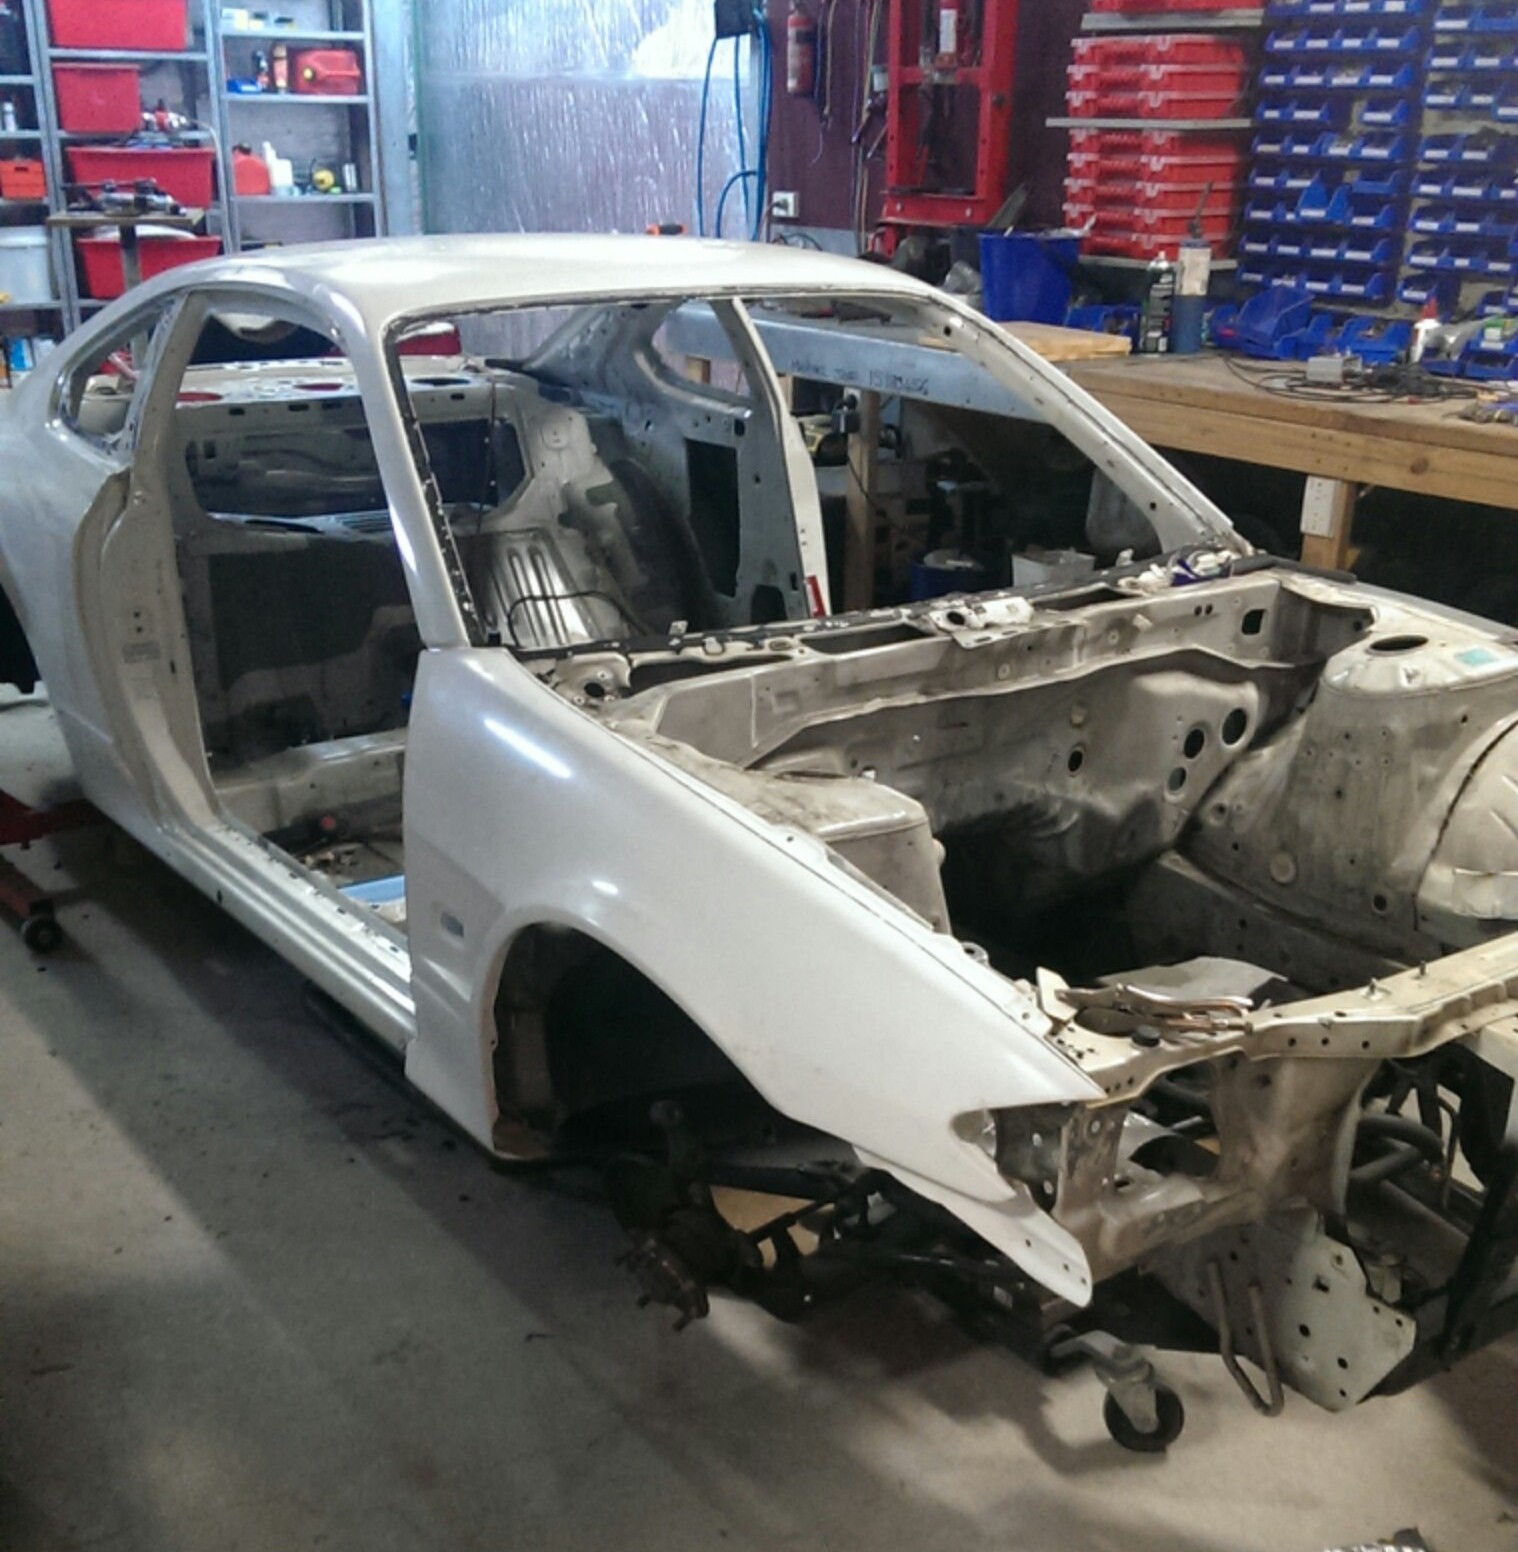
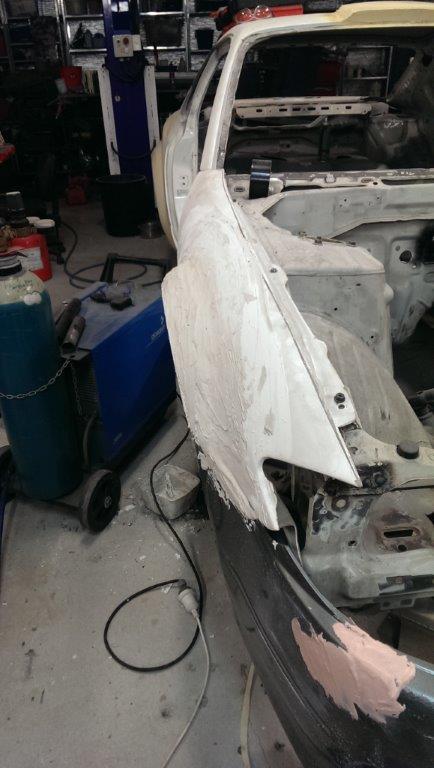
After another few layers of primer filler, more sanding, more filling, the front is taking shape nicely.

IMAG1885


Event hough they are actually 10mm smaller than the rears, they look so march larger!


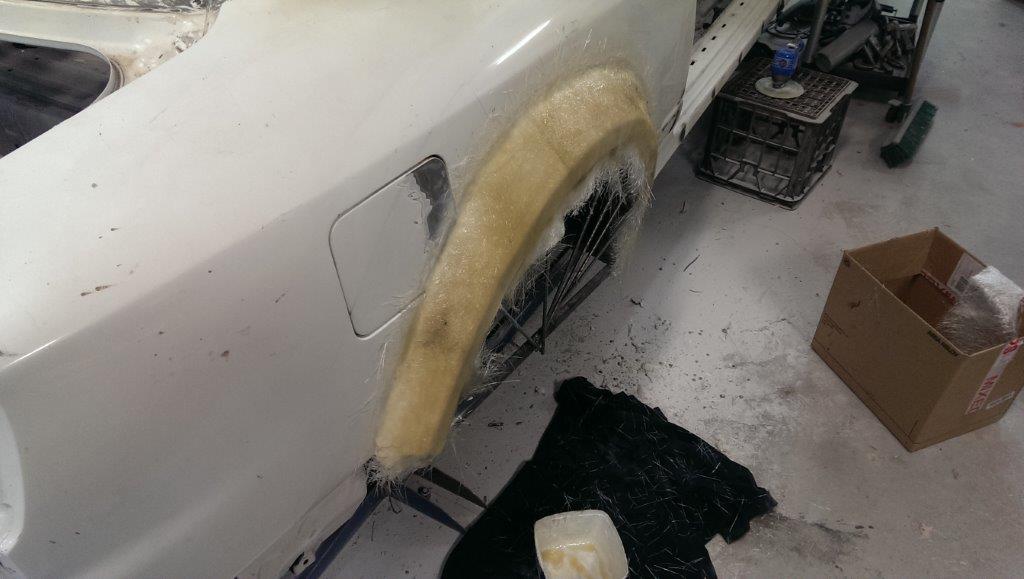
The rear just needs one more final sand (I hope) and a coat of paint to get it glossy and it’s ready for a mould to be taken!  Then I start again on the other side :/

IMAG1888


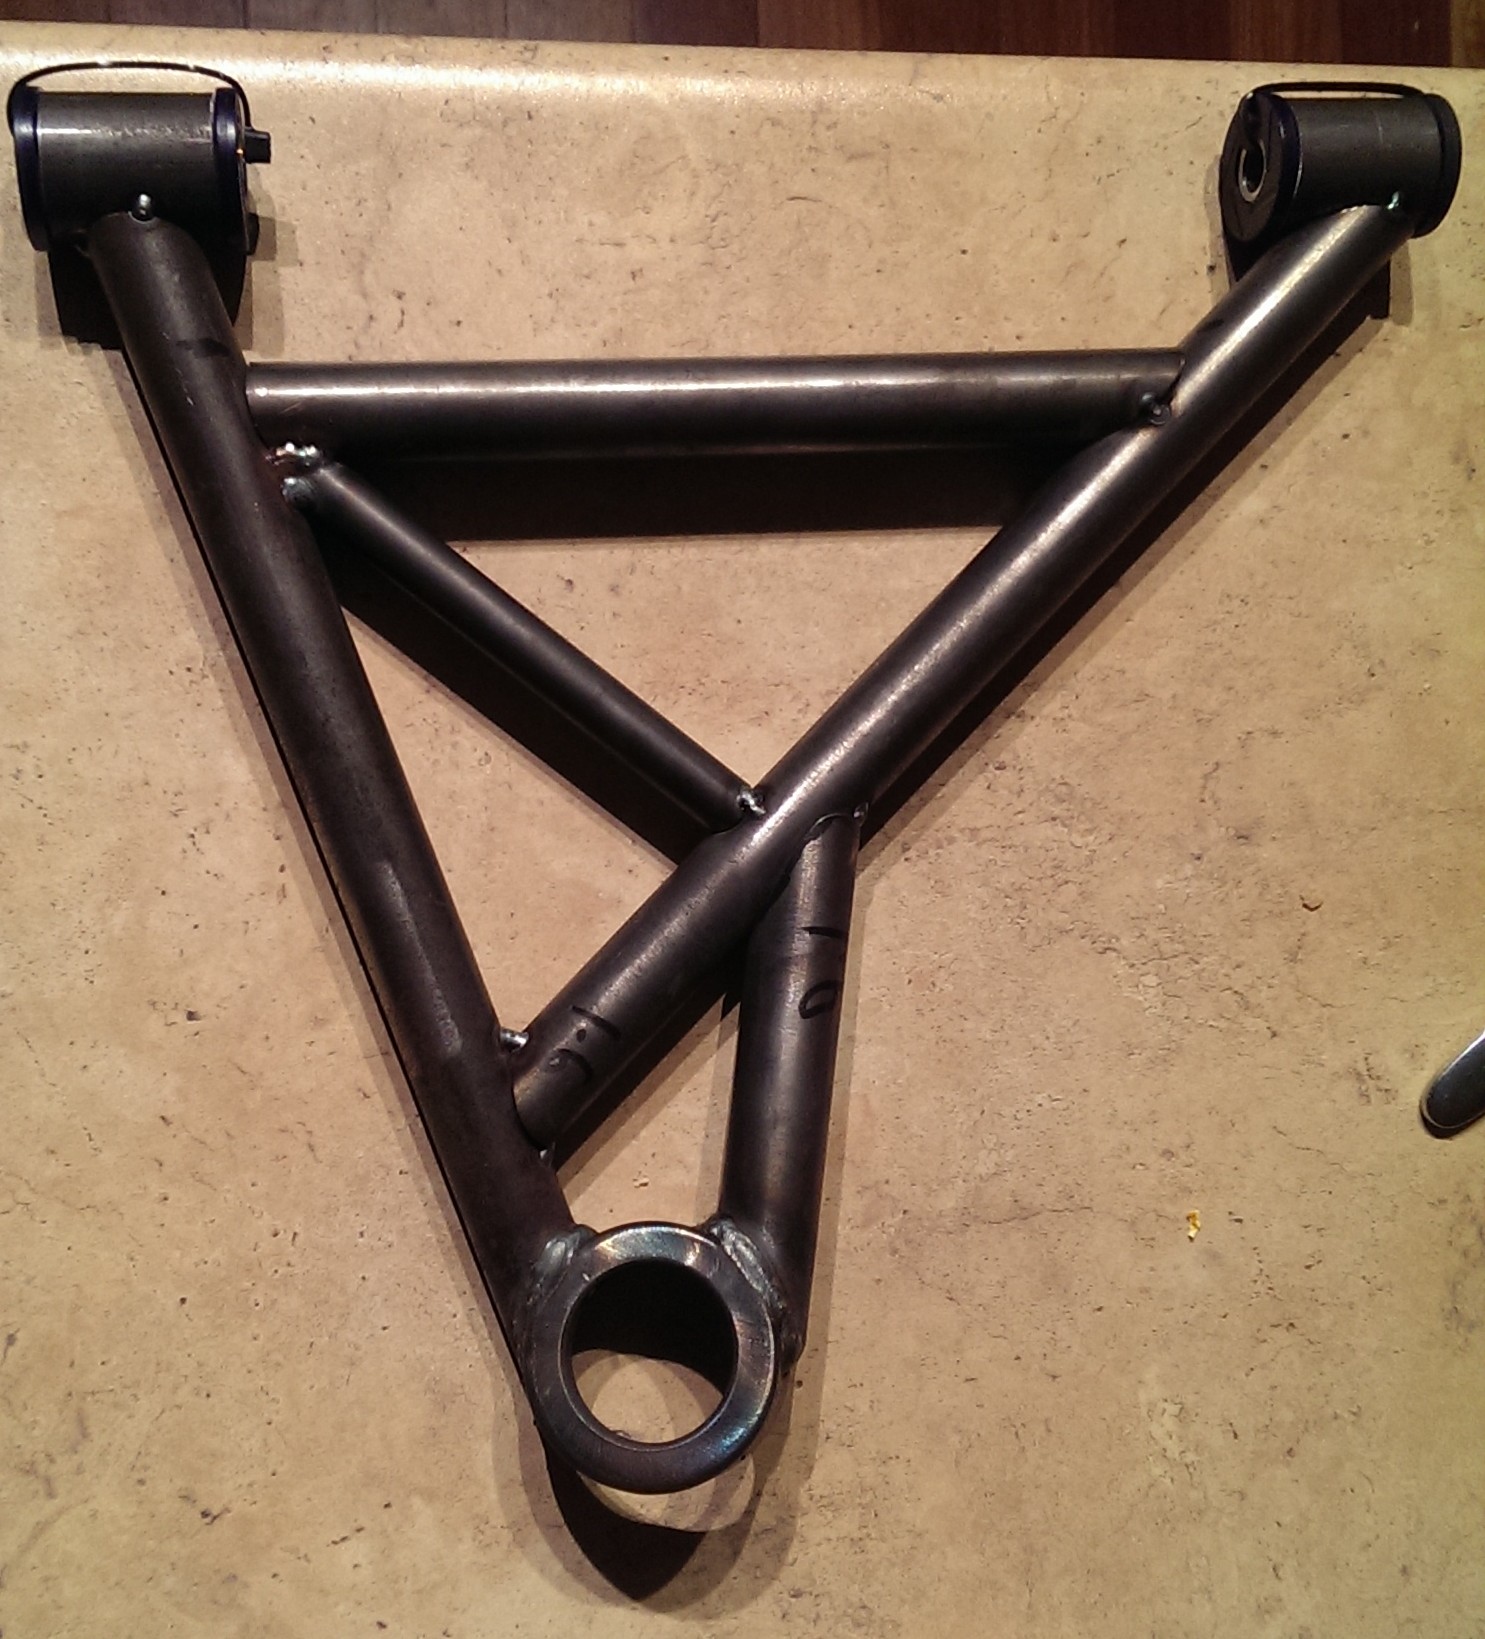
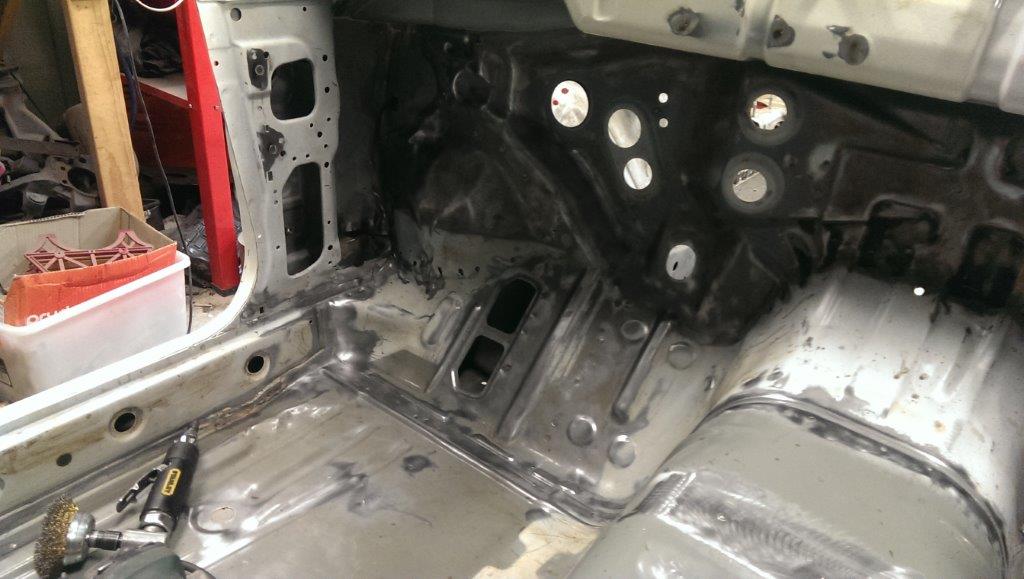
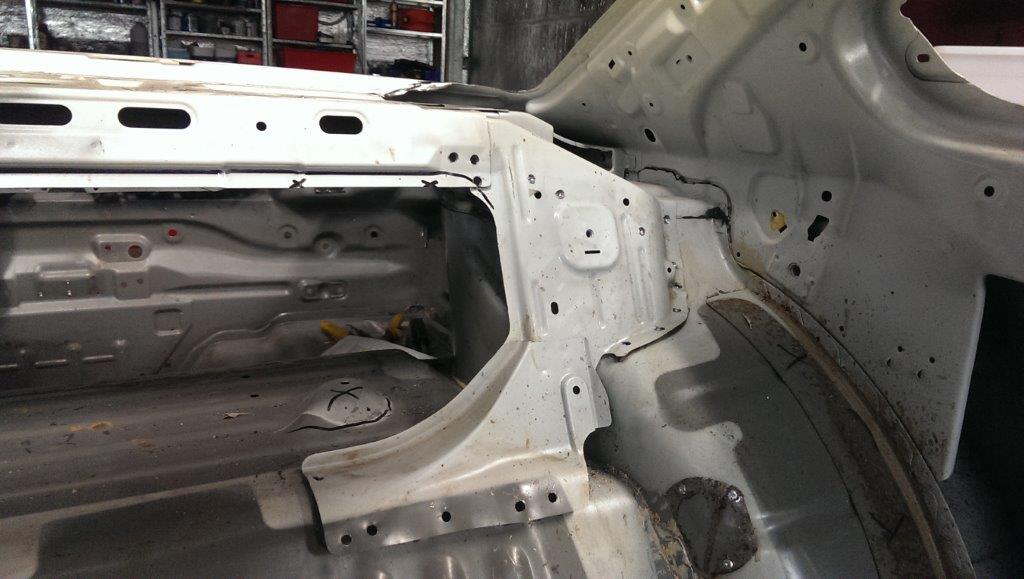
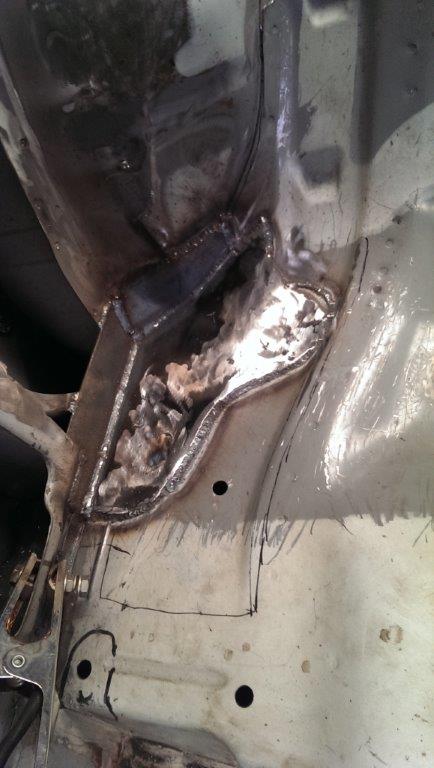
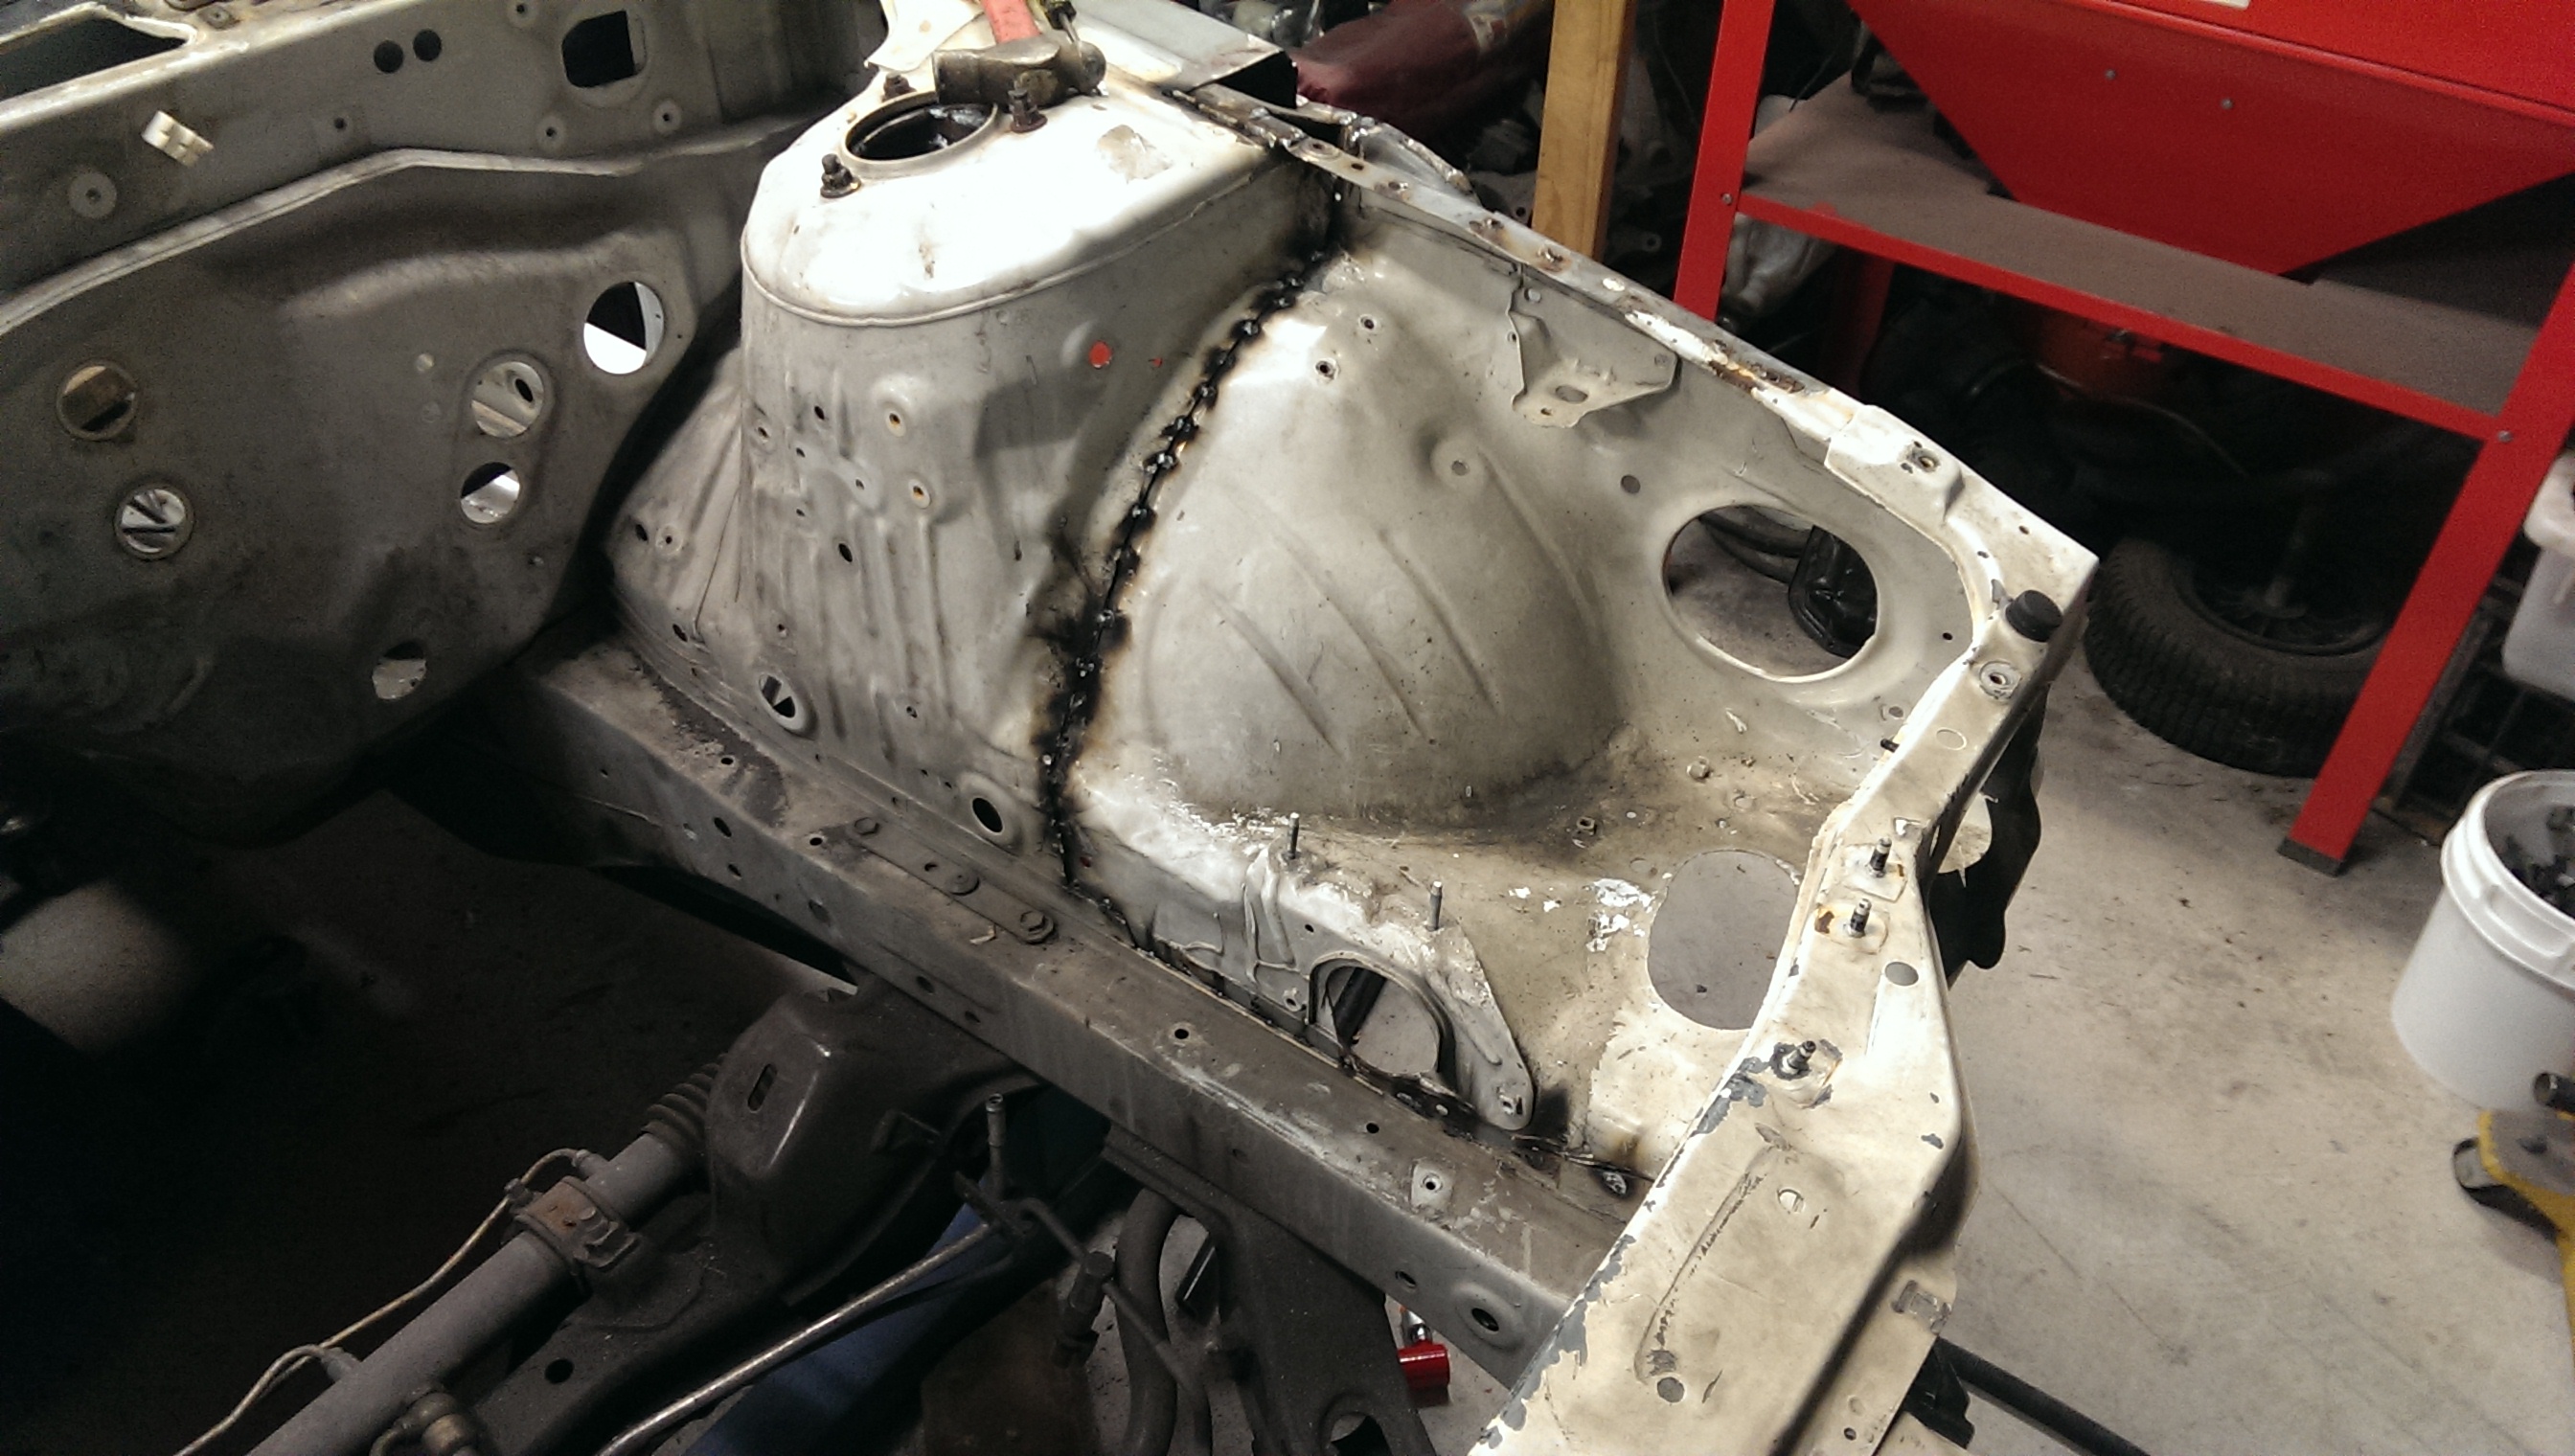
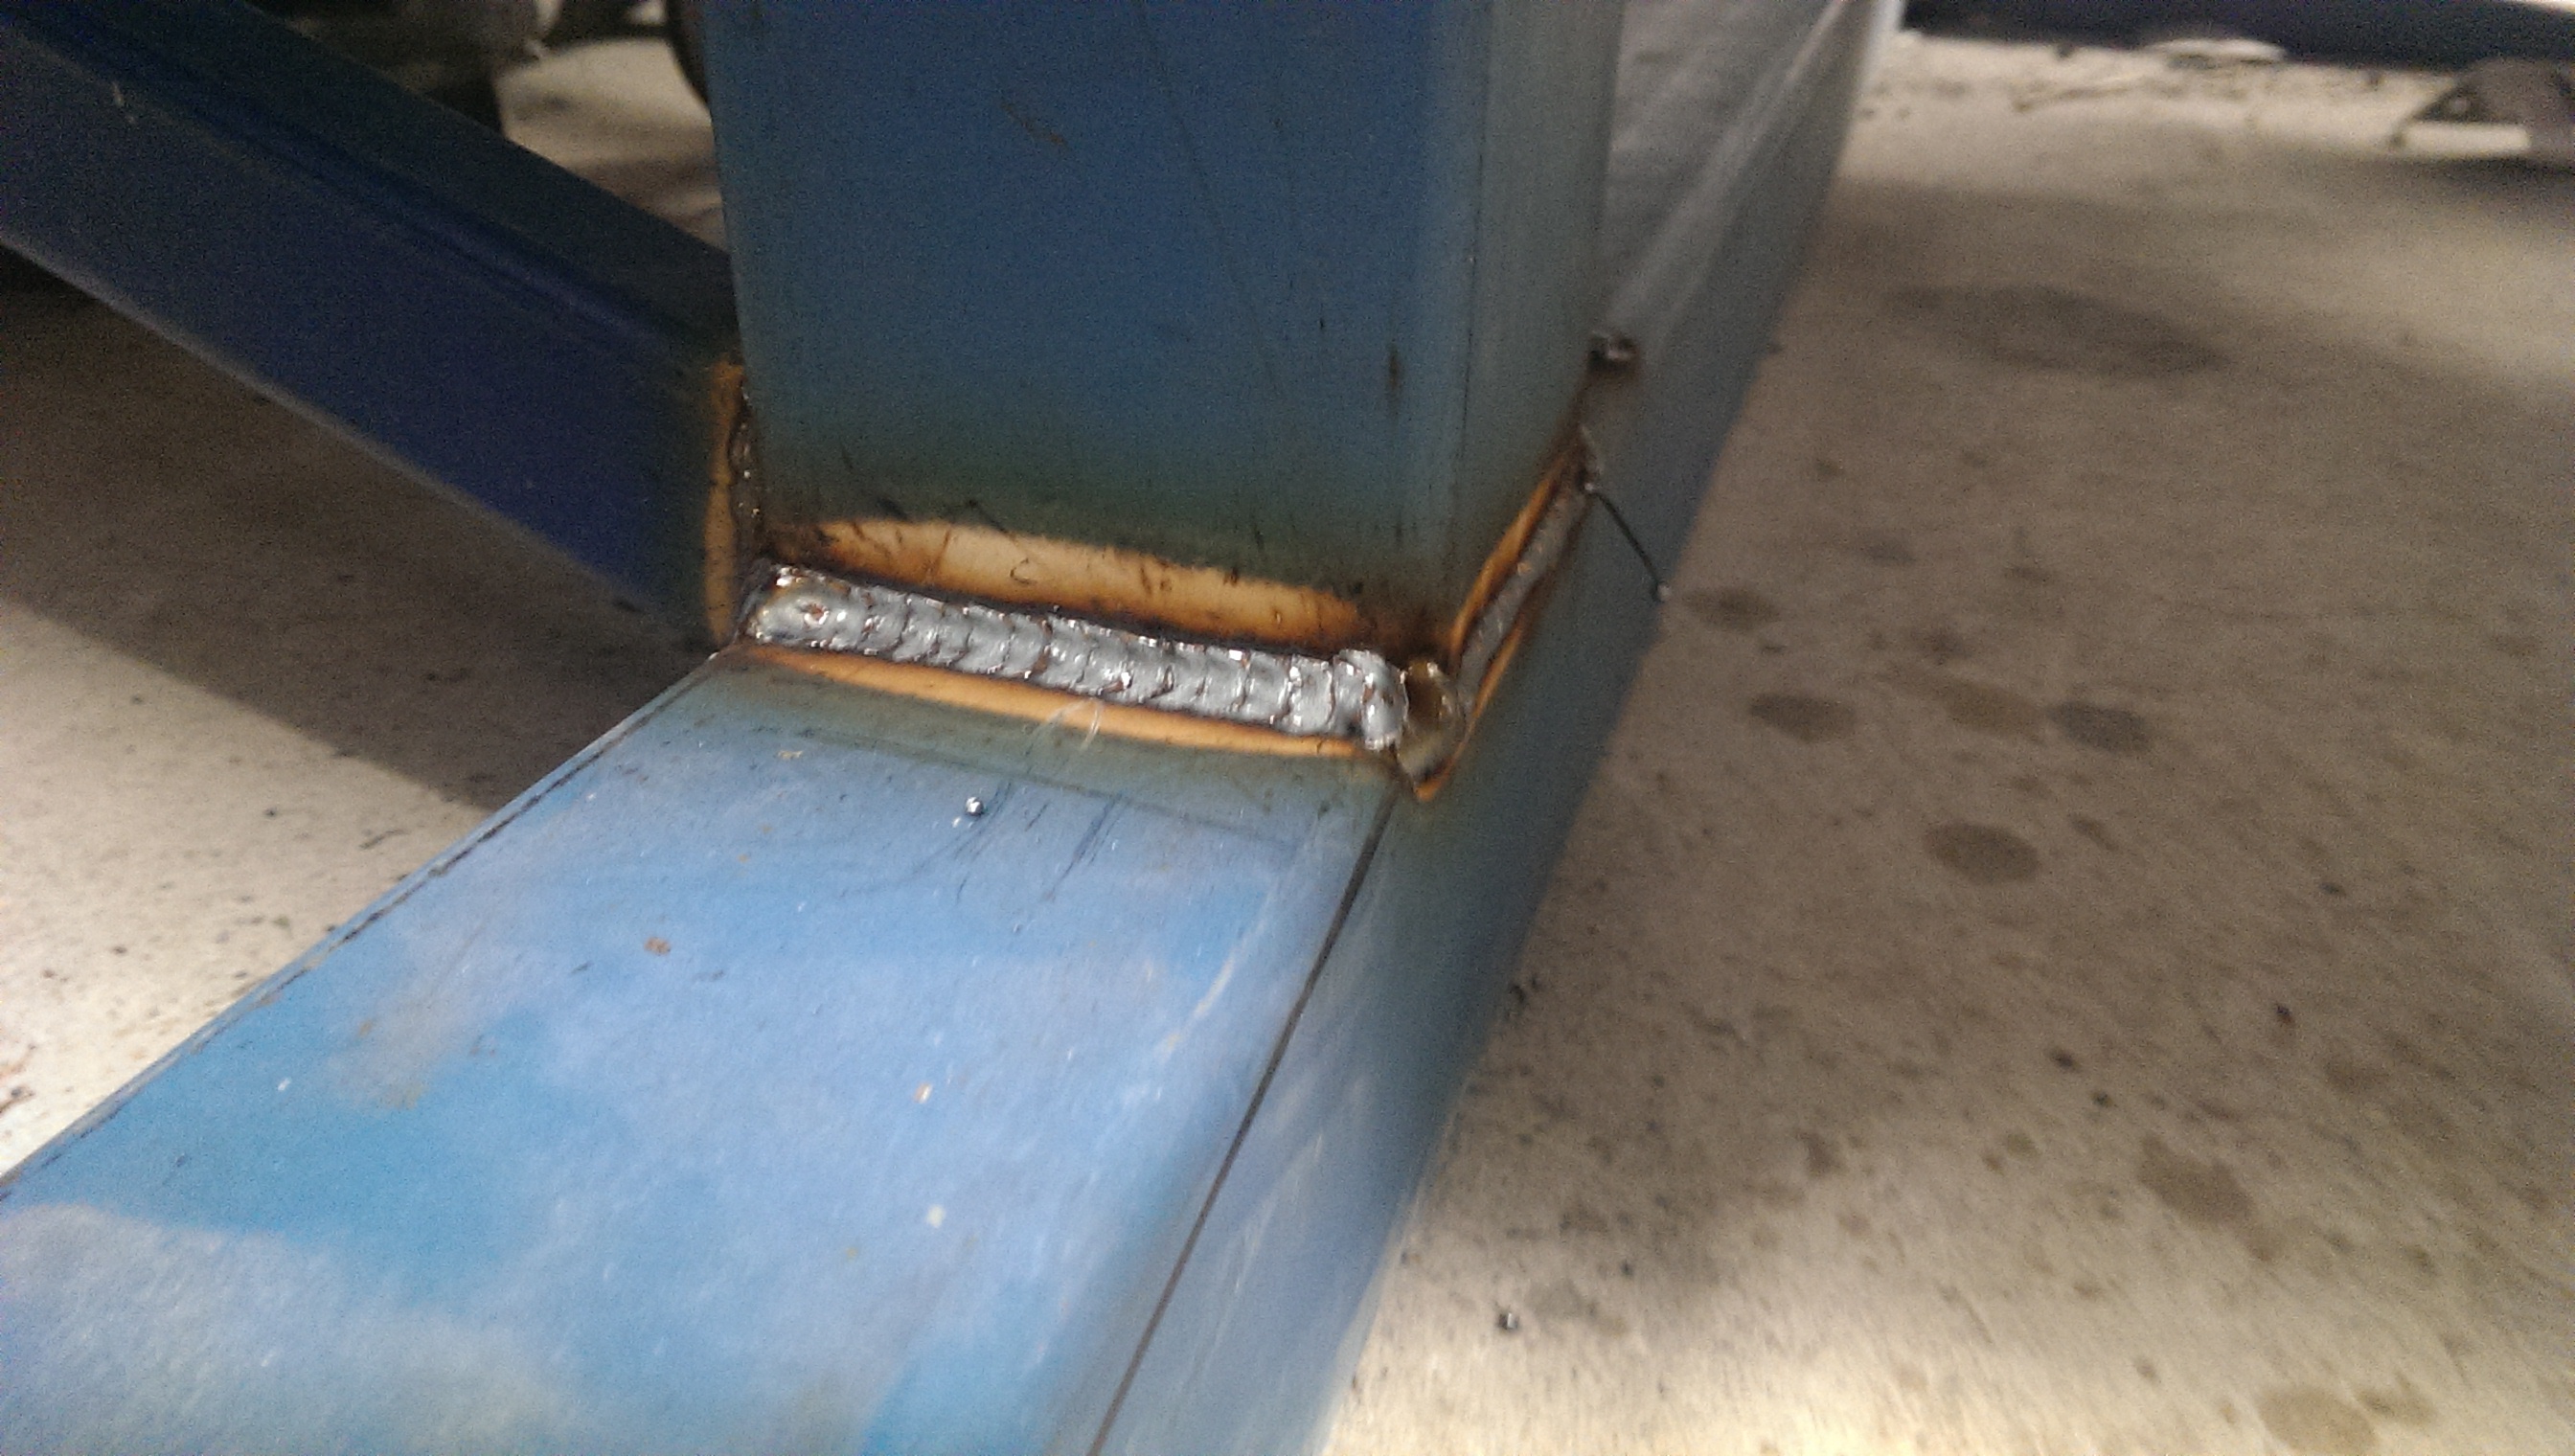
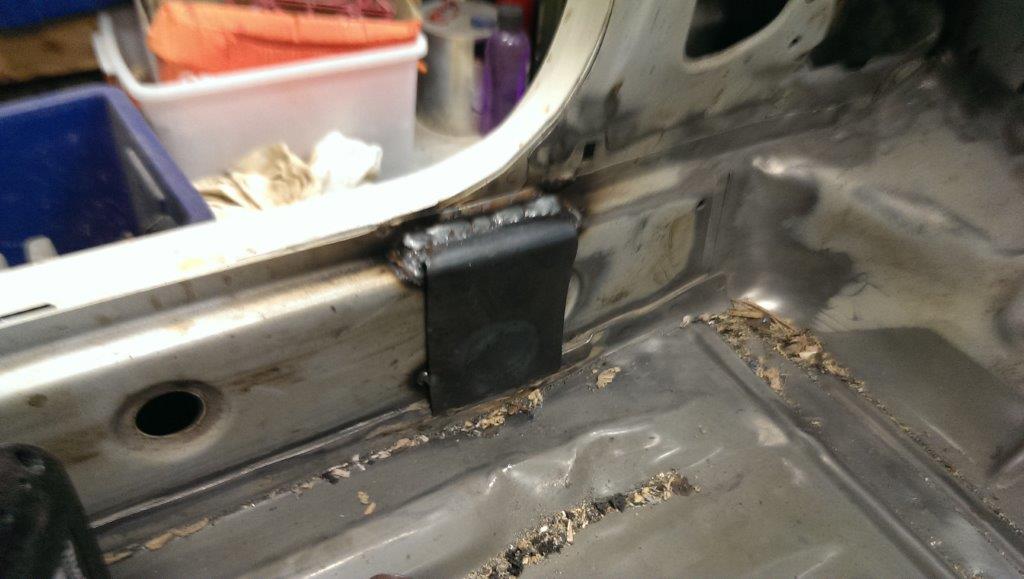
Between waiting for coats of filler and primer to dry, got stuck into making some little re-enforcement plates for each of the suspension pick-up points on the rear of the car.  These are going to take a beating over the years, so they need a bit so that they don’t crack due to fatigue.

IMAG1883

Just need to drill the mounting holes back into them, linish them to make them pretty and add a splash of paint.

IMAG1890


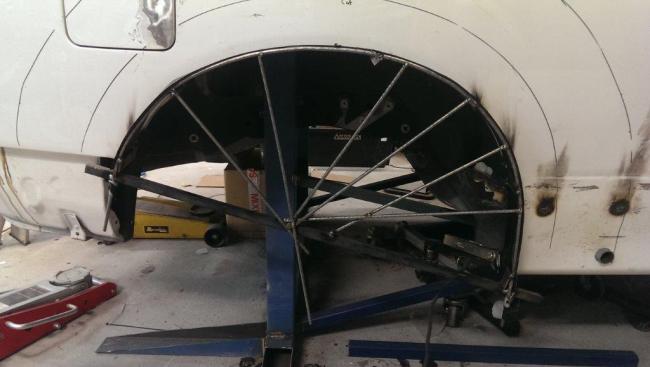
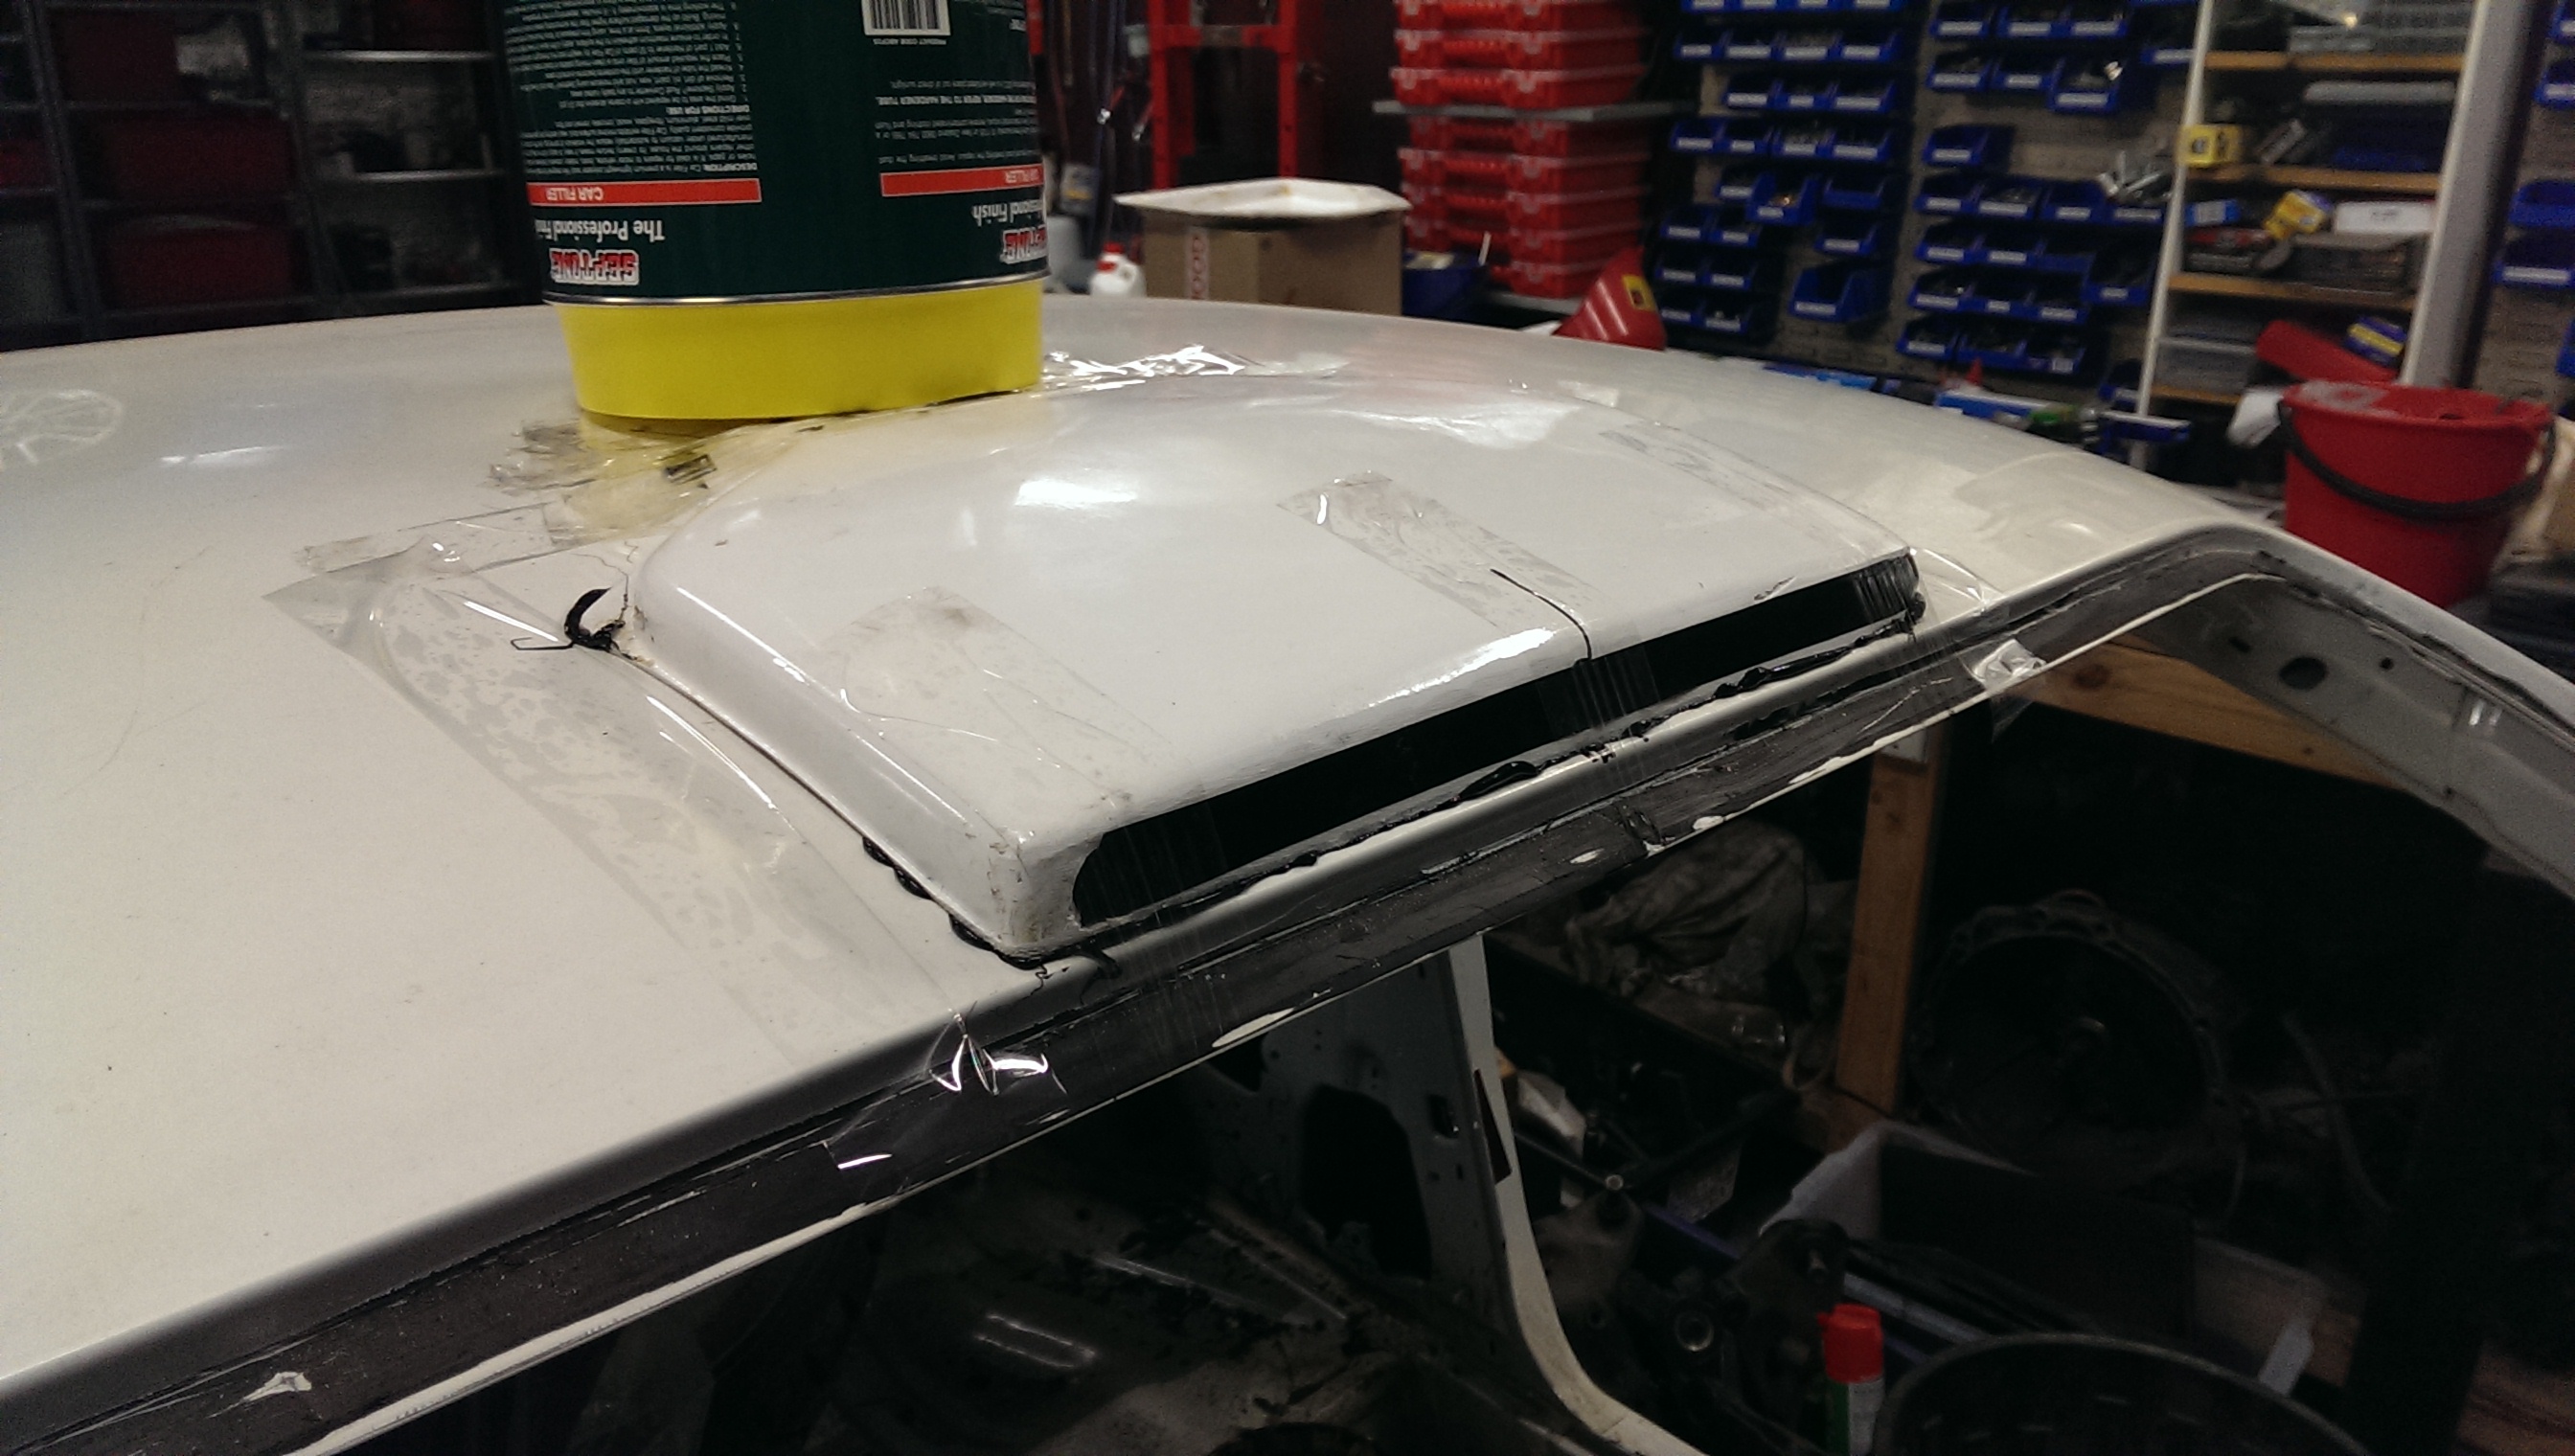
Change the roof scoop design too, cut the edges off and glued some strips of foam to it, which I’ll then profile into the new shape.  While there are more important things to do, I just couldn’t leave it as I wasn’t totally happy with it.


IMAG1889

Flare development – again

Started the day with some work on the front flares.

Made a quick frame and attached it to the lip of the front guard.  The cut the lip off and spaced it out 40mm from the stock guards.  By the rules I can go 50mm wider, but considering the front camber will push the front track wider already, I don’t want the front track getting a lot wider than the rear – need as much rear grip as I can get!

Added a layer of fibreglass over it to make a new base, then covered it with filler.

IMAG1855 IMAG1856


Frame removed after the fibreglass was set.

IMAG1859 IMAG1860


While the filler was drying, it was time to make some more of the jack stand mounts and the rear hoop mount.

IMAG1858

Almost there, just need to weld the sides and bottom if this internal plate.


The over engineered foot plate.  Where the hoop will sit is not over a very thick section of metal, so the foot plate extends to joint the chassis rail as well.

IMAG1857

And that was 1/2 a day done…..  Need more hours or less jobs.


Rear Hubs Complete

While waiting for my roll cage tube to arrive (and in between building a new chicken pen) I kept working on the the rear hubs which are now completely assembled and are ready to go back onto the car.

IMAG1838[1]

Complete with new custom made alloy backing plates to keep the rocks out.

Still need to bold on the wheel scrapers, but need to wait until I have the rims before that can be done.

IMAG1840[1]


Another layer of primer/filler on the flares – getting there…..

IMAG1841[1]

A few more layers of filler and paint, and I can make a mould of it.  Then, assuming wheel clearances are ok after I cut out the inner fender, I can start work on the other side.

Now that the hubs are done, just need to finish cleaning up the rear subframe and bolt on the suspension arms to check all of the clearances.

Hubs and arms

One of the things that I need to do before I finalize the rear flares is to put enough of the rear suspension in the car that I can stick a wheel on, then make sure I’ve got enough clearance.

Both rear hubs are now done, and once the paint has fully dried I can bolt the discs and calipers on as well.

image image


Another part that I need for this wheel fitment is suspension arms.

First job was to make a jig that hold the stock arm, so that when I make this one all of the angles, sizes etc come out exactly the same.

Below is the first version of the lower A-rm is tacked together and ready for final welding.  Making use of different tube sizes I’ve ended up with an arm 1/2 the weight of the stock ones.  This one is still a fair bit heavier than my tarmac set from the S13, but these have been build far stronger, with larger tubes for the beating that they are going to get.  Time will tell if they are strong enough…

wpid-wp-1402226675609.jpeg


I’m back!

Back from the big adventure, and back to life again….

Only got a couple of hours in over the last week, but a little bit of progress is better than none.


Put about an hour in total putting some more layers of body filler onto the flares, then sanding it off again.  Thank god for air tools!

image


image


Also found that the rear leaf spring bushes from a certain Hilux fit the S15 knuckles after you machine them slightly shorter.  Two packs were $66 and available from supercheap autos rather than $87 per arm (3 per side – two sides!)  Such a rip that the nissan ones have less material in them, but are 5 times more expensive (these are all the same brand!)

So, because I’m cheap I popped each Hilux one in the lathe and cut them shorter.  At about 30 seconds per bush it was quick.

Linished up and painted one of the knuckles, fitted the bushes.  Next up is getting wheel bearings, as the ones from this car are now in the road car – as its ones were knackered…..


image


..Ohh, and making up the alloy crush tubes for inside the bushes (not sure if alloy will be too soft for this job, but its much lighter :))

image

A quick weekend

Well, its the weekend before I go away for 6 weeks, and with so much to do its not funny what better time to waste an hour or two on the race car 🙂


Started off by putting some filler on the wheel arch flares.  A few hours later when that was dry, gave it a quick sand with the air sander, and used an old can of white spray paint to blend it in with the rest of the car, so that I could see if I was happy with the shape of them.

IMAG0249 IMAG0250 IMAG0251 IMAG0252 IMAG0253 IMAG0254

Pretty happy with the general shape, although they need a lot more finishing work before they are finished…


Then put a thin fibre glass layer over the top, to give some more strength to the shape (its just foam under there remember)

IMAG0255


Also popped the mirror mount buck out of the mold.

IMAG0256

And did a touch of welding and grinding on the subframe, so make it stronger but to also take as much weight off it that I can.

IMAG0248


Removed all of the rubber bushes from it too.

IMAG0257


There won’t be anything to report until the end of May, back then…..


The sculpture begins

Spent 5 minutes last night to start working out the basic shape of the flares.

image


A few bits need a touch more foam…

image


The first attempt is going to be a chunky square type profile.  We’ll see how that looks and will refine it from there.

image


Also put another layer of undercoat onto the mirror holders plug.  It needs some more sanding to remove the fine scratches, then it will be time to make the mold!image

Mini update

Well, the Sydney to London Marathon trip in the Falcon is now the Sydney to Perth trip – so I’ve got a little bit more time on my hands before I go, as I’ve got a lot less to organise now that I’m only away for two weeks…

Spent a couple of hours on Sunday relaxing…


Was really missing the smell of fibreglass resin – so thought I’d start making a mount to connect the stock S15 door mirror holder to my aftermarket mirrors.

I cut up the stock S15 mirror mount, and started making a section to match the mount on the mirrors.

Got that all sanded up and then painted on a coat of hi build filler.

Image

While the paint on that was drying…

I started working on the doors.  As usual removing anything that wasn’t needed any more.  Due to the rules I can’t just cut out the whole inside of the door and install a Lexan window like I want to 😦 – So it was the less exciting task of removing the wiring for the electric mirrors, removing the central locking, sound deadening etc.

I’ve gotten all of the wiring in the door down to these two – for the windows (and they have to stay) – got to try out the new wire sheath material that I bought though!  I like it!

One small step towards it being ‘hollywood’.

IMAG0230

Started sanding up the roof vent.  Then added some more bog to it.

Image IMAG0228 IMAG0229

Then, while that was drying…


Started making up a frame so that I could build the wheel arch flares.  First step was to make a copy of the shape of the arch, so that I can use that, spaced out 50mm, to form the new arches.

Image


With that spaced out and tack welded in place, layed some plastic strip on it.

Image Image


Stuck a peice of plastic to the side of the whole thing to keep the stuff in place, then unloaded a can of expanding foam…

Image


This morning, this is what it looked like with the outside plastic removed, and lightly trimmed.

IMAG0231 IMAG0233


Need to find my creative side now and start carving up the shape that I want.


Long time no see

It’s been a while, and I am still here!

The last few months have been working on the Falcon for the big event next month.  I’ll be back mid May, and then things will start up again in anger!

Over that time I did get a couple of little jobs done on weekends when the Falcon was at other workshops…


Most of the tar and sealer have been cleaned off from the passenger side.

IMAG0132 IMAG0135


Various parts of the interior metalwork have been removed temporally to fit the cage.  These will be replaced one the cage is welded in.

Left side has been removed, so allow access to the rear strut to, where the cage will mount to.  Right side is still in place.

IMAG0133IMAG0134


I made the re-enforcement plates for the floor where the main hoop will attach.

IMAG0162


Then made a prototype of an axle stand, that fits into the side of the car

IMAG0166


The tube poking out of the stand will fit into tubes welded into the side of the car.

First job was to drill the holes into the side of the car.

IMAG0153


Only to find out that your hole saw is not long enough to make it all the way through…..

No problems, just cut an old one in half, and weld a peice of chrome-moly tube in the middle, to make it longer 🙂  Shows the before and after

IMAG0155


On the inside, the tube that pokes out the side of the car was first welded onto this plate, then the plate was welded into the car.

IMAG0149


Meaning that from the outside you get this.

Rear mount

IMAG0152


Front mount.

IMAG0148

 There will be another plate welded on around this tube on the outside, then it will be ground flat.


The end result is something that looks like this

rally stands


Until next month!

Last months updates

Nothing hugely exciting, just a random selection of different items were started to try out some ideas.

I have a old LED trailer light that was broken, so cut it up and made some replacement globes for the tail lights and side indicators.

image

While the epoxy was drying on those, moved onto putting filler onto the roof rent, so that I can re-profile it a bit.  Once I’m happy with the shape, I’ll take a fiberglass mold of it and make the new, lightweight roof scoop.

image

Next up was making a roll cage out of masking tape.  I’ve made a small scale model of the cage, next was to try out the concepts in full size and to scale.

First up was the locations of the side intrusion bars and the head bar.  There are rules as to how much of the door opening these are allowed to take up – so as ever I’m pushing these to the absolute limit.  Here is the current plan.

image

Here is the view through the back window, going with the WRC style V roof bars and V rear leg bars.

image

Inside view

image

Roof area detail.  Trying to tie every join into another join, and to close up the side and front window apertures as much as possible for maximum strength.

image

Inside view from the passenger side.

image

Pretty happy with how it all fits in.  Just need to make sure that it works when the A-pillar bars are located in such a way that they don’t impact my vision looking forwards.  From the drivers seat, I want those bars to fit inside the factory A-pillar, so that they don’t block out any more of my forward vision.

Sunday – the day of rest?

Got some more hours outside on Sunday very late arvo / night.  After mowing the lawn, doing some reticulation work etc – then it was time!

Got the rest of the sealant out of the boot area and got all of that cleaned up.   Also took another lot of material out of the parcel shelf – all the “unused brackets” as per the regs 🙂

IMAG0079


Then finished all of the panel beating on the front end to get the rest of that all lined up, then welded it on.

IMAG0093


After that it was play time.  I used the fibreglass molds of the roof scoop that I made, and the mold I tool from the front 1/4 panels to make some fibreglass parts to use as the basis for shaping up parts on the car.

First up was roof scoop:

IMAG0090 IMAG0089


I’ve glued it on, so that I can start reshaping it slightly.  Once that is done I’ll take a mold off it, and then produce the final scoop.


Then, for some fun I started the top section of the rear flares – just sticky taped on at this stage, but….

IMAG0092


Then to waste a little bit more time, put one of the Falcon’s tyres in the hole.

IMAG0096 IMAG0095


The pics really don’t show it, but its going to look tough pumped out by 50mm per side!

Finally some time!

Between work, BLUE, birthdays and Christmas car time has been severely limited over the last month or so.

Finally got some shed time and made some good progress.  Step one was cleaning up…………..

IMAG0072

And then that day was over…….   The bigger the shed, the bigger the mess 😦

Got the rest of the chassis jig finished, aligned and all welded up, ready for the body work and cage.

IMAG0077

Now that the car is all straight and locked into place, work started on the front end.

IMAG0082 IMAG0074

At this point, it was getting late, and the final steps for the front end involved hammers, grinders and an assortment of other noisy gear, so I switched to design mode…

Started planning out seating position and spare tyre mounting locations.

IMAG0075 IMAG0076 IMAG0080

One of the rules that has changed since I last gravel rallied is that you are now allowed to add flares and other fibreglass parts to the car, if the car is over than 10 years in age.  Part of this allows you to remove 75mm of the original metal, for tyre clearance, so I started marking out where that would be, to see how it will all fit together.  The inner most line is where I’m allowed to cut out, the outer line is the maximum extremity of where the flares can extend to.

IMAG0083 IMAG0084

More tomorrow night I hope 🙂

Going mouldy

Got the odd chunks of 20mins of shed time over the last two nights, and some molds of the falcon’s roof scoop are the result.

These pics are straight out of of the molding process – not even polished yet and they are so shiny!  Very pleased, slowly getting better at this whole fibreglass melarky 🙂


This is the top part, it sits on top of the roof of the car.

IMAG0053


This part is inside the car, on the inside of the roof.  The two circles are cut out and replaced with air vents or tubes to point the air onto you.

IMAG0056


And a family pic of them together.

IMAG0057


Hopefully some more progress will happen over the next week.