Electrical again, and Engine Ancillaries

More wiring again, plus starting to get some of the other parts bolted to the engine, so that I can get one step closer to starting it!


Once of the first items is the coolant header tank

IMAG0742.jpg


Got the injectors in, and the last fuel line made up.

IMAG0754IMAG0751


Throttle cable in

IMAG0744.jpg


Breather hoses in, ready to start making up the catch tank.

IMAG0743.jpg


And more wiring…..

IMAG0777.jpg


Electrical

Most of the weekend was spent doing electrical lots of time but not a lot of visible progress…


The battery is all mounted securely.

IMAG0729


Most of the rear end wiring to the lights is complete.IMAG0730


The centre console, starter, ignition etc is all done.

IMAG0737

Another good step forward

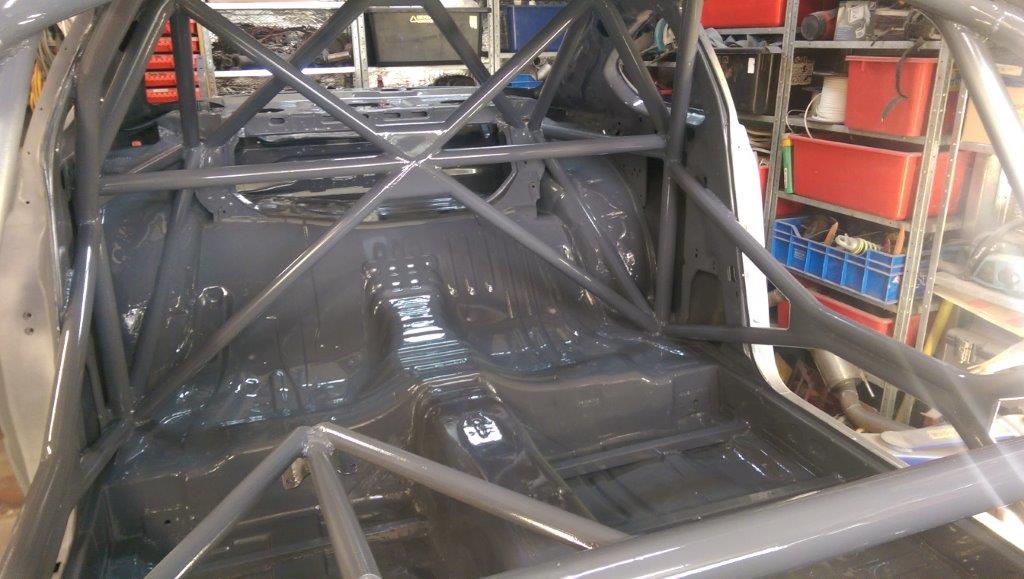
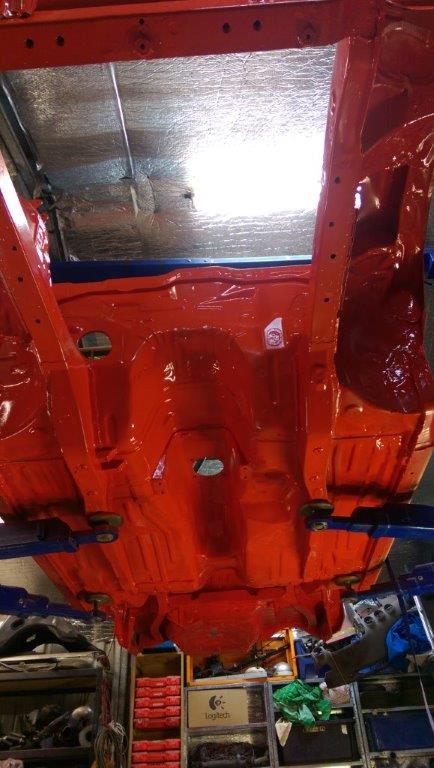
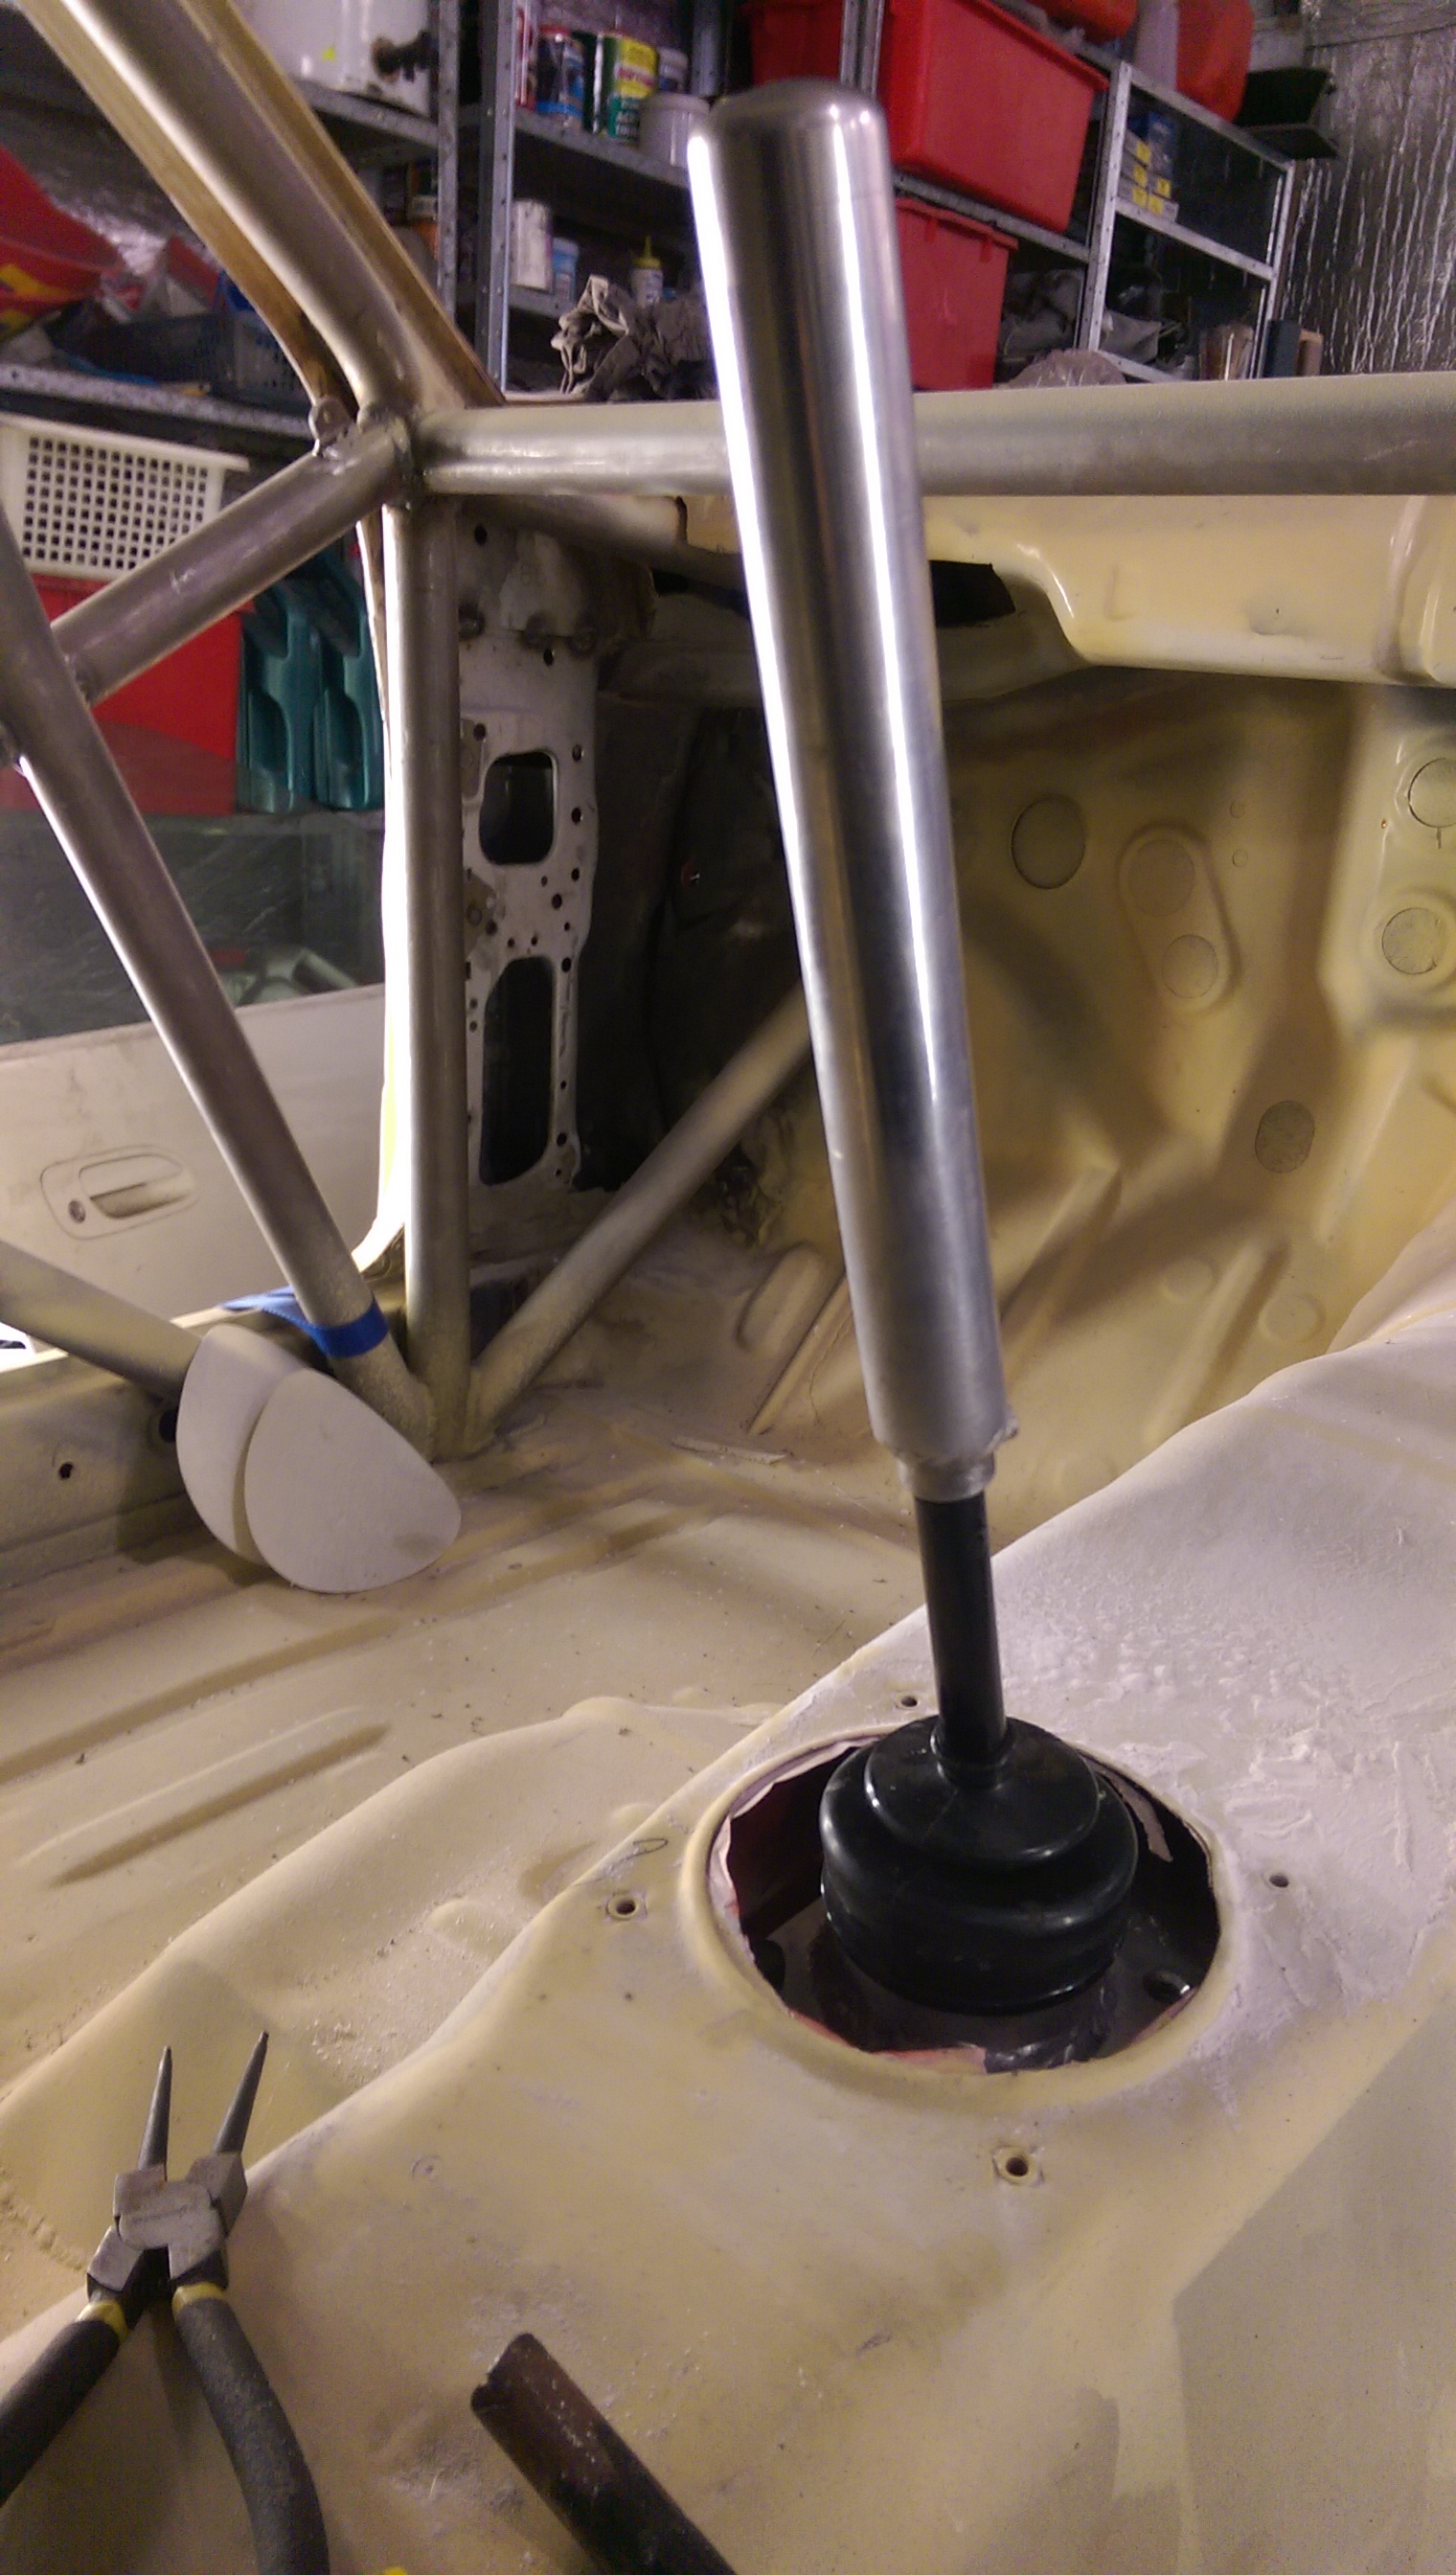
First job of the weekend was on Friday night, putting some flat black paint on the A pilar and Carlos bar, helps to make them ‘disappear’ when you are looking out through the front window.

IMAG0688

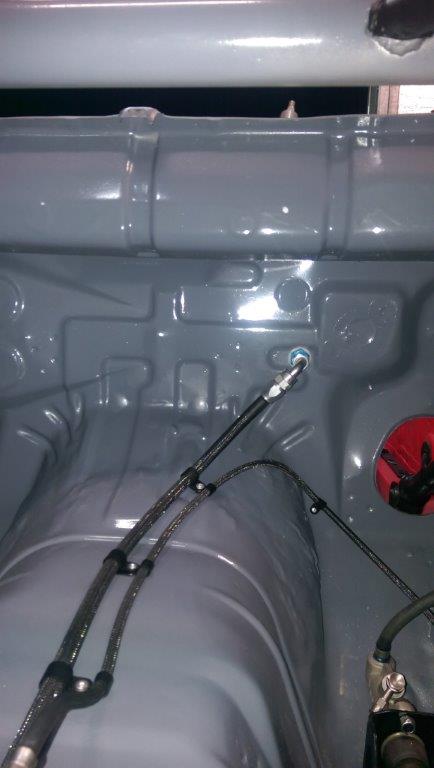
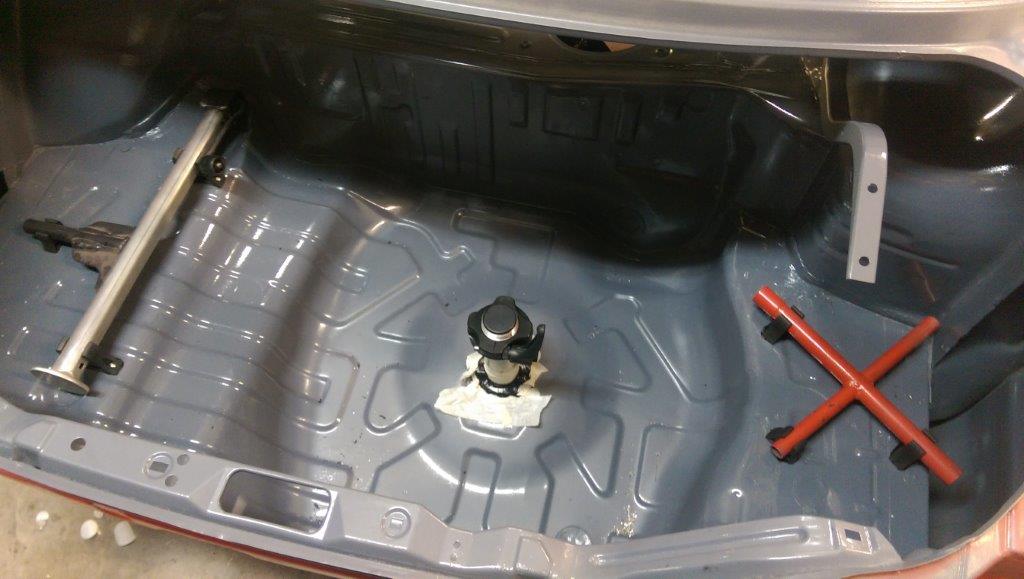
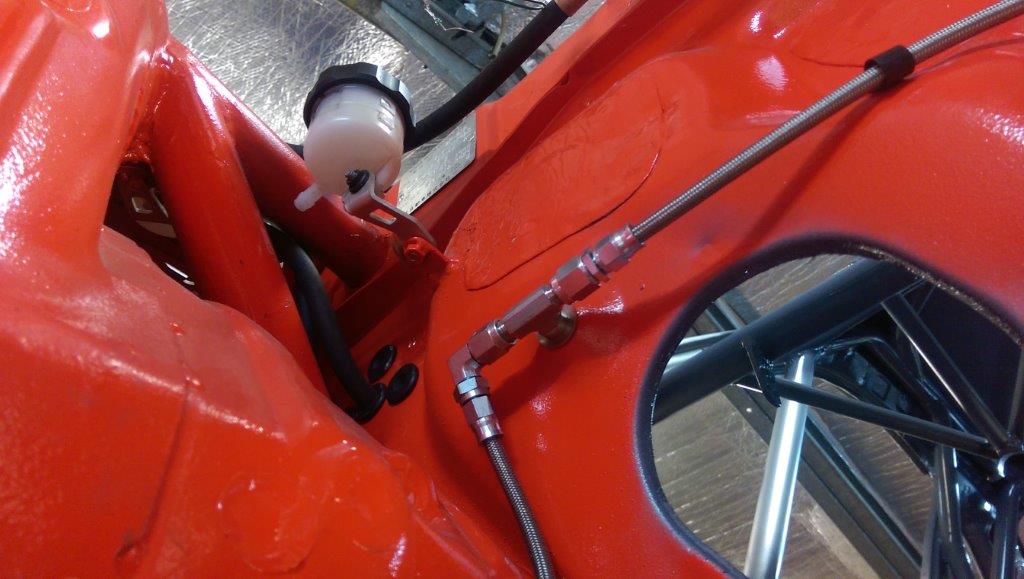
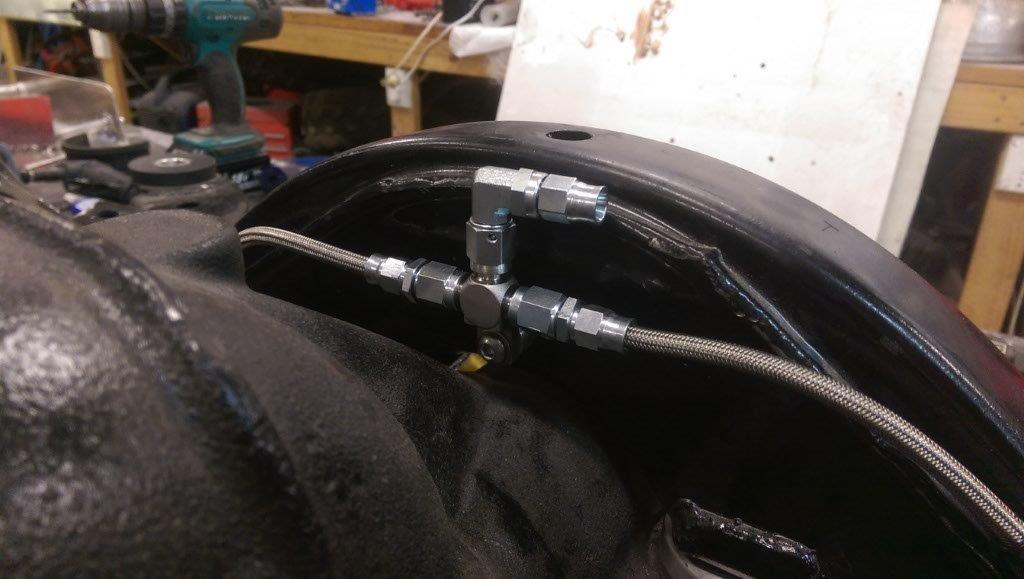
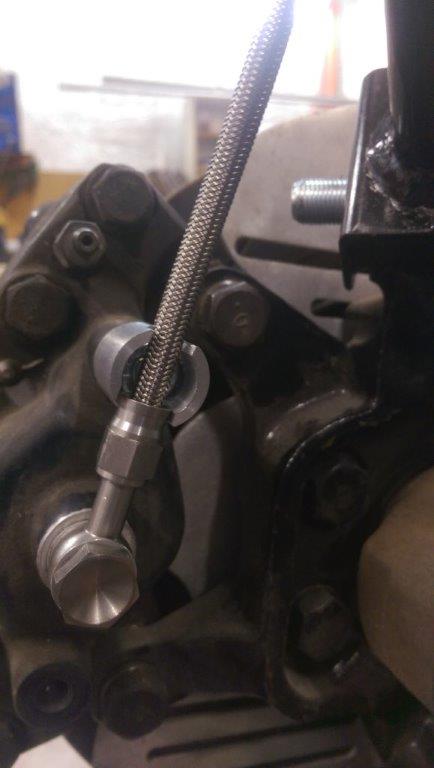
On Saturday, once the paint had dried it was time to get inside and start getting all of the brake and fuel lines done.

IMAG0696

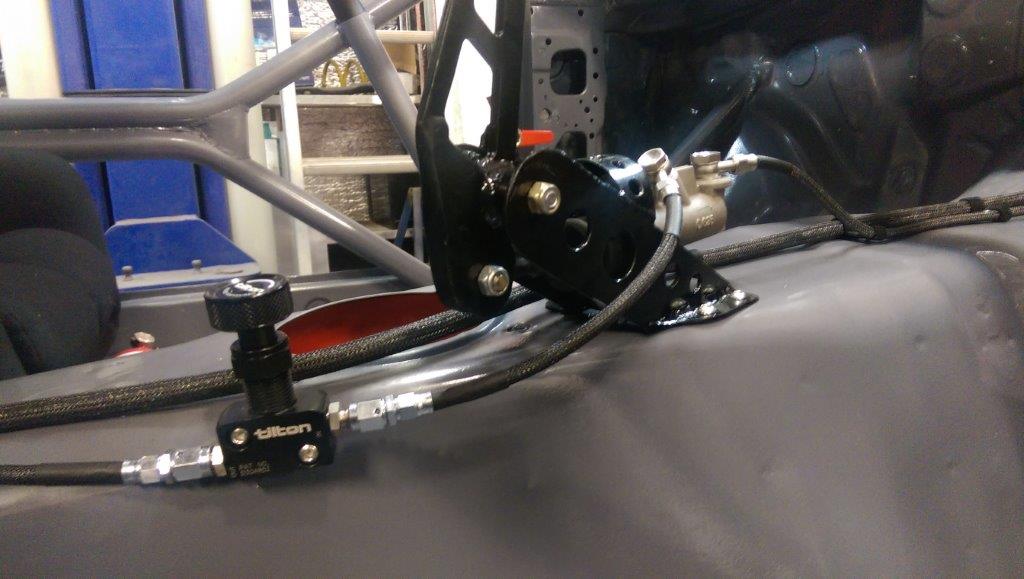
Got the handbrake mounted, rear split valve in place.IMAG0699


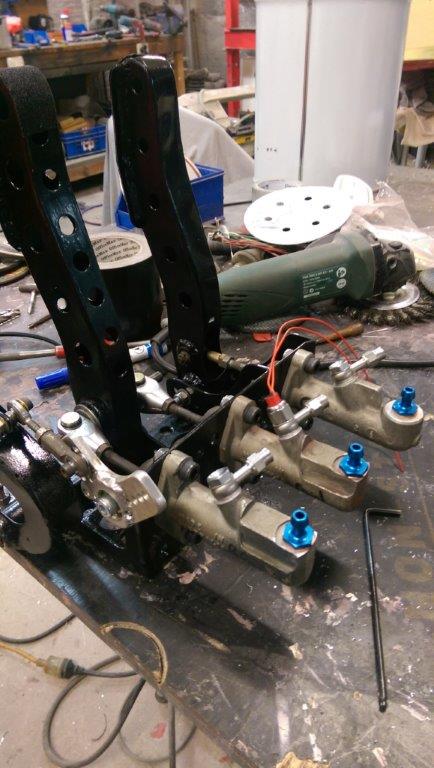
Pedals all mounted and plumbed in.

IMAG0693

CoDrivers seat and belts all in.

IMAG0691

A bit of colour coding to the Velo logo, just because….IMAG0702


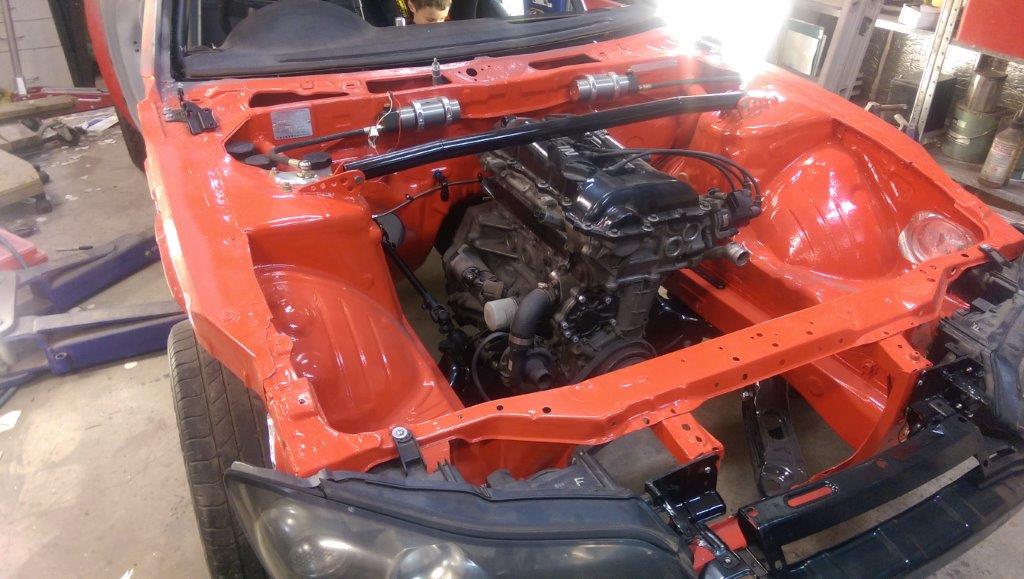
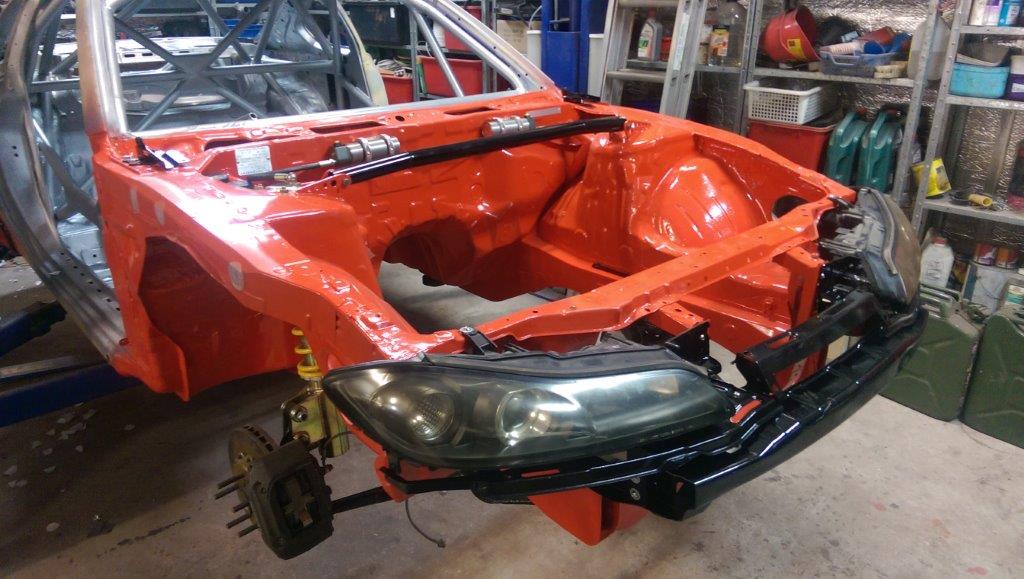
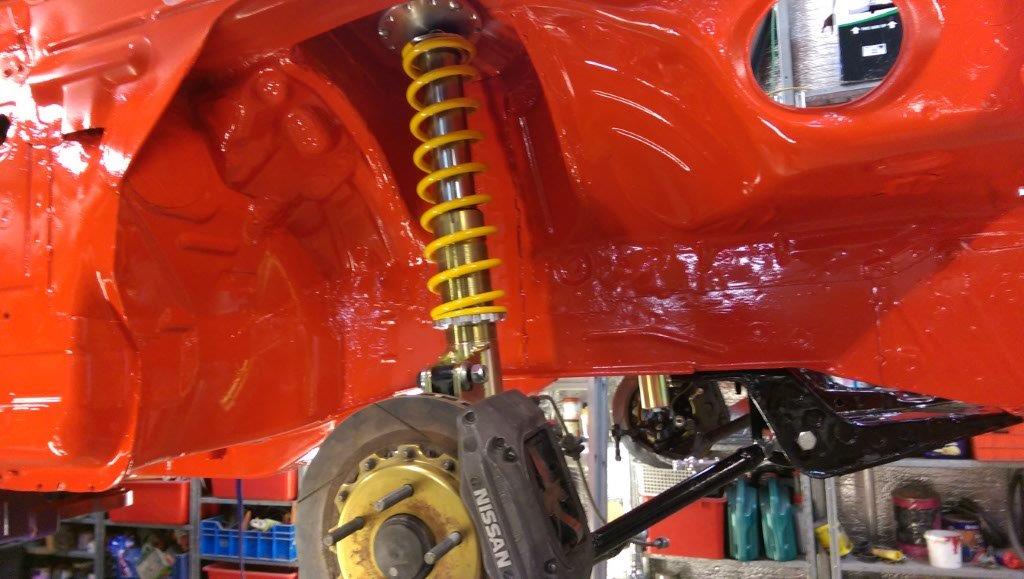
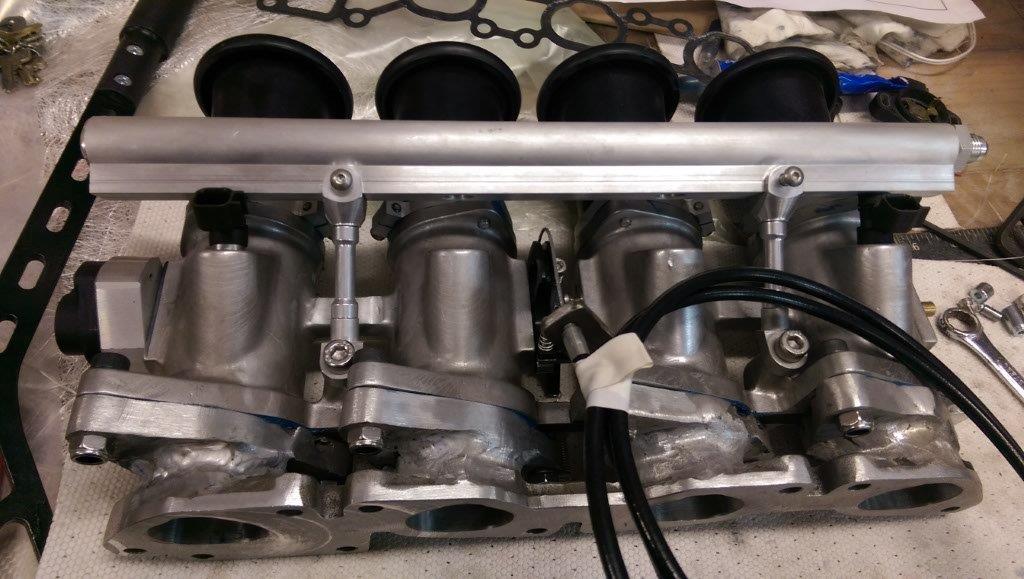
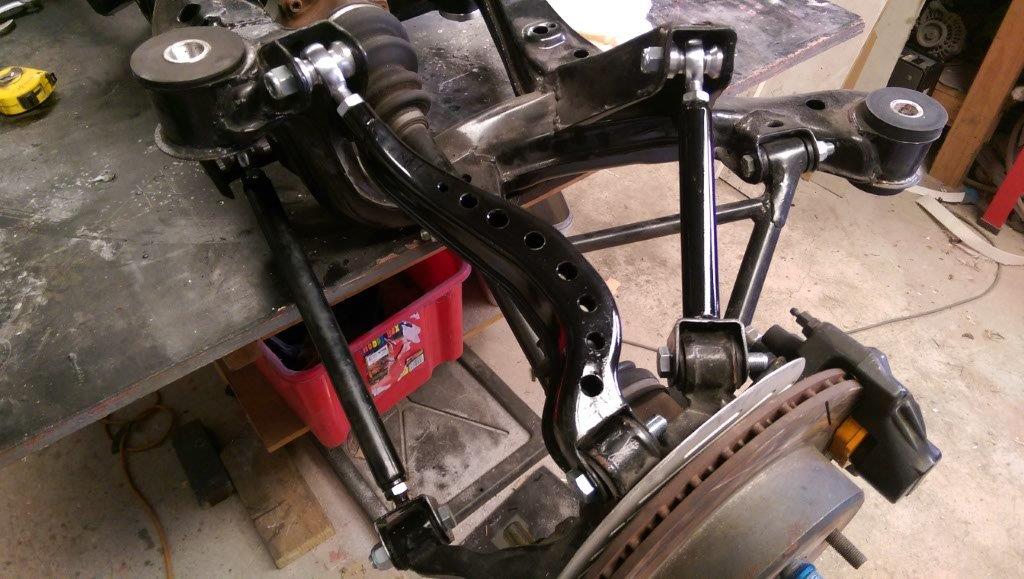
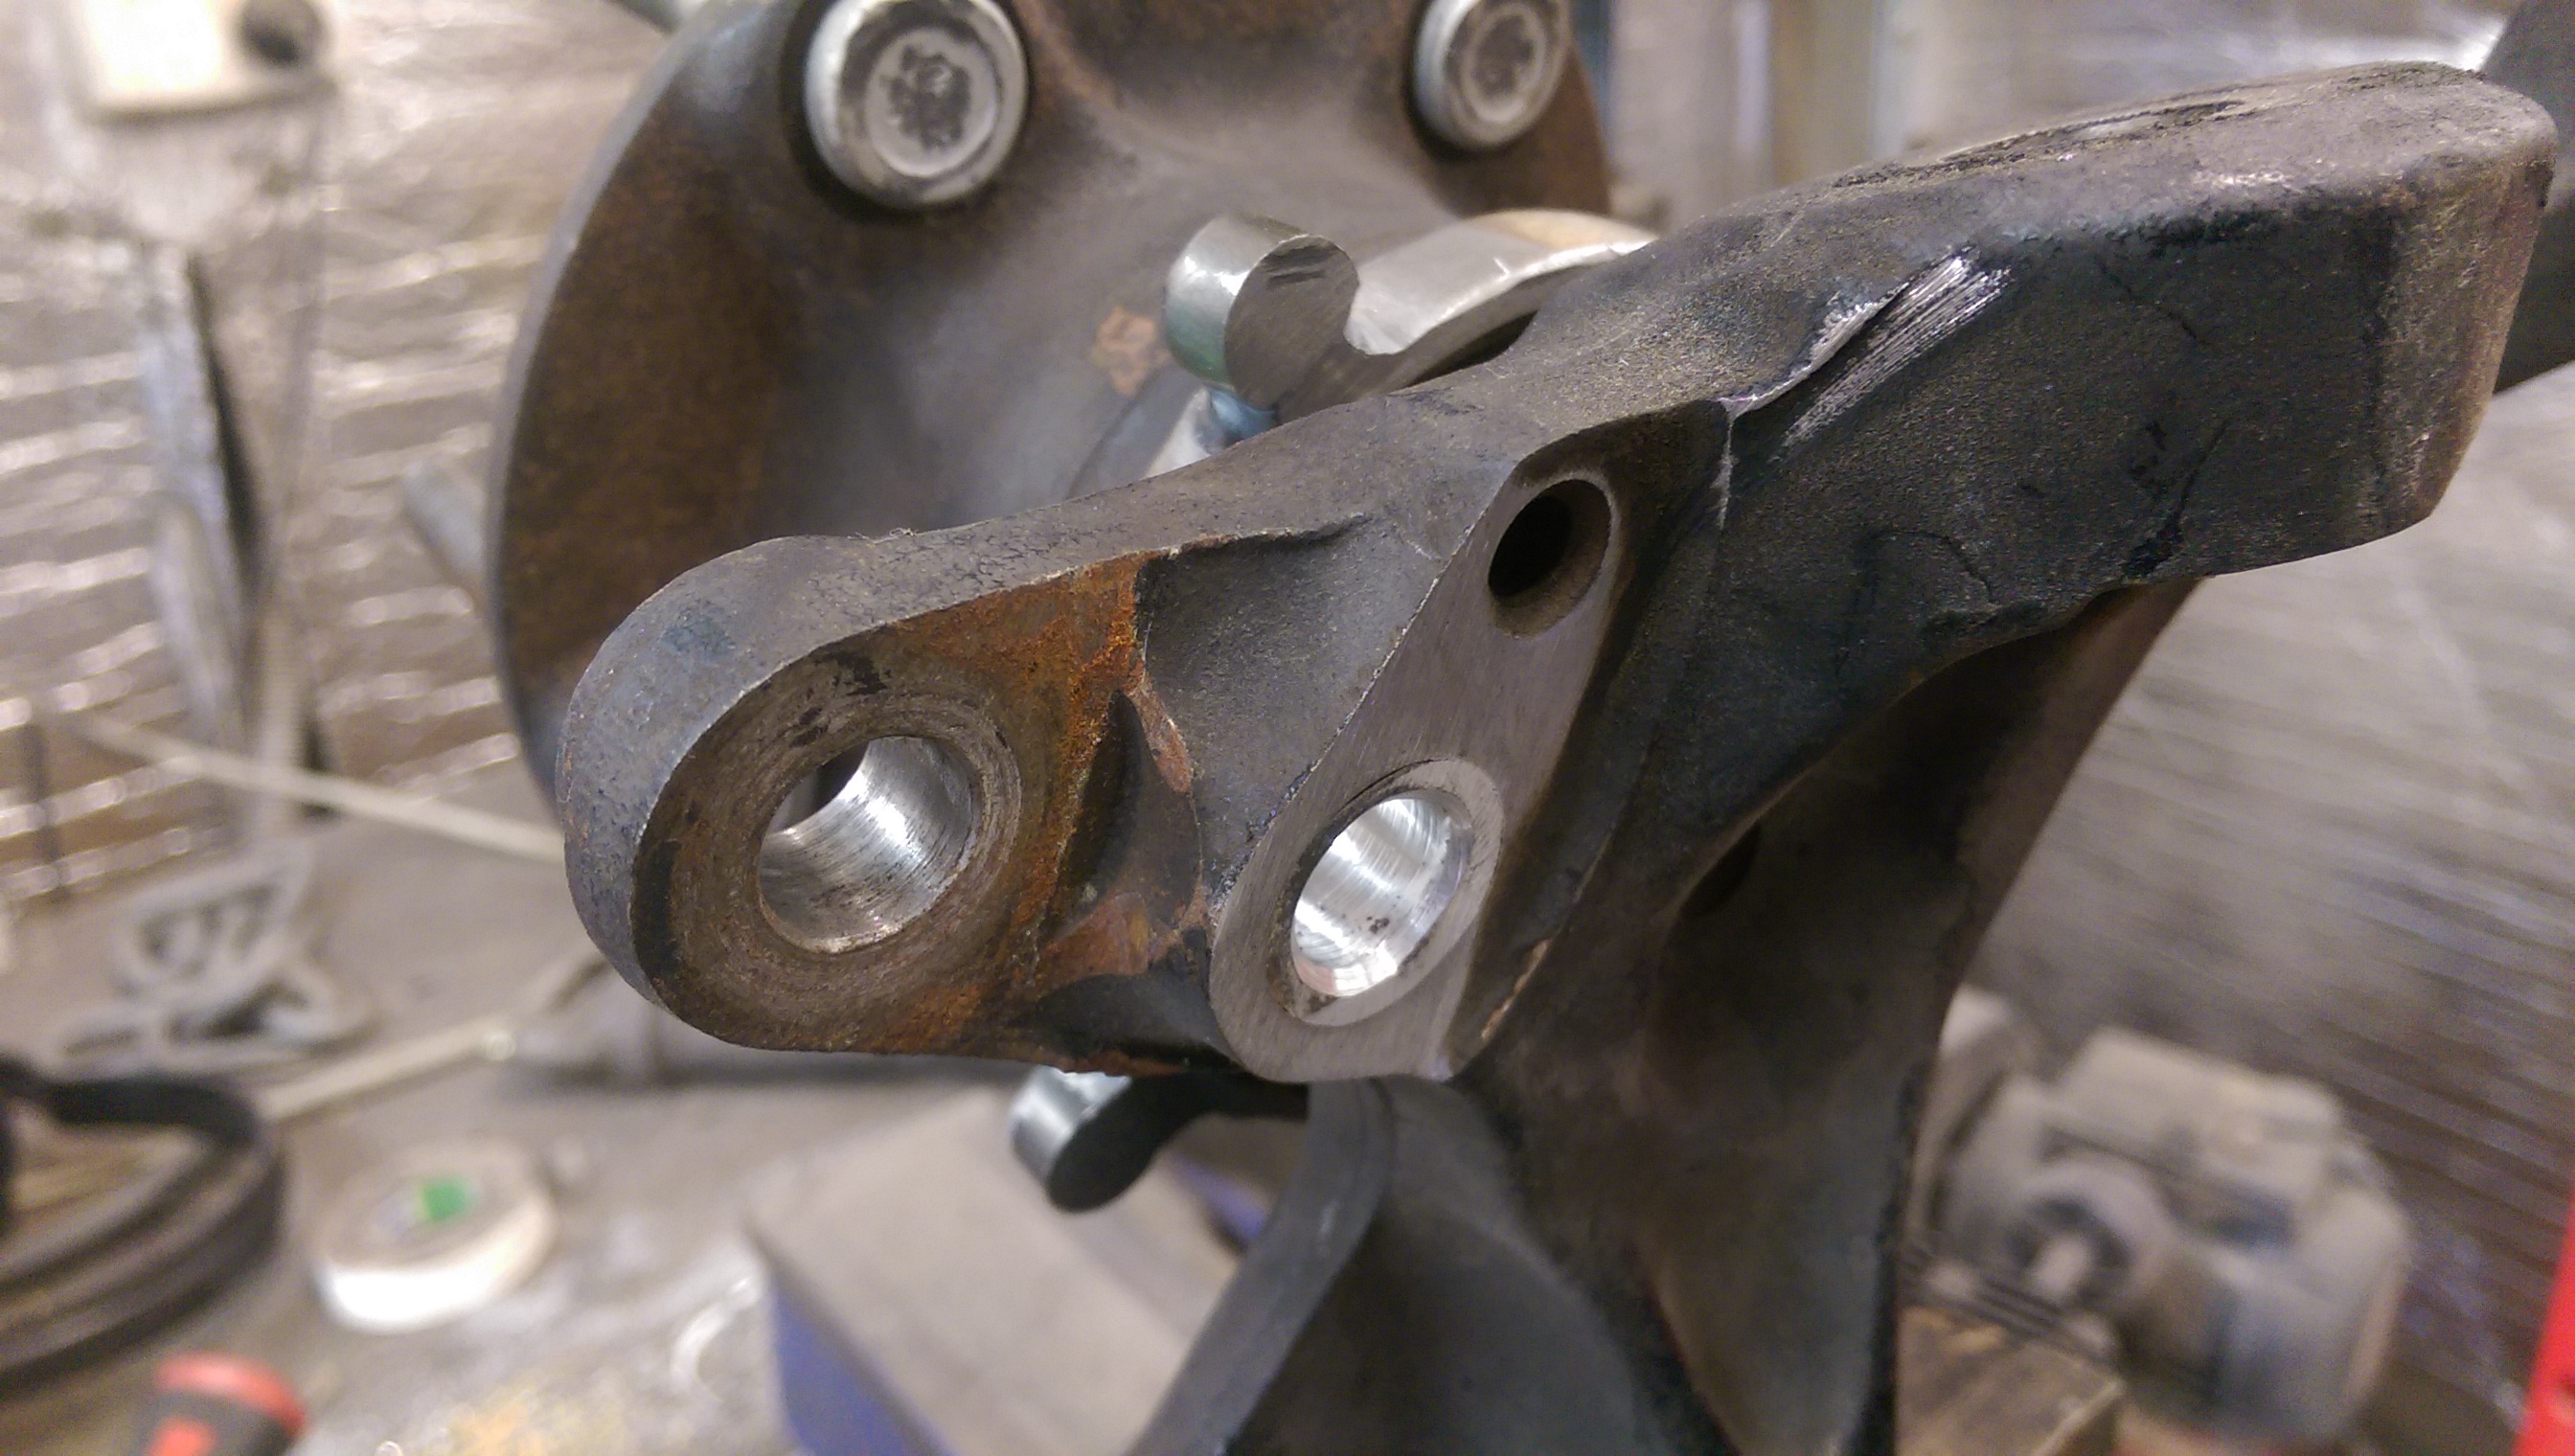
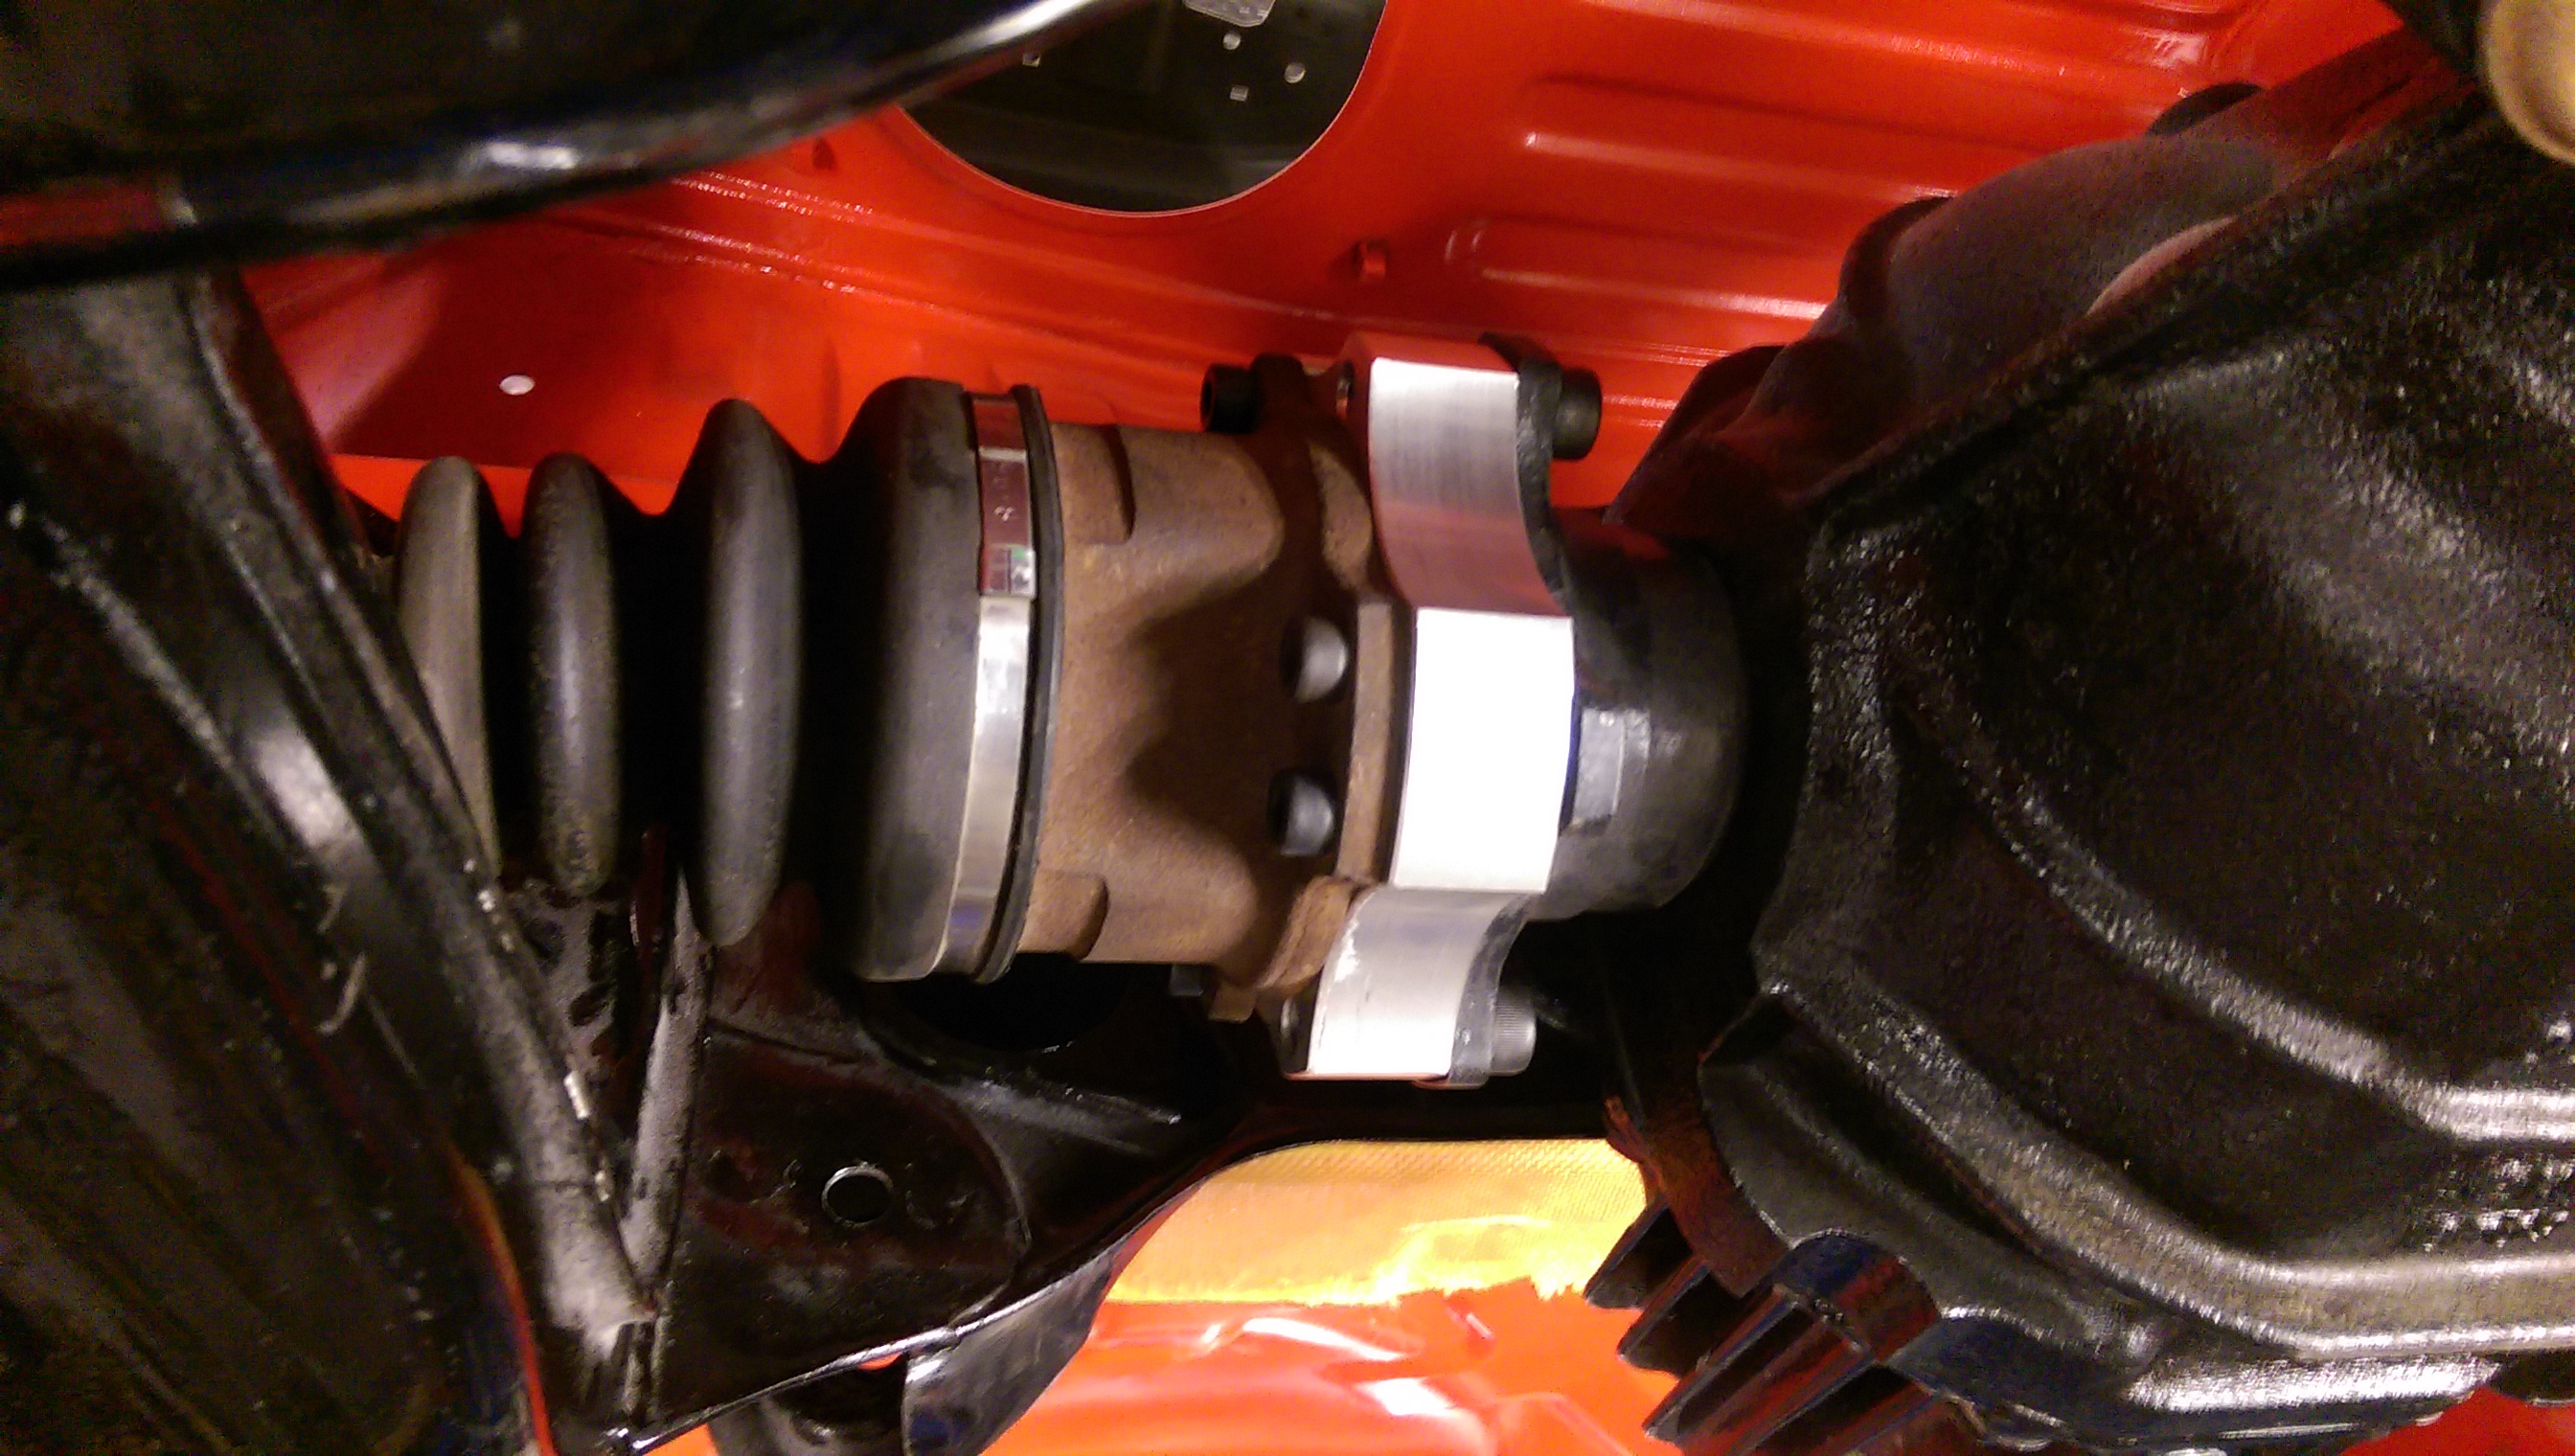
Engine, gearbox and front cross member all in, front suspension all attached.

IMAG0710

New top and bottom radiator mounts made, rad repainted and fan fitted.IMAG0716


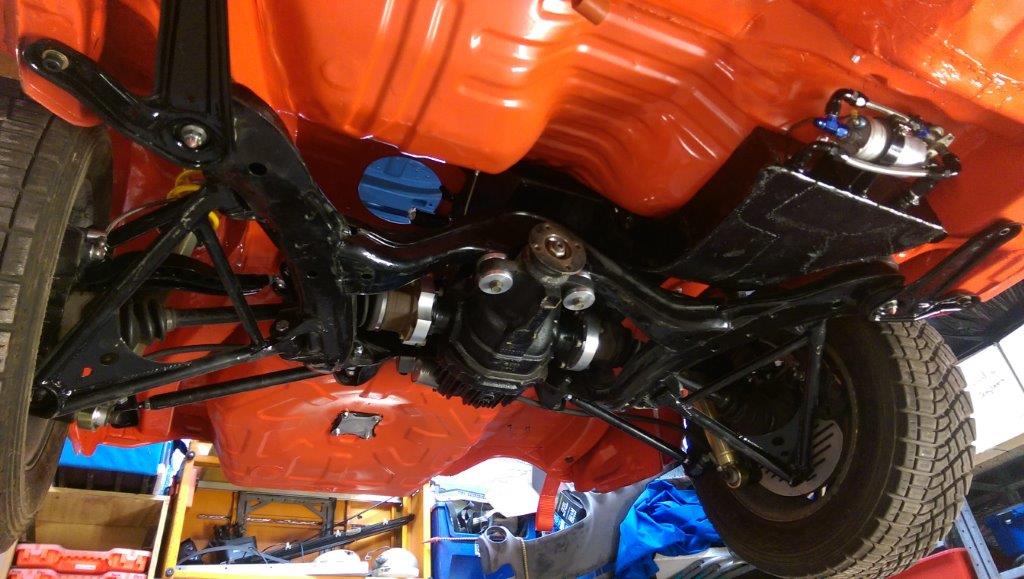
Tailshaft and exhaust painted and mounted.

IMAG0717 IMAG0718

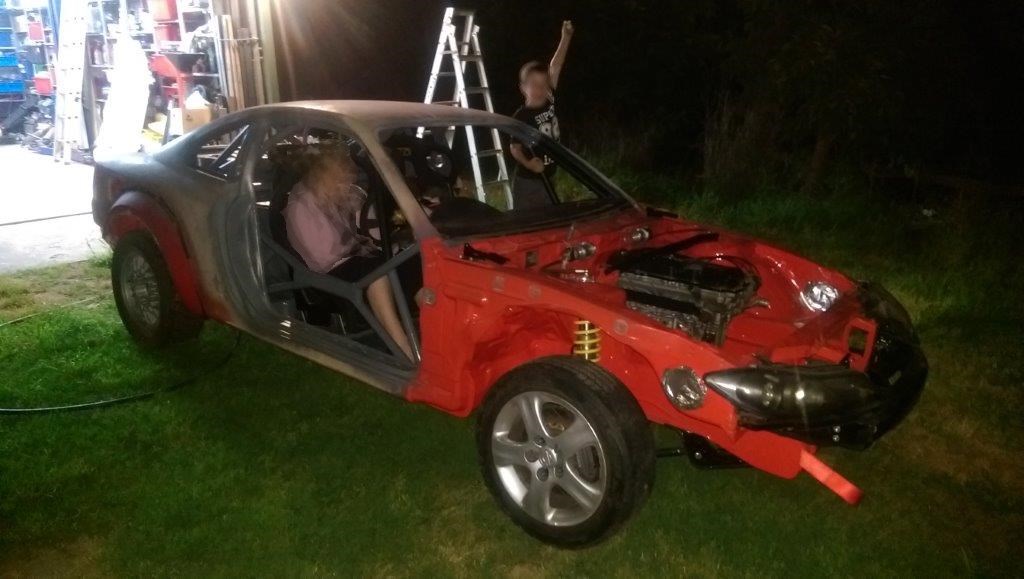
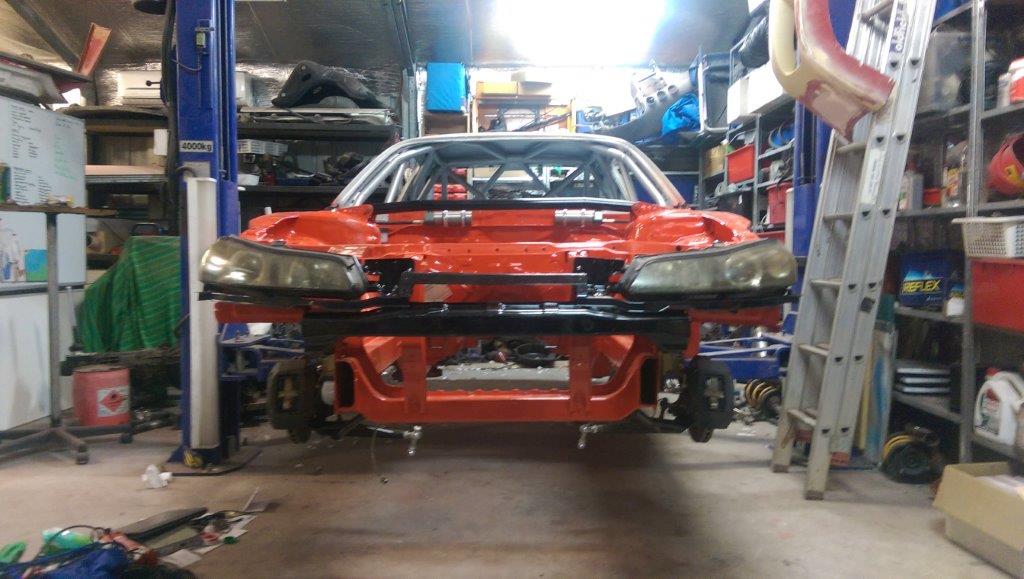
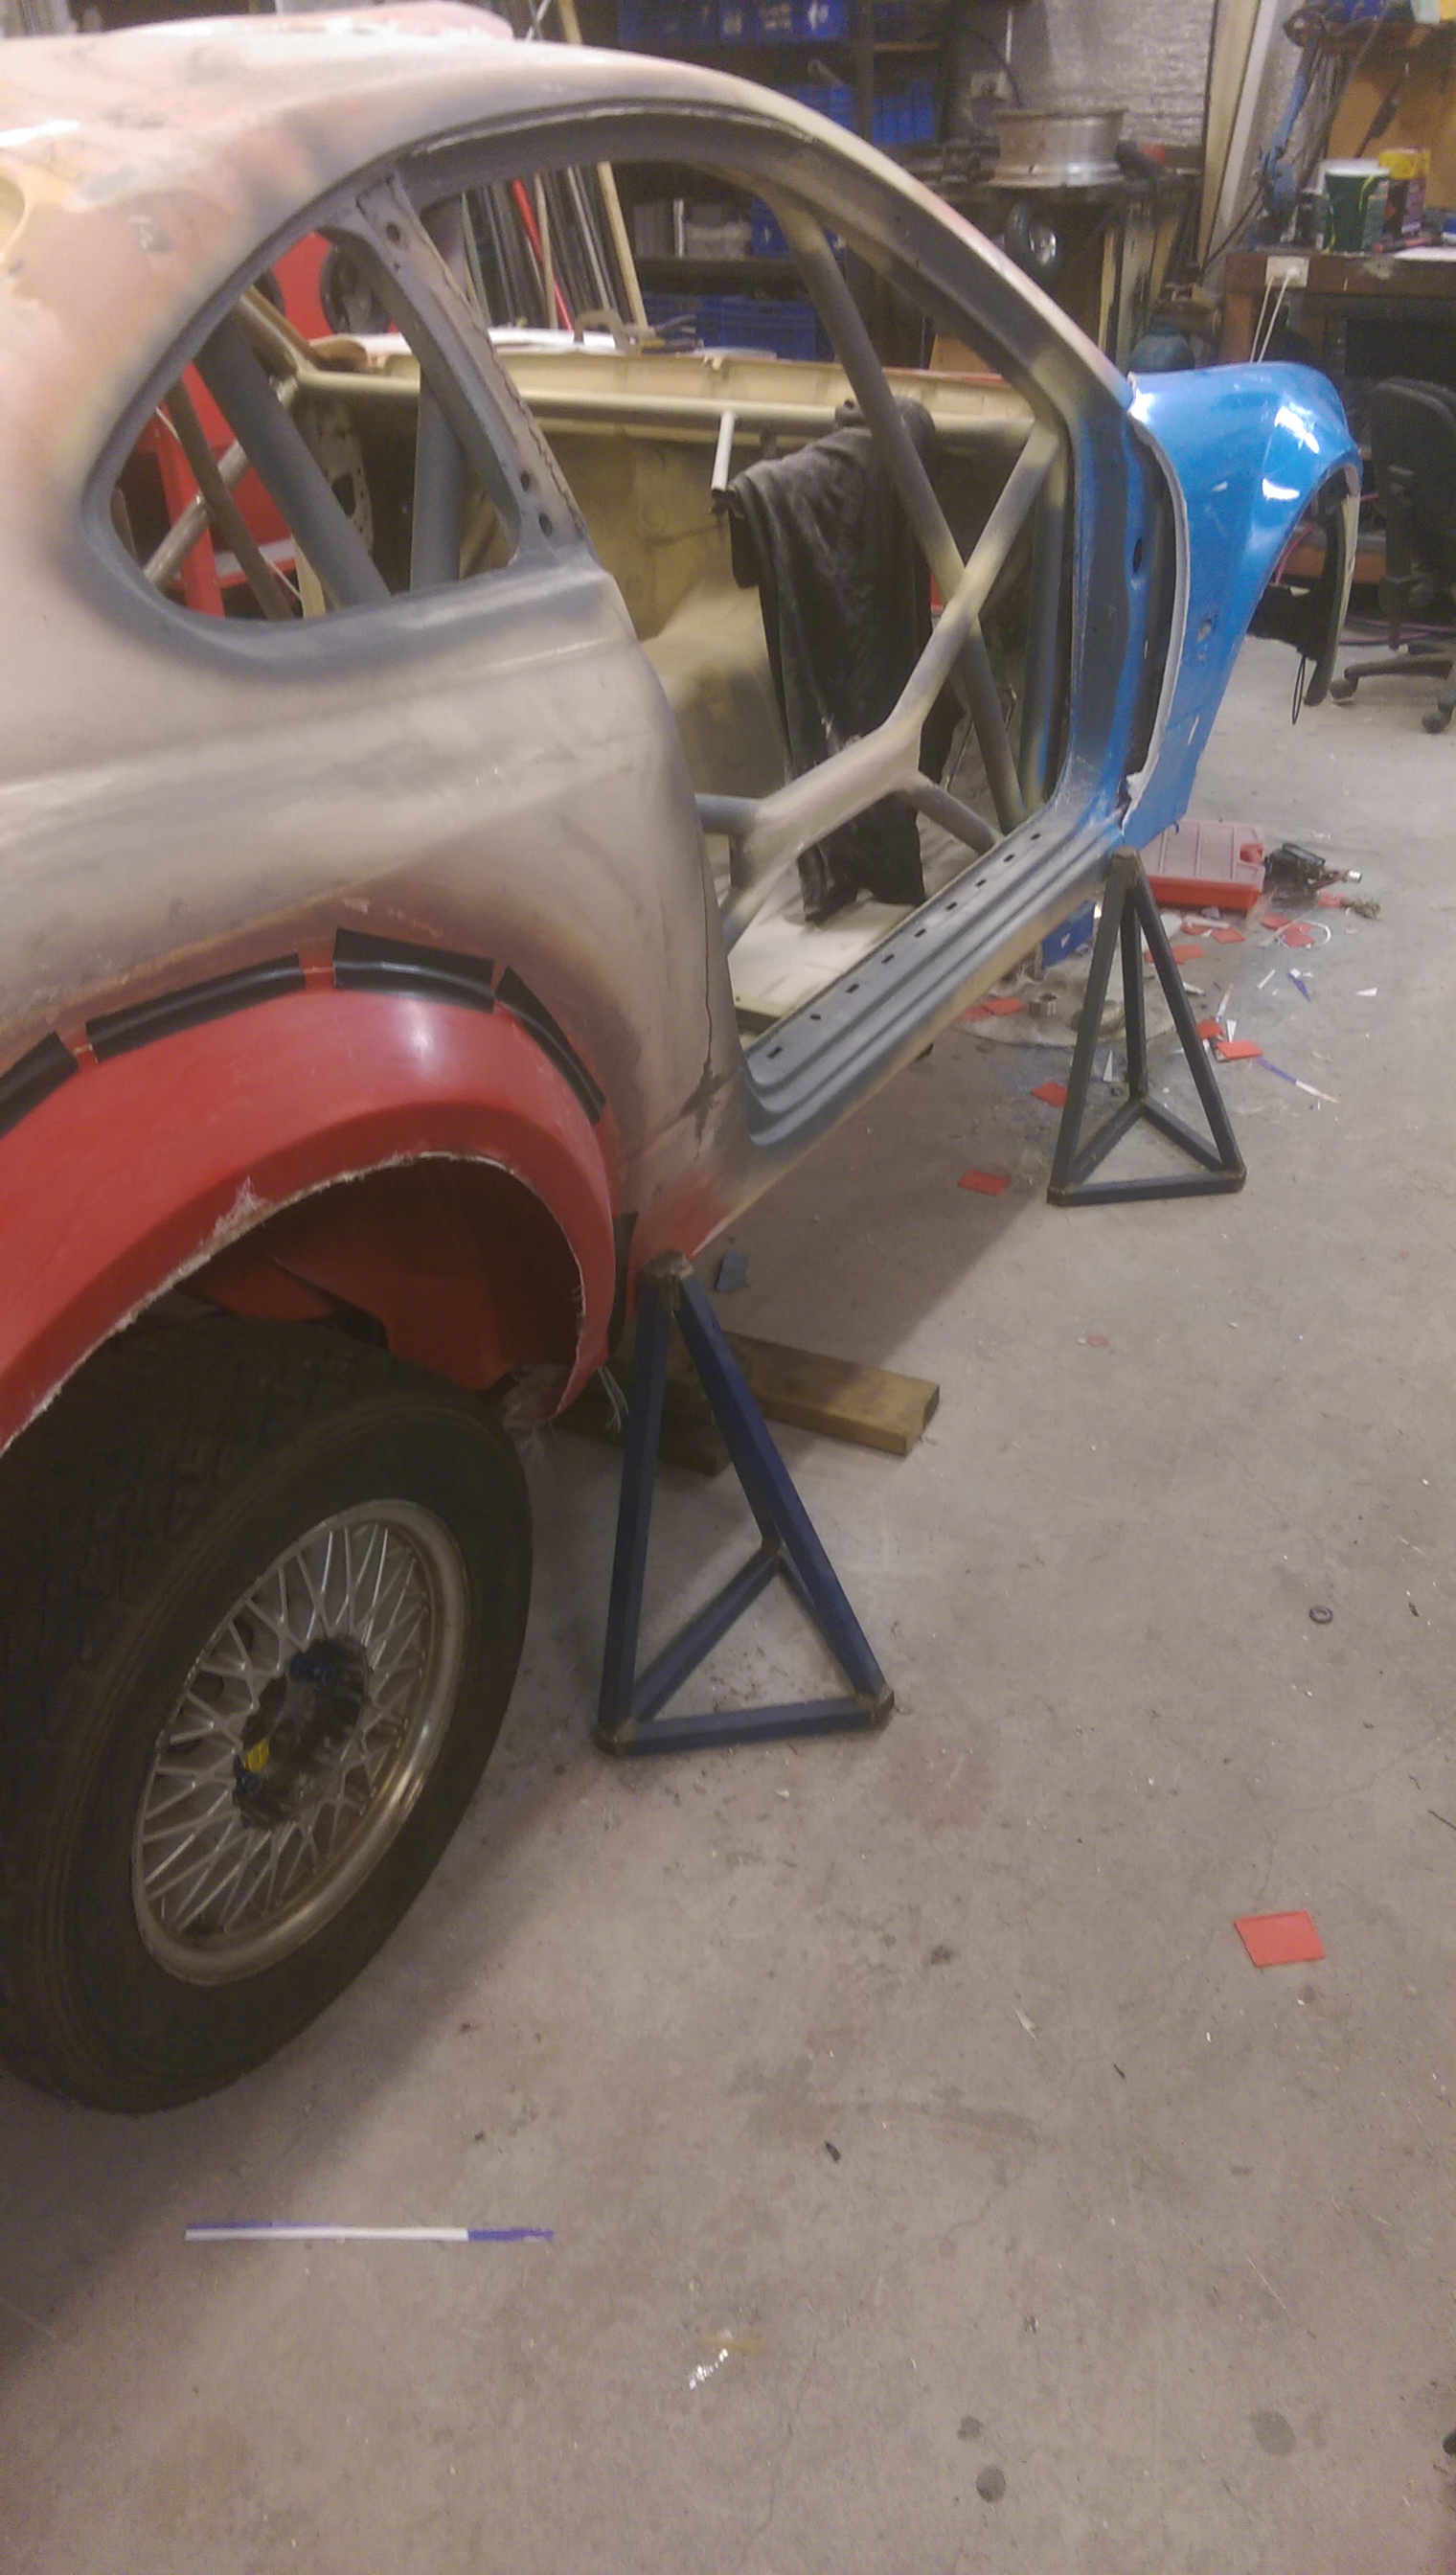
And on its own feet for the first time since the stock, crashed shell was pushed into the shed 2 years ago!IMAG0714


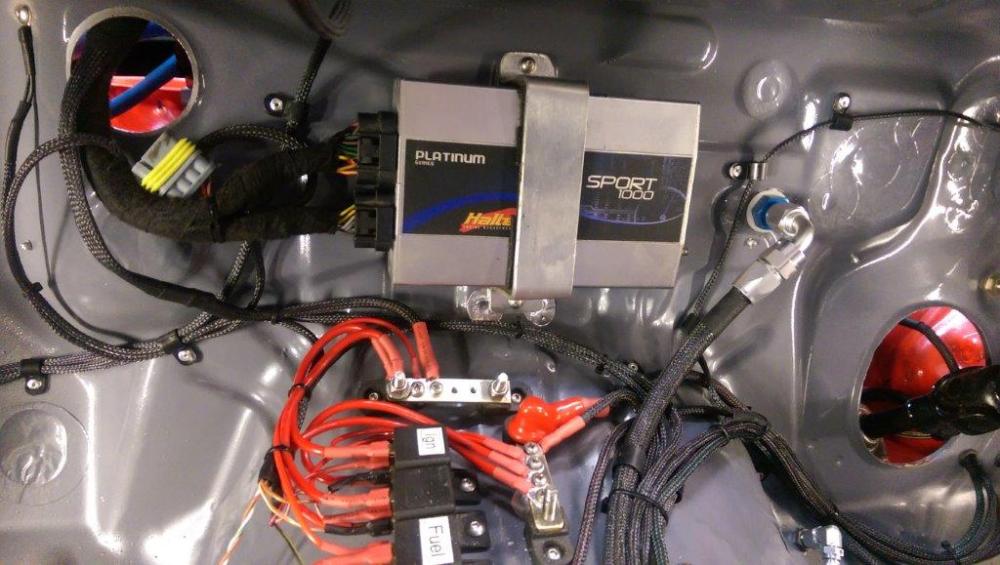
Now all I have to do is paint it, make the wiring loom, fit all of the other interior bits like dash, ECU, map light, trip computer, intercom, medical kit, triangles, cage padding, battery mount, foot rests for both sides, sump gaurd, get the engine tuned get it CAMS log booked, road licensed, etc, etc etc…..  I’ve got a month, so……….  :/

145

Yeap, a total of 145hp at the tyres.  Considering its a totally stock 2L motor with some bolt ons that’s a healthy figure.  Sure, its a long way short of the 200+ that I want once I build a motor, but a great start for now 🙂

Massive thanks to Shannon at TuneCorp for getting me the last few sensors that I needed, and for the awesome work tuning the car.

Feeling good, large chunks of progress

While the paint inside the car is dry, I want to leave it to hard a bit more before I do too much inside, so it was time to do some work underneath.

Got the fuel tank in, and fuel pump mounted.

IMAG0674

Got the rear subframe all in, shocks mounted, tyres on, fuel pump and regulator plumbing done!

IMAG0683

Plumbed the line from the subframe to the car.

IMAG0680

Mounted the jack, wheel brace and spare tyre mount.

IMAG0676

Got droop?

As it turns out, I could have gotten another 30mm of droop out of it before the driveshaft hits the subframe 😦  Oh well, we will see how it handles, and if I feel that I need it, I’ll get a quote on getting some more out of it when they are over east being serviced in the future.  I already have a lot more travel than the ‘standard’ S15 MCA setup, maybe I’m just being greedy now….

IMAG0675

Starting to work on the lines from the fluid reservoirs to the masters.  Will mount the pedals in this weekend! (they are just sitting there right now)

IMAG0679

Pedal box re-assembled

The repainted pedal box is all dry, so I put new bearings in all of the pedals, and reassembled it all.

IMAG0661 IMAG0660

As soon as the paint inside the car is completely dry then I can do the brake lines from the pedal box to the rest of the car.

Got some more of the front end parts painted black and assembled on the car.

IMAG0659 IMAG0657

First parts bolted BACK ON!


Its been so long removing things, and pulling everything apart, for the first time something is being bolted back on for the final time!

IMAG0614 IMAG0616 IMAG0620 IMAG0621


Gave the wing a covering with undercoat, now to sand it all off again to make it all smooth…..

IMAG0632


Made up a little mount for the external canisters for the suspension, and started mounting the brake fluid reservoirs.

IMAG0647

Electricity and paint

Started work on the alternator mount.  Just need to get a belt this week then I can keep going on this.

IMAG0567


Throttle cable arrived, so I setup the throttle bodies on the manifold, cable holder etc.

IMAG0571


Then did the second and final coat on the underbody!  The flash in the pics make it look orangy, its more red in real life.

IMAG0610


All of the underneath is now 100% complete!

IMAG0612

Stop and go, all in the same weekend

Started with some things to make it go.

I made an adapter to use the stock S15 TPS (I have two of them, so can’t justify buying one of a different type to suit the throttle bodies.IMAG0562


Then switched to making it stop.

Got all of the brake lines setup on the rear end.

IMAG0560


All of the lines are secured to the subframe

IMAG0559

Machined up a little holder for the end of the banjo, to hold it place.

IMAG0558


Then went back to work on making it go, wrapping the headers.

IMAG0566

Machining day

Before:  Stock Nissan diff mount on the left, new solid mount on the right.

IMAG0506


After: Stock rubber on the left, new lighter alloy solid mount after some time on the lathe.  🙂

IMAG0502


Got another two of the rims sanded back and painted – couple more to go….

IMAG0507


All of the rear end is now together, all of the alloy spacers either side of the rose joints are now done.  Apart from the couple of nuts missing in this pic, its all ready to bolt in once the shell is painted.

IMAG0508

Making good progress, even though its slow progress…

More bits and peices


The sump guard is in progress, all of the mounts have been attached to the body shell.

IMAG0480


The final suspension re-enforcement plates have been finished, and are now welded on.

IMAG0477


The strut brace and its mounts are done as well, so getting to the final bits that will be welded to the shell, so getting closer to paint!

IMAG0460


All of the front suspension is complete, ready to bolt in as soon as the chassis paint is complete.

IMAG0482

Lines, brakes, panels, wings – its all happening

First item this week as to pick up my shopping – fuel and brake line parts from Matt at Autopro Canningvale – awesome service and price, thanks guys!

IMAG0417

Got all of the callipers fitted onto the hubs on all 4 corners, with brake pads etc all fitted.

IMAG0423

Had the day off work on Friday, so made a final boot lid, from the moulds that I made previously.  Just need to trim the edges up and its ready to bolt on!  Total weight of 2.5kg, and strong enough to hold the pressure from the rear wing.  If it were not for the need to support the wing, this could have been just under 2kg.  We’re no pros, but we have come a long way with our fibre glassing since our first attempt 3 odd years ago.

IMAG0419IMAG0420

JC paid me another visit on Sat, and we started the rear wing.  More on this as it grows.IMAG0422

Sunday afternoon I went and picked up a bonnet and some head lights, hopefully that’s the last big item that we need to get this thing going.  The photo below is the bonnet, surrounded by a dam, covered in a nice layer of gelcoat, the first step in making a mould of the bonnet (the steel one is nearly 19kg!) so that we can make a fibreglass one, and other fibreglass ones when we hit things and ruin this one 🙂  I’m aiming for a sub 4kg bonnet that is still stiff enough to feel like steel, time will tell if I’m dreaming or not – so the aim is a 15kg weight saving.

IMAG0427

Front arms, intake and exhaust

JC helped me out for the day and sculpted up the buck for the air box.  It’s a bit hard to explain, or to see it from this picture, but as the weeks go on you will see this take its final shape.

IMAG0287

Front lower control arm in progress.  Still need to add the lock stops and the sway bar mount.

IMAG0284

The amount of steering lock looks good, and I didn’t have to resort to steering spacers or anything yet.

IMAG0283

Next thing to tackle was the Exhaust.  It was next on the list so that I finish all of the welding on the shell, so that I can paint the whole thing.  Managed to get the whole thing nice and high, up above the chassis rails for pretty much the whole length.

IMAG0367 IMAG0365

More front suspension arms and more odds and ends

Added the steering lock stops and the sway bar mounts to the front lower control arms.  Then made a mirror image of it for the other side.

Made a press in sleeve to adapt the ABS mounting hole to suit the Monit rally computer wheel probe.

Also took the stock ABS ring and welded some larger rings on it, so that the Monit has something to pick up a signal from.

IMAG0398

Started working on the mounts for the wheel brace and jack.

IMAG0399

Ans the very raw beginnings of an adaptor to mount my TPS sensor to the quad throttle bodies.IMAG0400 IMAG0401

odds and ends

Took the stock engine mounts out and made up the real set.  Much lighter and stronger than the stock ones.IMAG0382

Made a short shifter and extended gear lever.

IMAG0383

And finally started making a mold of the boot lid.  This is the inside of the boot, which while not needed for the rules, I needed in order for the boot seal to be effective and keep the dust out.

IMAG0397

Rear suspension arms, version 2

Started version 2 of the lower control arms, lighter and stronger.

IMAG0238

Since building the other arms, the rims have changed and I have widened the track a bit more, so these needed to be longer.

Have also started on all of the other arms in the rear of the car.  I don’t have a bender for the smaller diameter moly tube, so version 1 of this arm is just a modified stock arm.

IMAG0237IMAG0233

Coming together.

IMAG0236

Also started on the spacer for the drive shafts.  As its a bit wider than stock, it needs longer drive shafts.  Again, version 1 is going to be an adaptor, version 2 will happen when I find some longer shafts that will fit these CV joints.

Started with a square billet of alloy, and then started the process of removing 80% of it….

IMAG0232  IMAG0234  IMAG0259 IMAG0263

And finally, all fitted up.

IMAG0266

Managed to find a front bumper for $10, very happy with that price.  It was snapped in half, but nothing some fibreglass, screws, bits of metal and body filler can’t fix!  This will be the buck, will take a mold of this and then make a nice light front bumper.

IMAG0286

And I still hadn’t finished cleaning up the shed that I started last weekend, so did a bunch more of that too.

This is the first time I’ve seen the top of this bench in years!  Thanks wifey.

IMAG0260

She’s cooked

She is finally off the rotisserie and on her own legs, albeit temporary legsIMAG0195

Also made the rear bumper, just need to wash the PVA release off it and it’s ready to go!

IMAG0209

The rest of the time was moving the car onto the hoist again, and cleaning up the last few weeks mess – the shed was looking like it had been bombed.