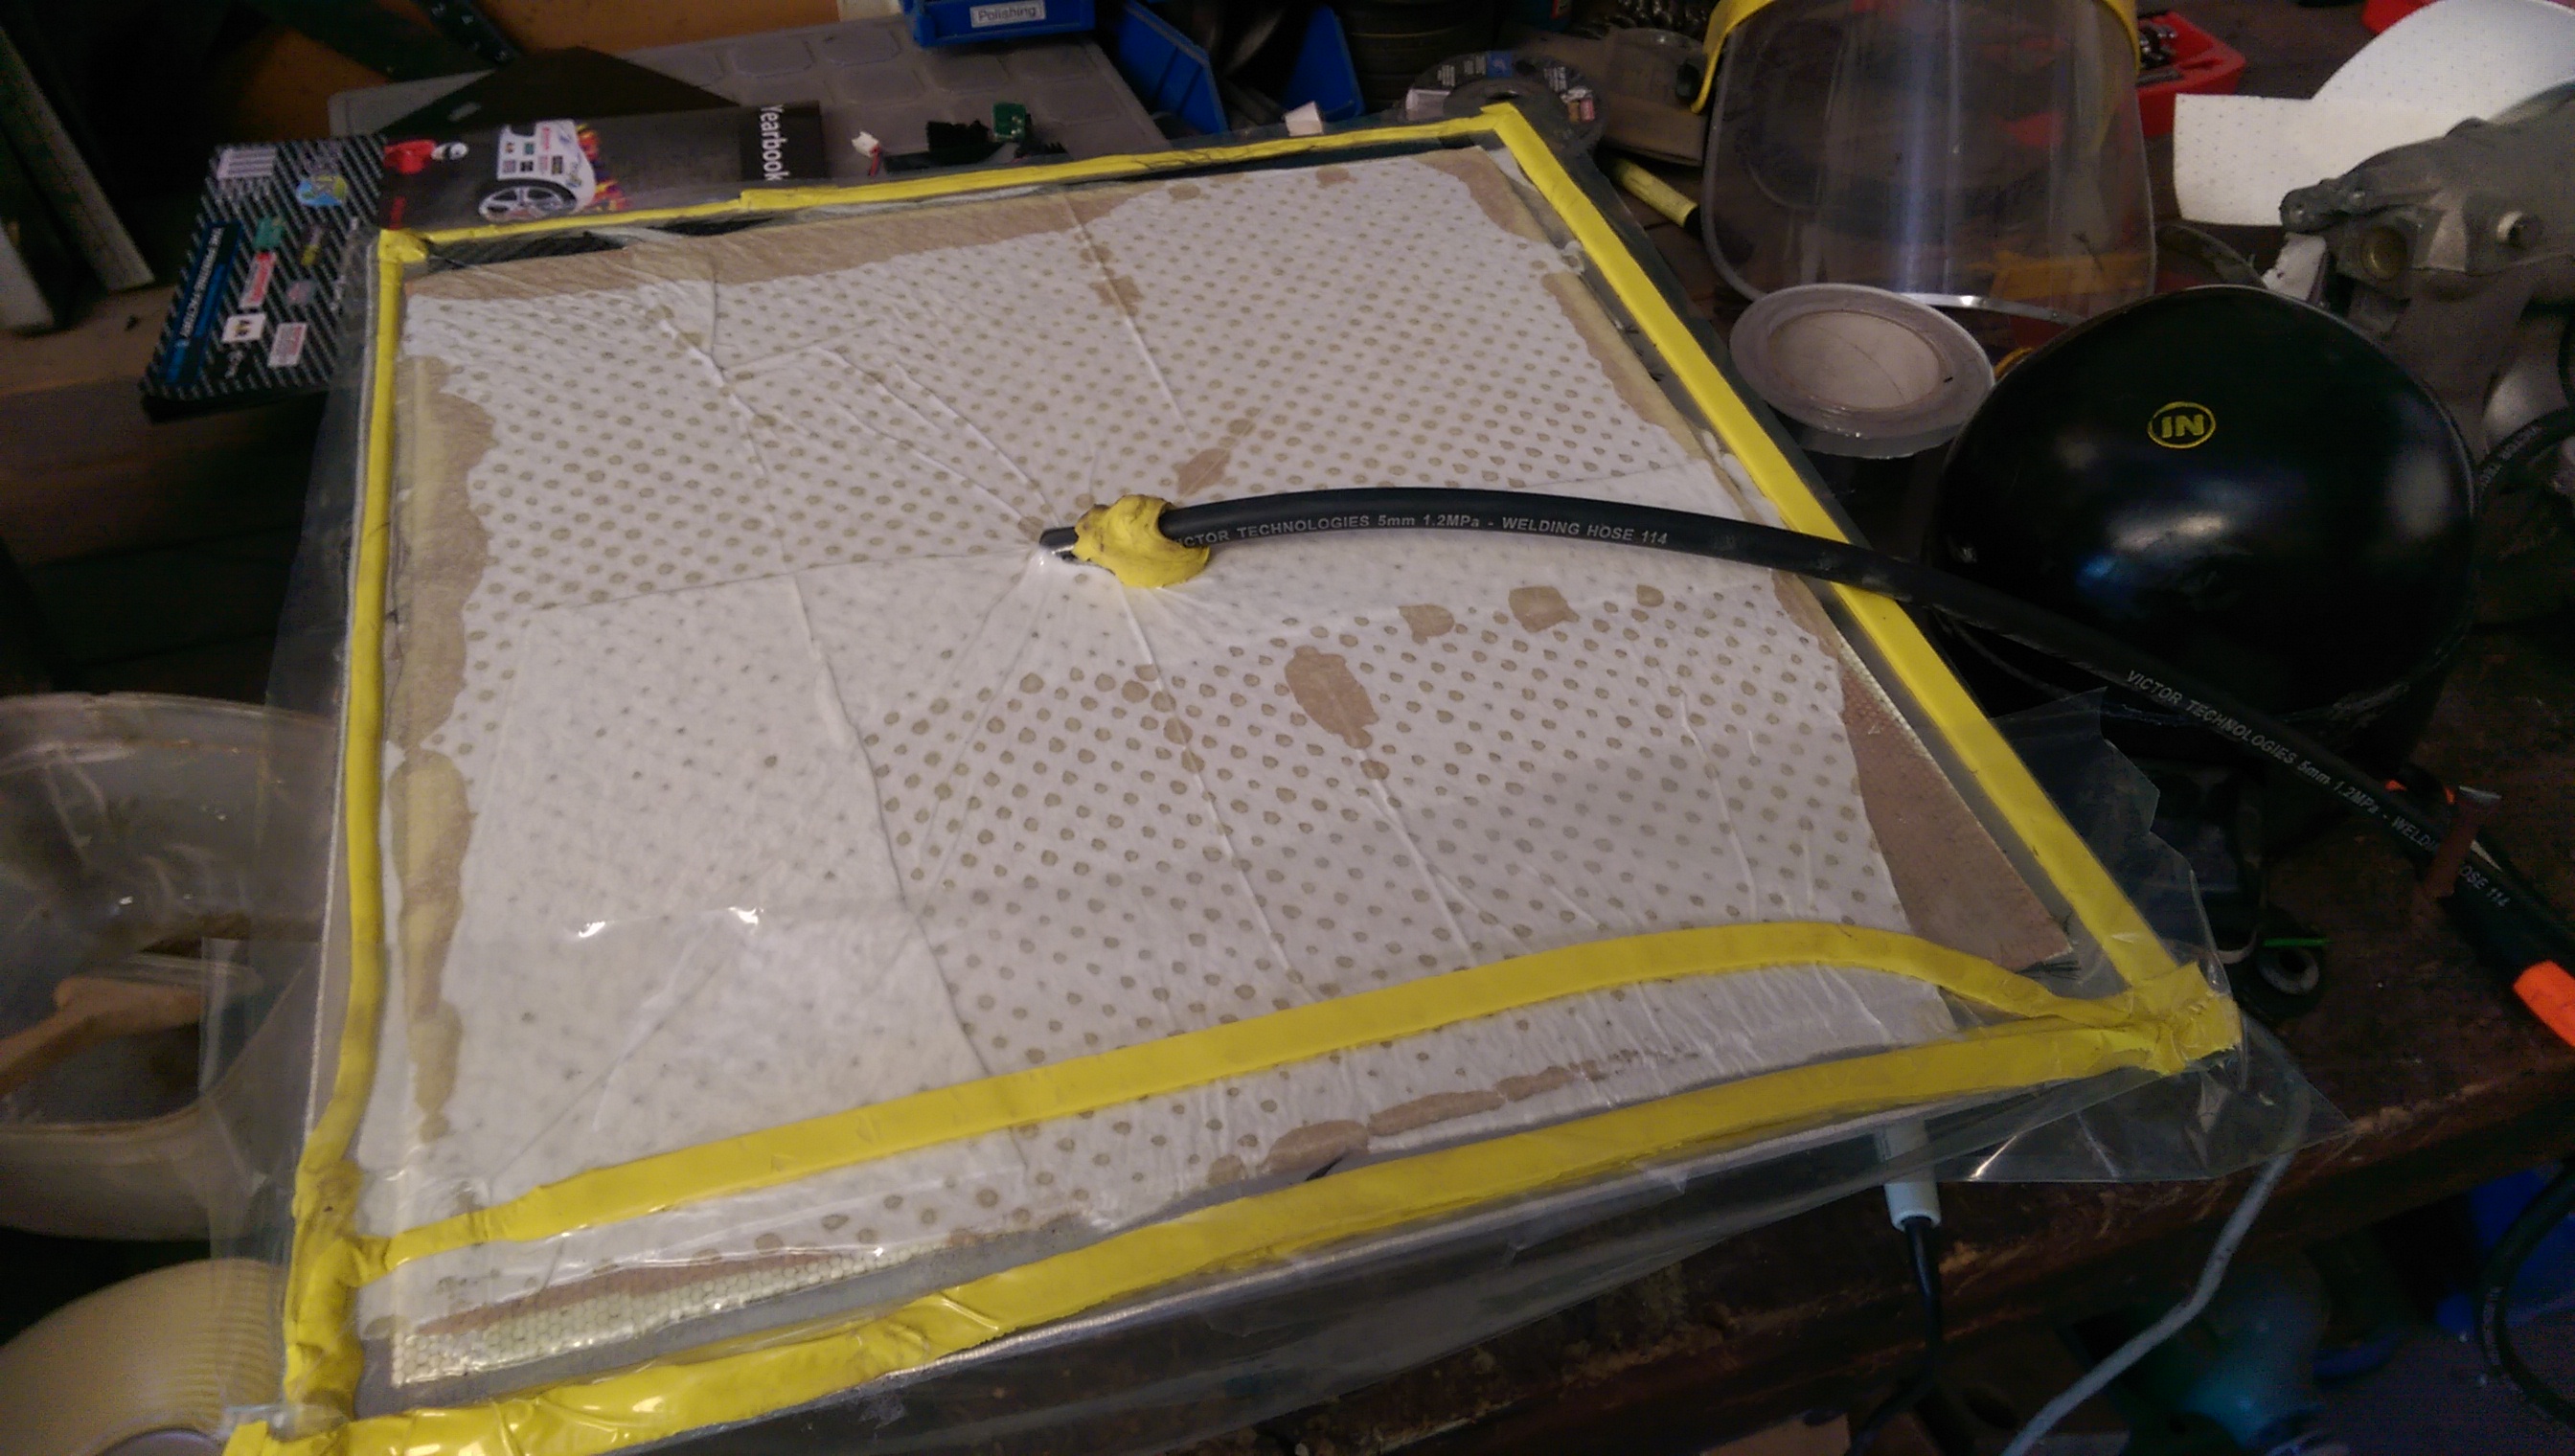
Throttle bodies have arrived

Even though this current motor is just stock internally, the future plans are for a high compression NA engine capable or 9000rpm, so I’ve started collecting nice parts for it.

Throttle bodies were the first items to arrive.

IMAG0180


First job was to make a manifold/adaptor for it.  Used some standard manifolds that were laying around, and turned them into a nice flange to build apon.

IMAG0184


And the finished job 🙂  Its not going to have a lot of grunt, being stock and all, but at least now it will sound good.


IMAG0265  IMAG0264

Extra long weekend

Had friday off work, so the first order of business for the day was to find some 15″ rims.

Ended up with these from a wrecker.  Not the Braid or Speedline that I want, but at $200 for two full sets they are a lot cheaper for now.

IMAG0161

Glued the roof vent on, will then do some final finishing on it with body filler to get it all nice, then take a mould of it to make the real one.

IMAG0164

Got the front guards back on, a whole day of body filler, primer, sanding, repeat – and then a gloss coat of paint to make it all nice for making the mould of it.

IMAG0165 IMAG0163

Painted the rocker cover and got all of that fitted on.

IMAG0167

Machined up the subframe mounts and got all of those installed into the subframe.

IMAG0168

Ended the weekend by getting the stock suspension arms on, so that I can measure out how much longer the new arms need to be.

IMAG0174

More soon.

The sweet smell….

….of resin

Or not so much smell as I found out when trying some vacuum bagging for the first ever time.  A bit disappointing really, that smell was the best part.

Started by making a flat carbon panel, on a piece of glass to figure how to do it (and because I needed a flat bit of carbon for something else that is in the works)

IMAG0142

Learnt a lot from that, so did a couple of other small parts.

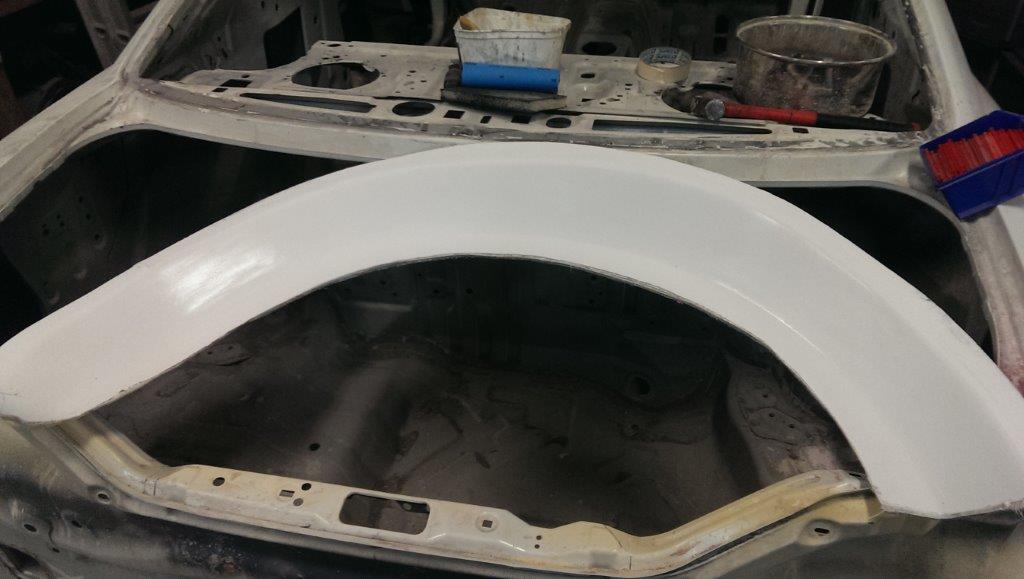
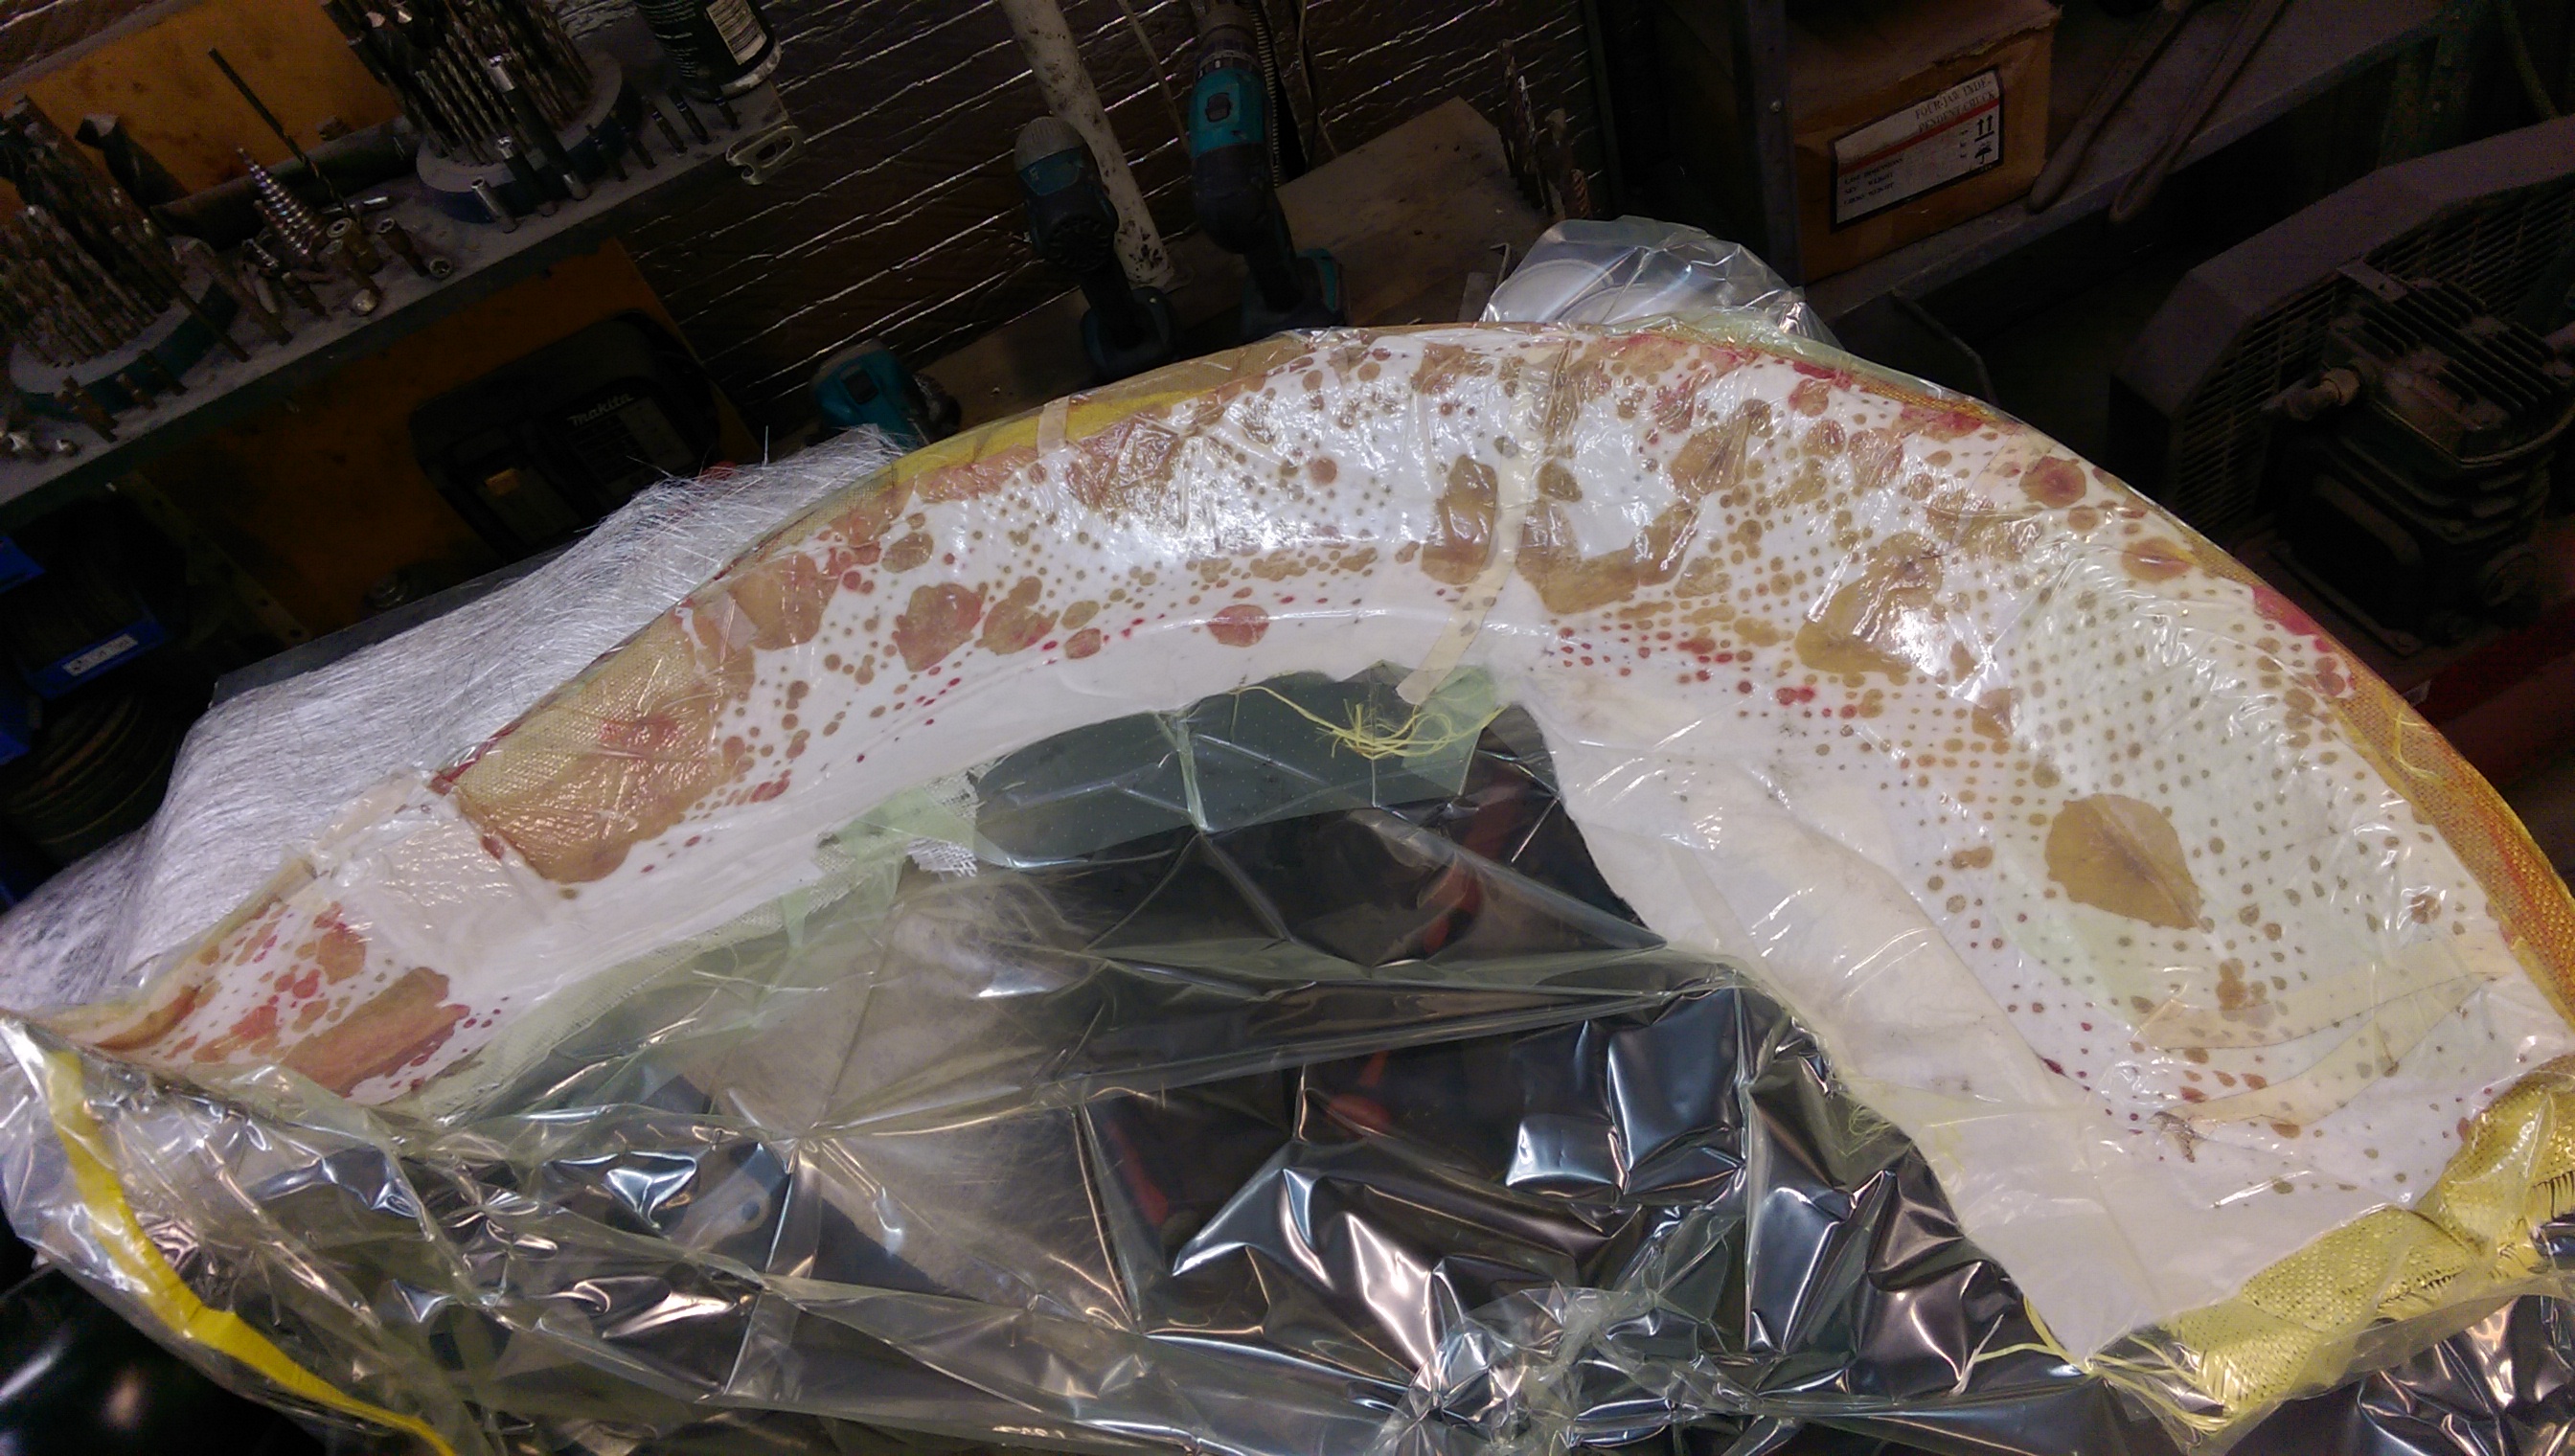
Then started on a bigger piece.  I had done the mould for the right rear wheel arch flare a long time ago – time to lay it up and bag it up

IMAG0147

Turned out nice, not perfect but I’m happy with the first vac bagging attempt of something this size.  Learnt a few more lessons to apply to the next part.

They are straight out of the mould, so they have not been trimmed yet but they weigh in at 320 grams, so considering the layers that are in them, and the strength of them I’m really happy about their weight.  I can easily make them a lot lighter if this was a tarmac car, but they are going to have to cope getting smashed with rocks, so they are a bit tougher and so heavier.

Used some high tech sticky tape to hold them on the car to see what they look like.

IMAG0153IMAG0151

Powerplant progress

Went through all of the old bits that I have from previous S chassis cars that I’ve had, bought a stock NA engine and bolted it all together.  Its ready to drop in, if I ever get the engine bay and the rest of it painted!

IMAG0125

Scored these for free with the motor, stock extractors from the Autech model from what I can find – nice 🙂

IMAG0123

Hopefully next season I can build a good motor for it, but for now this will do while I learn the car, setup the suspension etc.

The inside is still just in under coat, have been continuing on the parts of the car that will be in red (the inside colour is different)

Front chassis rails, first coat.

IMAG0129

Door openings, sides of the front wheel arch area are done, now onto sanding and finishing the engine bay.IMAG0087

I’ve also been experimenting with roof vents.  This one is a copy of the TTE roof scoop from the ST205 Celica, which while being one that I loved, looked awful on this car with its different roof shape.  So, I cut 100 mm off the front of it, and now it suits the car really well.  Job done.  Well not quite, now I need to get it to fit perfect, then take a mold of it, then make the final one, but at least its one step closer.

Inside progress – Rear end painted?

Have been working on the inside, for days – but got sick of holding the angle grinder, so did some painting to make me feel like I’d made at least some progress.

IMAG0127

All nice and glossy already, even after just one light coat.  Need to cover all the holes in the rear that used to have rubber bungs and wiring looms running through them, then add the final coat.

First Paint!

Its just the wheel arches, and its just one side, but they are all sealed up and have the first coat of paint!

IMAG0067

The rear arches needs some foil tape on the couple of holes, then they can get the final coat and will be done!IMAG0066

This was all done only after hours on the angle grinder with wire wheel attached, spraying razor sharp spears of wire at myself, now to repeat on the torture on the other side 😦

More welding…

Most of the seam welding is done now, so its time to do more welding.  As a part of the rules you can cut out 75mm of the wheel arch metal work to fit flares, you just need to fill it back in with metal in a ‘safe’ way, no sharp edges etc.

IMAG0043

So these are all filled back in now, nearly time to clean up all the metal and add some paint!

Sick of welding…

Sick of seam welding, so for ‘fun’ I welded up a wheel brace for the car out of moly tube leftovers.IMAG2137

I know, I have issues 🙂

Added some paint to the upper parts of the cage, and the roof skin, then welded that back onto the car.  The rest will be done when the rest of the inside gets painted.  Did these bits while the roof was off, because it the cage is so tight to the roof that its the only way I’ll be able to get paint on the tops of these tubes.

IMAG2049

The jig is up

The cage has been fully welded in, and the car was taken off the chassis jig and spent a few hours on its new stands.

The chassis jig was then cut up, and re-assembled into the shape of a rotisserie for the next phase of work!

IMAG2075[1]

The next jobs are all the fun ones, stripping off all of the rubberised under body protection, and seam welding around all of the chassis rails

Bending, Bending, Bending… then grinding and welding and then more bending…

Spent a bunch of time making sure that the pillar bars are in the right location to be perfectly in-line with the standard A-pillars when I’m seated in the car, meaning that the cage causes no extra obstruction to vision when compared to the stock car with no cage.

IMAG2012[1]


IMAG2017

Mocking up of the seat, dash etc inside the car.

IMAG2019

And the beginnings of the seat mounts.

IMAG1988

More next week, after I get another length of tube to finish the side intrusion bars and the front strut tower bars.

Cage Progress

I started with the main hoop, getting that bent and fitted in place.

IMAG1954

Then the cross in the main hoop starts to take shape.

IMAG1955

Seat belt mounting bars in

IMAG1956

All of the rear bars tacked into place.

IMAG1960

As I’m still waiting for the bending die for the 40mm tube to arrive I can’t do any of the A Pillar bars etc, so have just mocked up a few designs for the top part of the side intrusion bars and Carlos bar. The side bars will consist of two complete bars, forming an X in the door way, with a slight flat section in the centre (where the white sticky tape is)

IMAG1961

Mini Update

A lot of work, but not much progress over the last few weeks.   Machined up a couple of new strut towers for my mates Sports Sedan.

IMAG1933[1]


And spent a day helping make the mold for the front of the car.

IMAG1936[1]


Plus a day making the new front.

20140810_194258


Add to that making an engine and transmission cover for a bus, there has not been much to do on the D15


Did manage to get my other three jack stands finished on Sunday night though.

. IMAG1944[1]


And the bending die has been ordered, so that I can bend the cage tube, and the tube will arrive this week – so can hopefully start the cage on the weekend.

The sweet smell of resin


Got some of the fibre glassing jobs done.


Starting with a layer of gel coat on the flares

IMAG1900


Layers of glass over the top

IMAG1903


Allow a few days to harden, and the flare mold is complete.

IMAG1906


Same for the bumper.  A final sand to smooth it down, then polish with mould release wax, layers of PVA release agent

IMAG1899


Then a liberal application of gel coat.

IMAG1907


Then layers and layers of glass

IMAG1908


Again, after a few days of drying time we have a mould!  Just need to get the plasticine cleaned off from the around the number plate area and she’s done!

IMAG1910