
A short night last night, but the under dash bar and bars connecting to the front struts are done.
More today hopefully.
A short night last night, but the under dash bar and bars connecting to the front struts are done.
More today hopefully.
First job was to remove the under dash bar, to allow the motor to come back further.
Then got the engine and gearbox all disconnected, and have moved it back and lifter it up to where I think I want it to be.
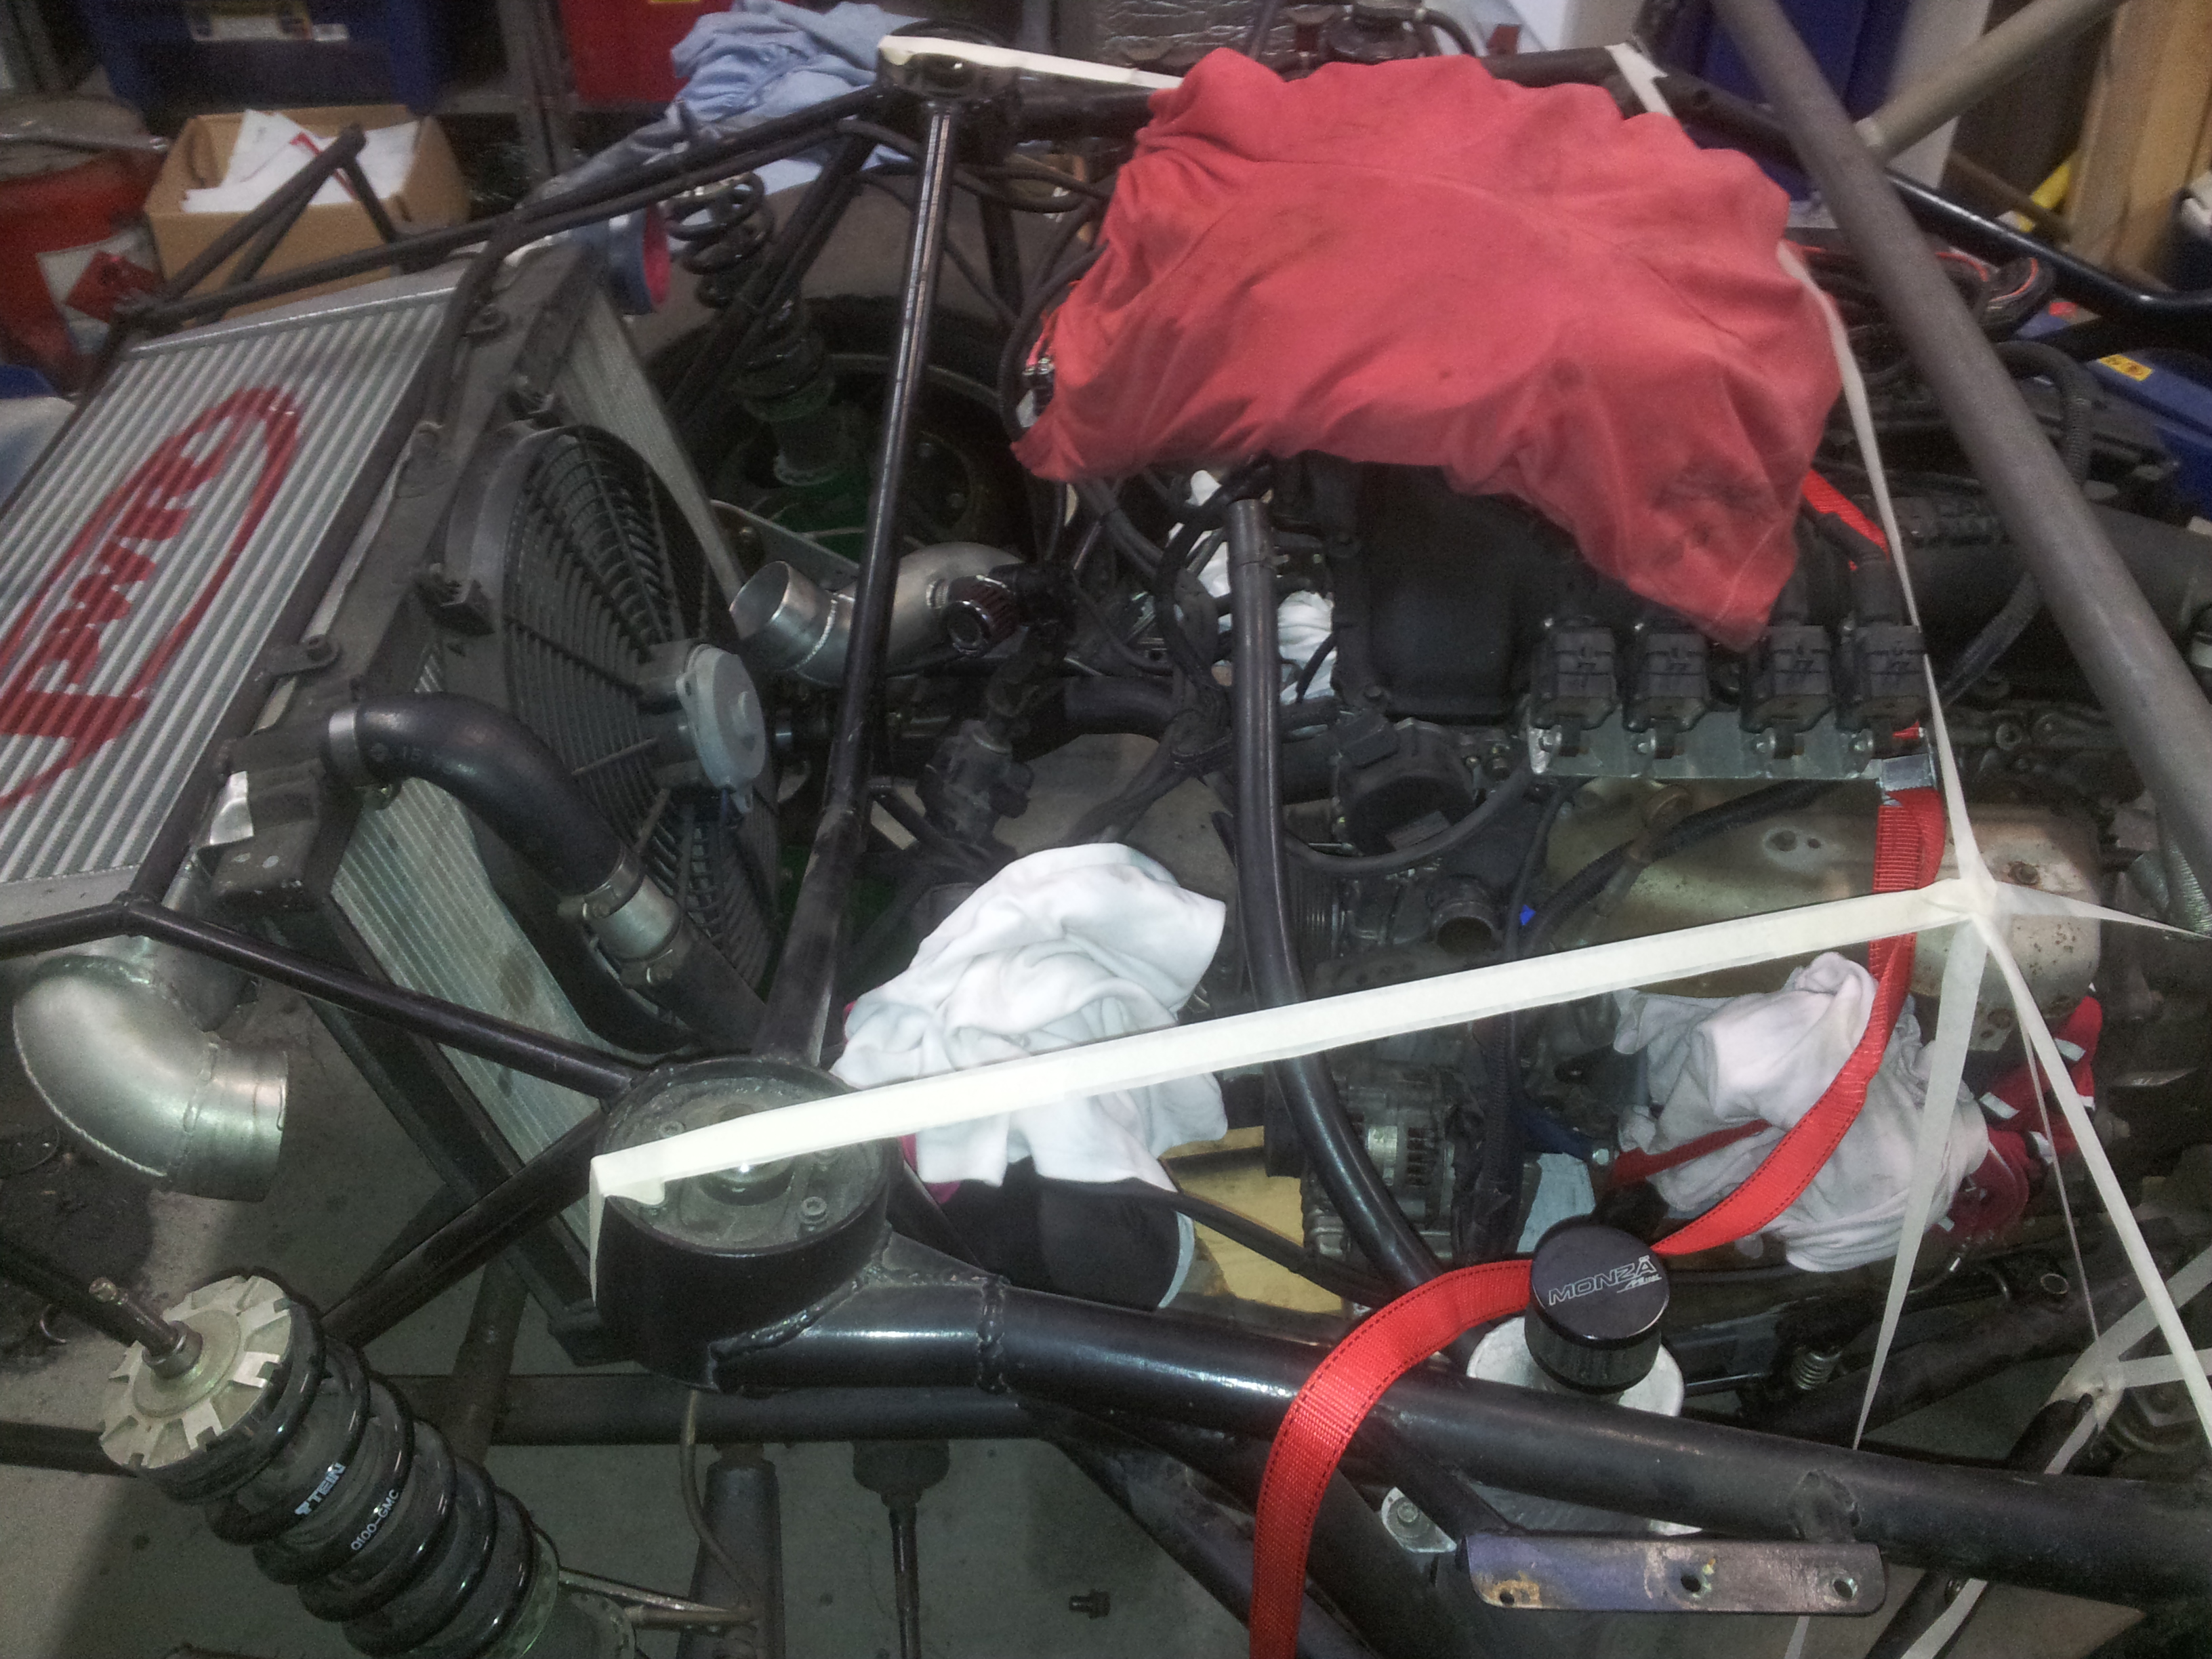
As it sits here, the motor has now been moved back over 650mm from the stock location, with this shift moving it back 250mm from where it was last year.
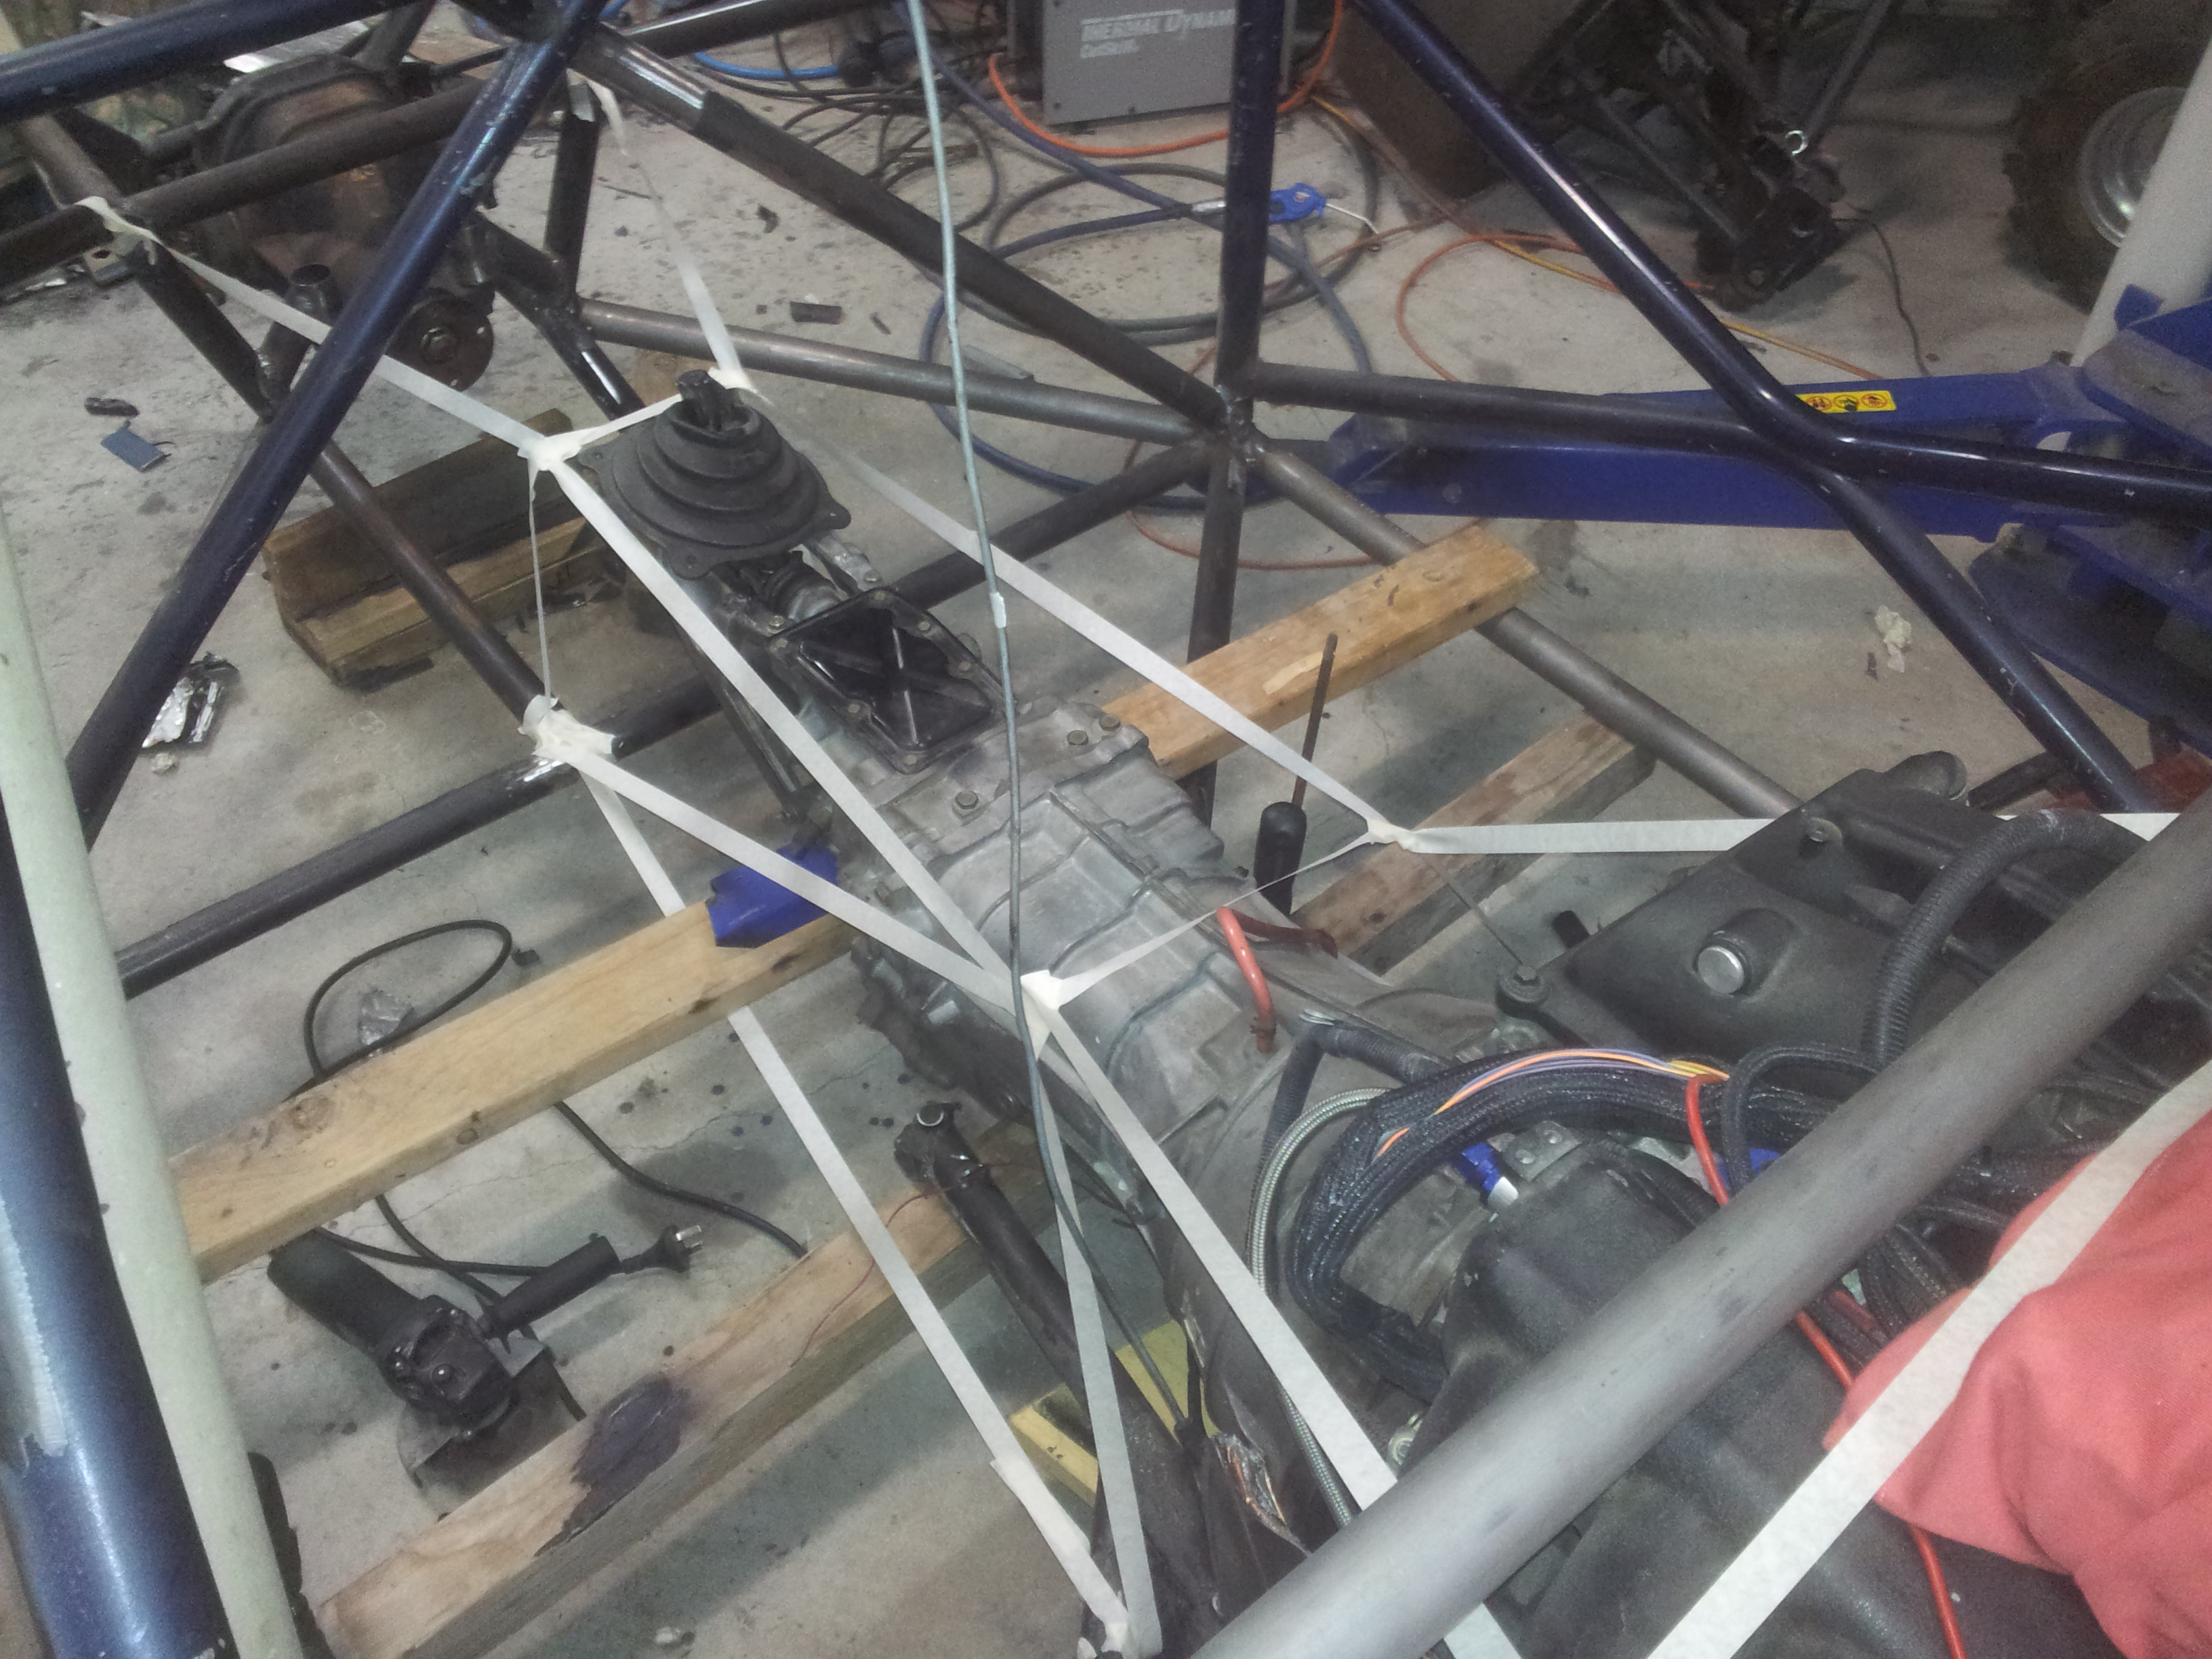
Then it was onto designing the framework for the new trans tunnel.
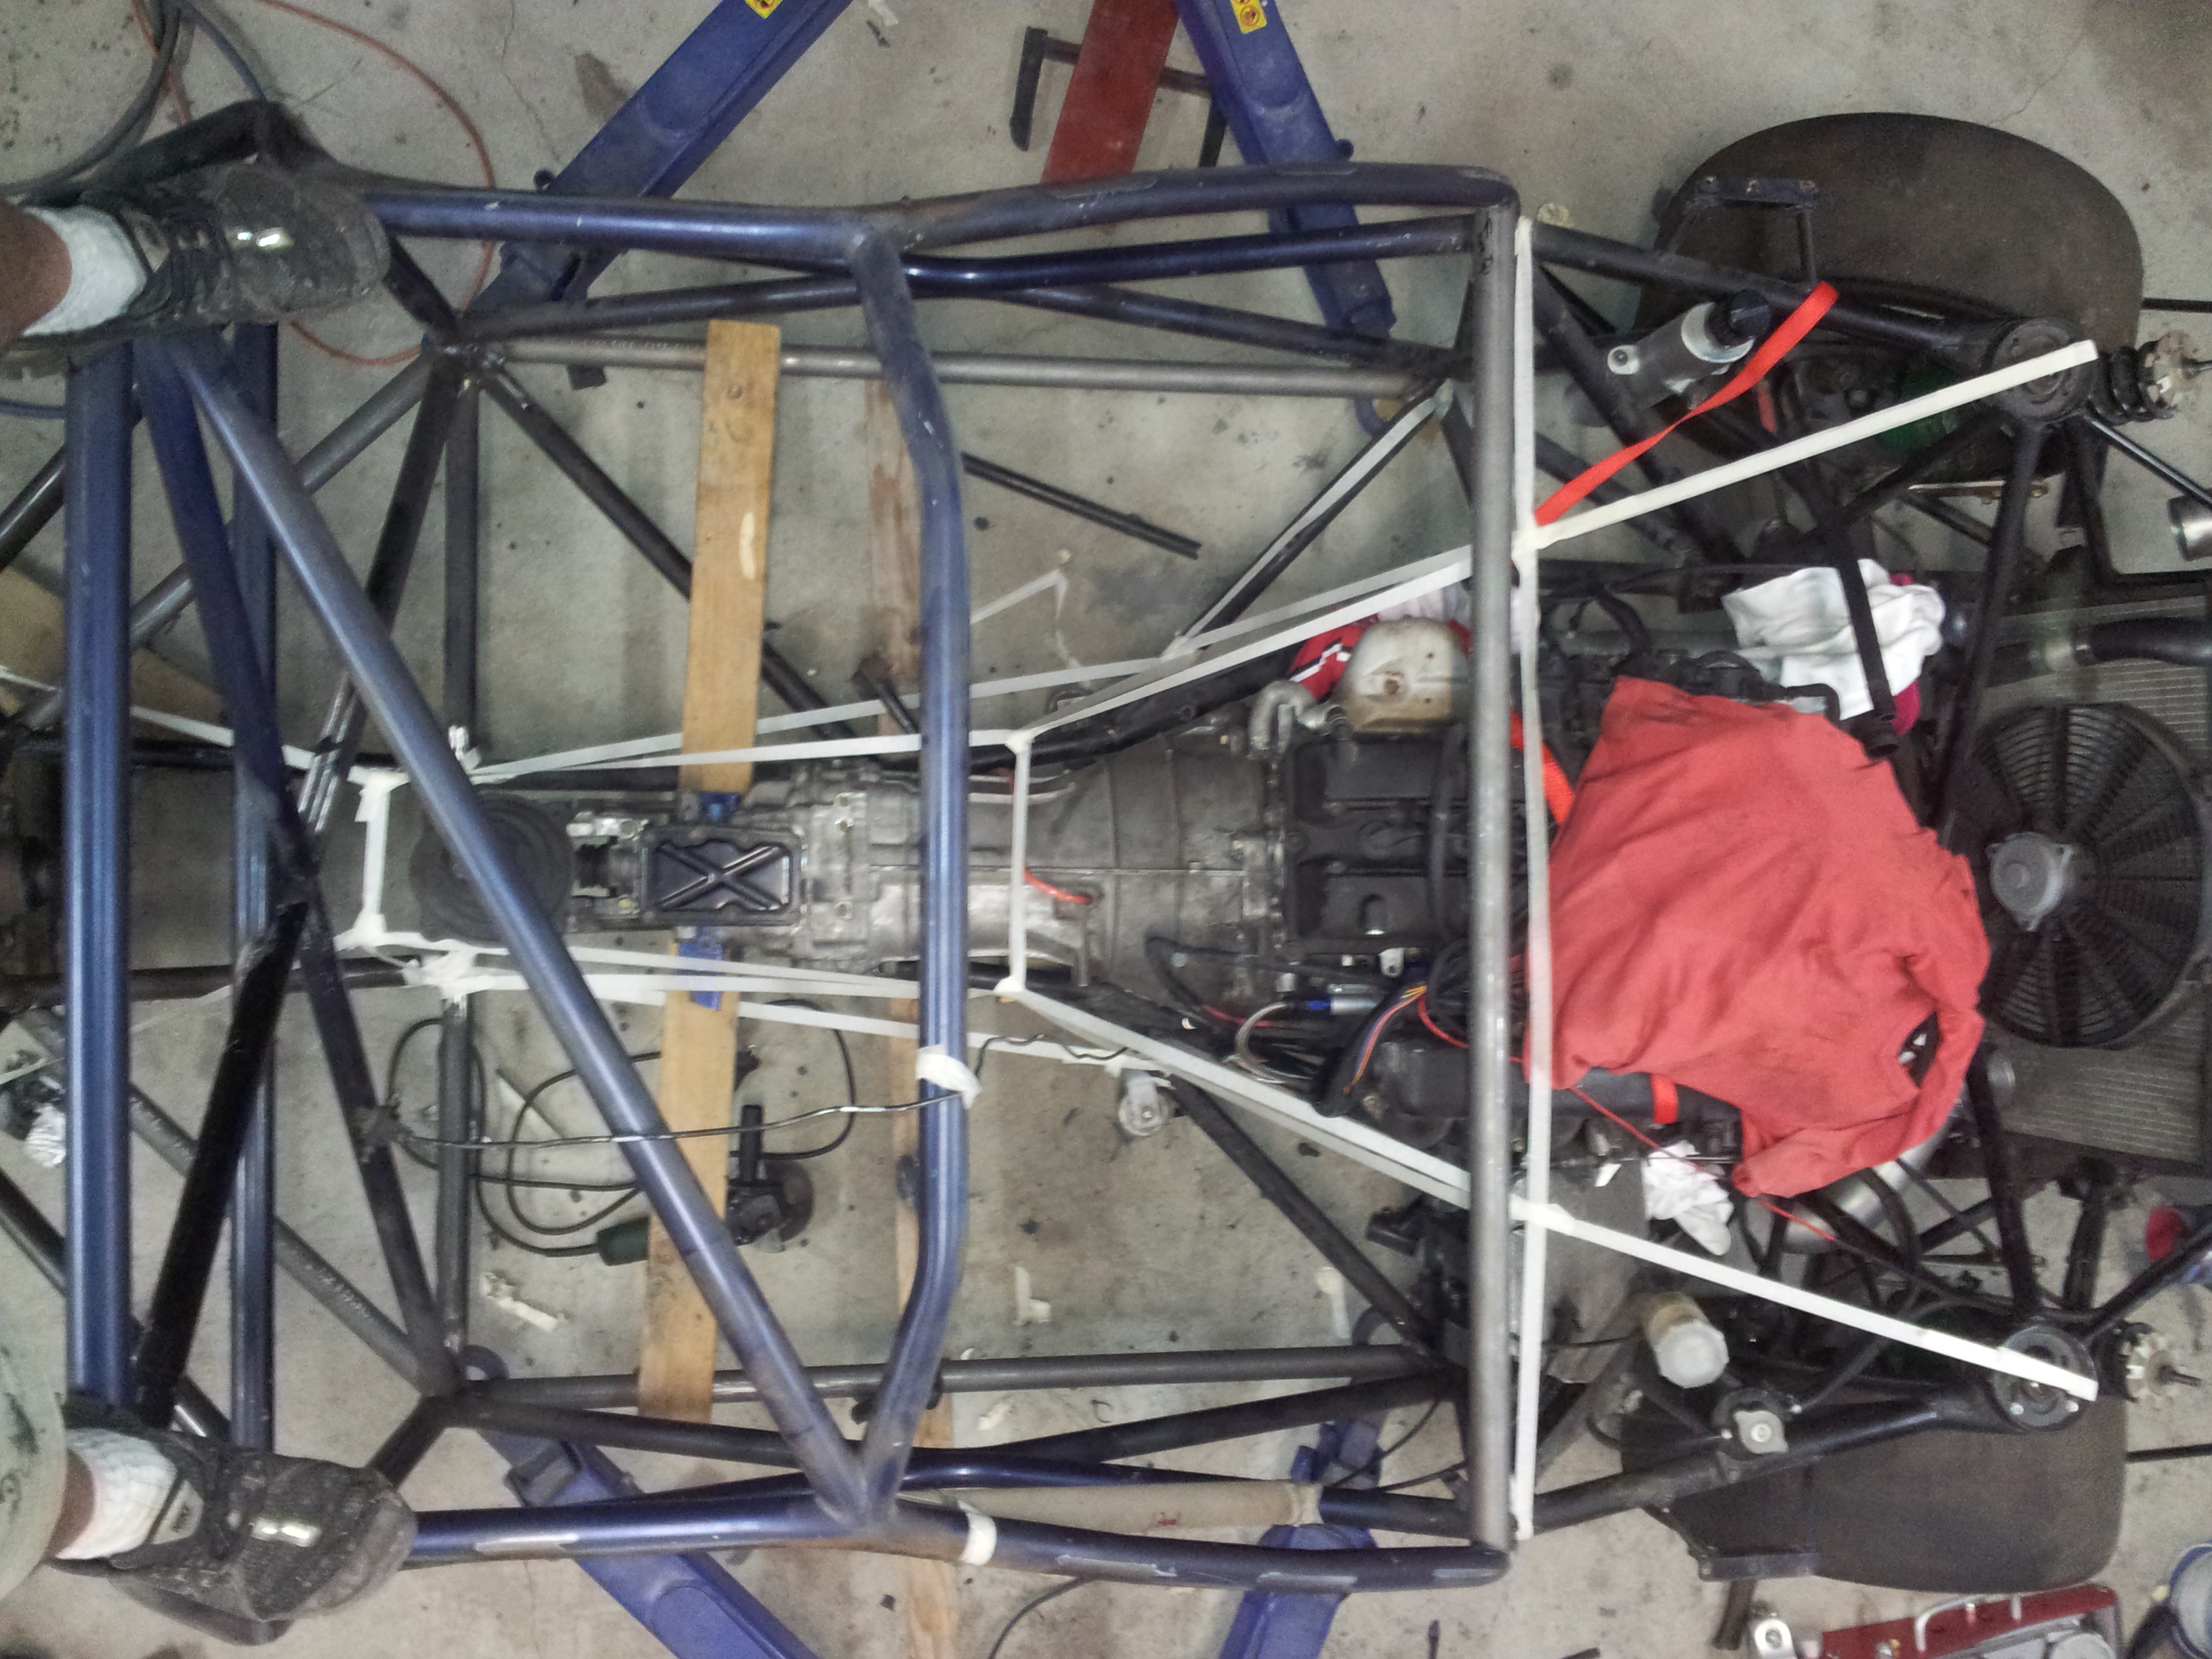
And one more from the top.
There are a couple of bars in the floor that I’m going to change as well, then I’ll start building the tunnel tubes.
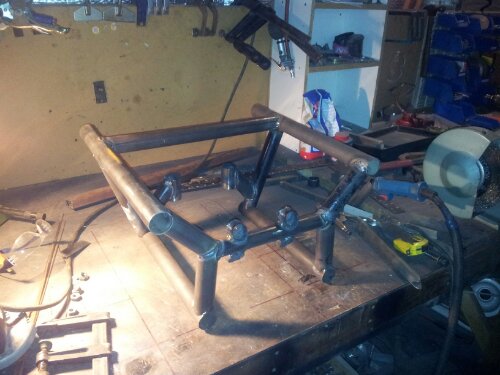
Needs two more bars, then need to fully weld it.


Next is to cut out the under dash bar and move the motor back, so that I can work out how big the transmission tunnel needs to be.
The last two bars in the rear end join up to the top of the tunnel, hence why they are not in yet.
Made some good progress getting JCs car back together on sat. Roof mounted, sil rails finished, all the cage painted, firewall painted and floor painted.


The new rear end. Total weight is 17kg.

The first part of the mold removed. More pics after tonight.
Its soooooo nice!


The sil bars are all welded in too.


Rockers for possible use on the new rear end.


The mold is FINALLY 100% complete, fully waxed and is ready to go!


Hopefully we can get the first rear end laid up this week.
I’m keen to try something different in the suspension department this time – here is the mock-up.


More details once its finished and I can prove that it’s going to work…
Here is my little helper, giving me a hand with the mock-up.

The mold for the rear end is getting closer to completion.


Hopefully we’ll have this done on Sat, and maybe start laying up the first rear end if we get it done in time.
It’s about 70% welded now. Total weight so far is 4kg. More details as it grows…
I have started making the new rear subframe.

More as it takes shape…
And no, not from me – still working on that, its not as easy as getting the grinder out ![]()
The car is now 100% free of all factory steelwork. The sign of a good nights work:

The chassis is now all cleaned up. All of the roof, drivers side sil panel, b pillar etc are all off – i love my plasma cutter 🙂

Have mocked up the Carlos bar that i want to add in.

I wanted to check steering wheel clearance. There are specific rules for this bar, so i cant just put it anywhere.

I’ll need to pop the seat back in and check, there is room but I’m not sure if its enough in a tank slapper when your hands are going everywhere.
The passenger bars have all been cleaned up and the side sil bar is in.

Next job is to make some gussets to strengthen it all up. They will be something like this.

Although they wont be made from paper 🙂
After a couple of hours shooting sparks at myself, my arms look like this

Looks like some sort of tropical disease…. Still not sure why i like doing this……….
More bits gone….

Have made the new under-dash bar so that’s ready to be welded back in. Started on the new sil panel bars too. Just need to cut the old bars out, clean up the joints then weld these new ones in.
Hopefully i can get a couple of hours in tonight and get that finished.
Had a couple of shed hours tonight, so I got started.
The seat is out, the upper firewall is out, roof and screen are off, all of the passenger side sil panel and B pilar etc are gone.

I was sure I had more, but I only had 2 cutting discs for the grinder, so the drivers side B pillar and sil panel will have to wait until tomorrow night.
The A pillars will come off at the same time. The bits that are left on there are welded to the cage.

Hopefully tomorrow night I can get an hour of work in and I’ll get the rest of this cleaned up and start preparing the new bars that will go into the roll cage and get those tack welded in.
I’ve pulled my roof from the mold, some bits are a touch light (3.2kg total weight) and so are a bit flexi, so I’ll put a bit more fibreglass on some of the areas to stiffen it up.
I’m in a difficult spot right now. The rear bodywork is wider, so the suspension arms need to be longer, and if I’m going to change them I want to change the rear end geometry, to do that I need to change the rear subframe, and when I do that I want the diff to be higher, this means that the gearbox and motor need to go up because the gearbox hangs too low and so that the tailshaft stays lined up with the higher diff, and this means the trans tunnel needs to be raised, and the under dash bar needs to be raised so that I can raise the motor, and this means new engine and gearbox mounts, so with the under dash bar going higher the motor can come back more, and so it goes…..
So to do it right, a lot needs to be done. I really want to add more hollywood to the car, and have it really nice and have it right – rather than compromised because its easier.
So last night, while waiting for the first coat of epoxy to set on the roof layup, I started stripping the rest of the car.

Love the fact that 10 bolts on the front end gets it looking like this…

Doors are also off, all the electrics are bolted, the trans tunnel is apart, the passenger side firewall is off. Amazing what you can pull off a car in 30 minutes.
This would be a nice ride height 🙂

So I’ll cut the roof off first, then start adding new bars for the cage, then start on the rear end framework.
I got my roof layed up last night. Its a mix of carbon and kevlar more the main area.

The yellow that is visible here i the Kevlar cloth (the stuff they use in bullet proof vests).
I’ll leave it in the mold for the day today in the oven (the shed on a 35 degree day), and will pull it out tonight.
Saturday was a long, but productive day.
We now have 4 doors completed, 4 side skirts completed, a roof done, another roof partially complete.
All we have left to do, in terms of layups, is clean up the rear end molds, then we can lay those up too – the last ones!
Then the work begins with hinges, clips etc to hold these parts to the chassis.
Pics soon…
